Xubuntu 18.04 has been released recently and this time it is an LTS (Long Term Support) version, hence you will get updates and support until April 2021. Xbbuntu with Xfce desktop is always great and in this article we’ll be looking at the new features of Xubuntu 18.04 along with an easy step by step guide to install Xubuntu 18.04 in your system.
Xubuntu 18.04 LTS– New Features:
As always Xubuntu is exciting and the LTS brings with it some exciting new features:
- In Xubuntu 18.04 LTS, MATE applications are preferred over GNOME applications to enhance the consistency levels that is being followed in other set of features
- The Xfce Pulse Audio Plugin replaces the Sound indicator Plugin to allow for more control over the volume and other multimedia applications from the panel
- Toggling between “Do Not Disturb” modes for notifications is easy now with the introduction of the new xfce4-notifyd panel plugin
- The all new Menu Libre version ensures that menu setting have been significantly enhanced
- Improved support for HiDPI screens
- Overall, consistency levels have been largely improved
- Slight enhancements in the Greybird GTK+ theme
System Requirements for Xubuntu 18.04 LTS:
The minimal system requirements you need to install Xubuntu are:
- 1 GB RAM
- Dual Core Processor
- 20 GB Space in your hard disk
- Installation Media (DVD or USB)
- Internet Connectivity (Optional)
Step-by-Step Guide to Install Xubuntu 18.04 LTS in a Virtual Machine
Step:1) Download Xubuntu 18.04 LTS edition(ISO File)
First step is to have the Xubuntu 18.04 LTS version, download its ISO file from its official portal :
Step:2) Burn the downloaded ISO into USB or DVD
Burn the downloaded xubuntu 18.04 iso file either into USB or DVD and make it bootable. Boot your system with bootable media,
Note: Make sure you change the bios settings of your system so that it gets booted with bootable USB or DVD drive.
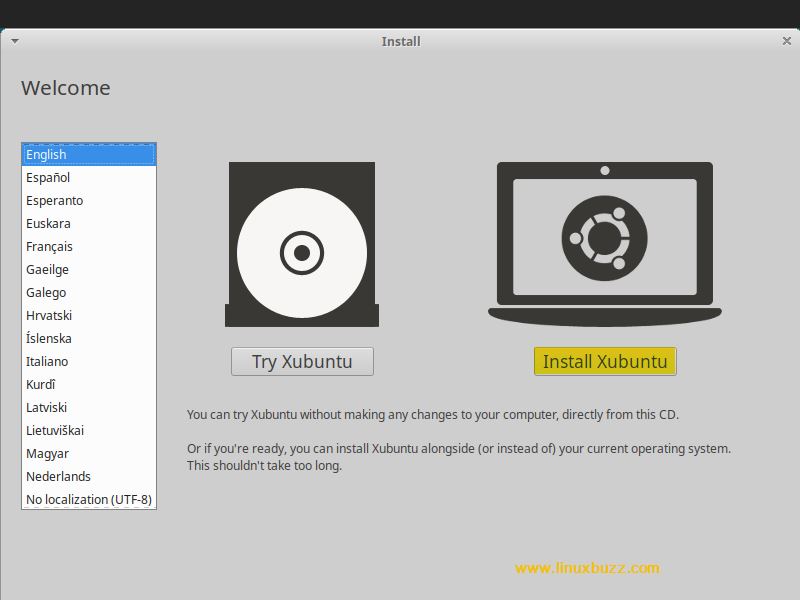
Step:3) Choose ‘Install Xubuntu’ option
The following screen will ask whether you need to try out Xubuntu or Install Xubuntu. Click “Install Xubuntu”
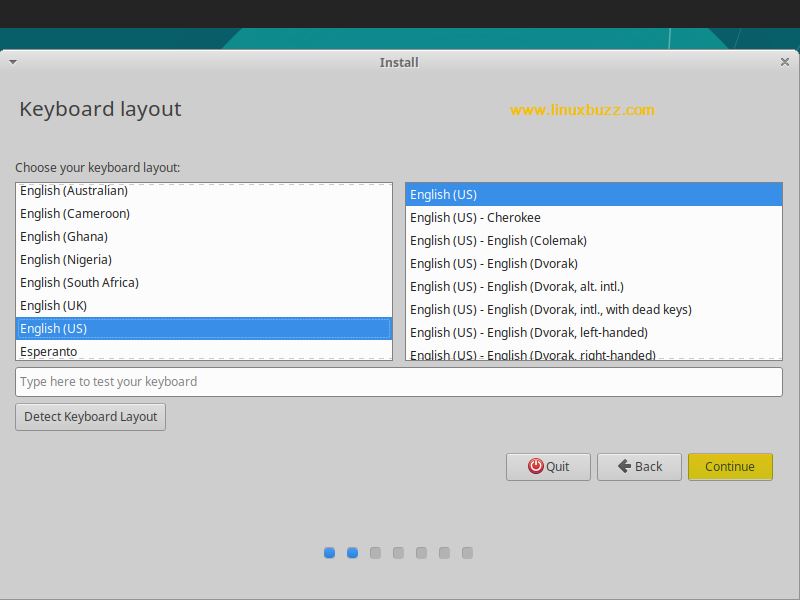
Step:4) Select your Appropriate Keyboard Layout
The next screen will provide option to select your appropriate keyboard layout for your installation.
Click on Continue…
Step:5) Download Updates & third party software during installation
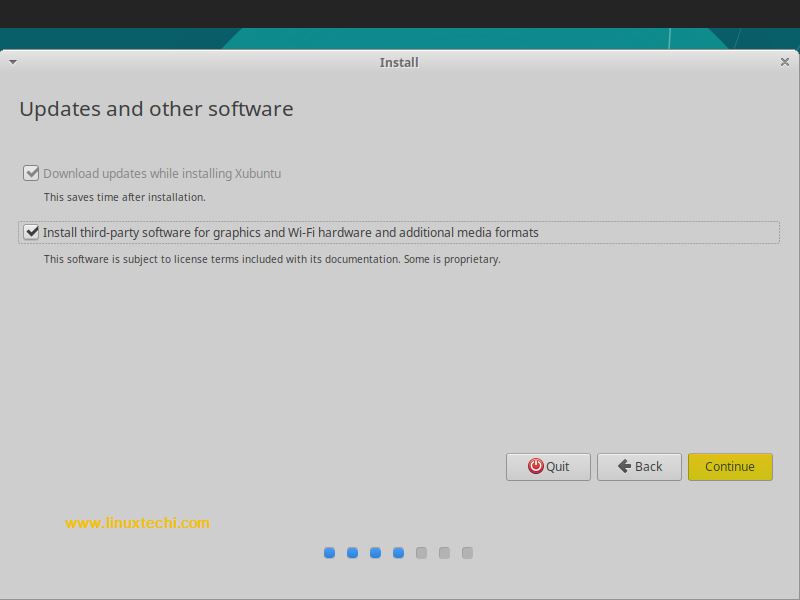
Next Screen will provide us an option whether you need to download updates while installing Xubuntu 18.04 and also install other third party graphics and multimedia software. If your system is connected to internet, then you select these options.
Step:6) Select Your Installation Type
In this step we will decide the installation type, We will get the following options:
- Erase Disk and Install Ubuntu – This is Fresh installation, installer will automatically create partitions
- Use LVM with the new Xubuntu Installation – This option is used when you want LVM based file systems
- Somethings Else – This is used when you want your own customization partition table
In this article, we will create our own customization partition scheme for our Xubuntu 18.04, So select “Something Else” option and then click on continue…
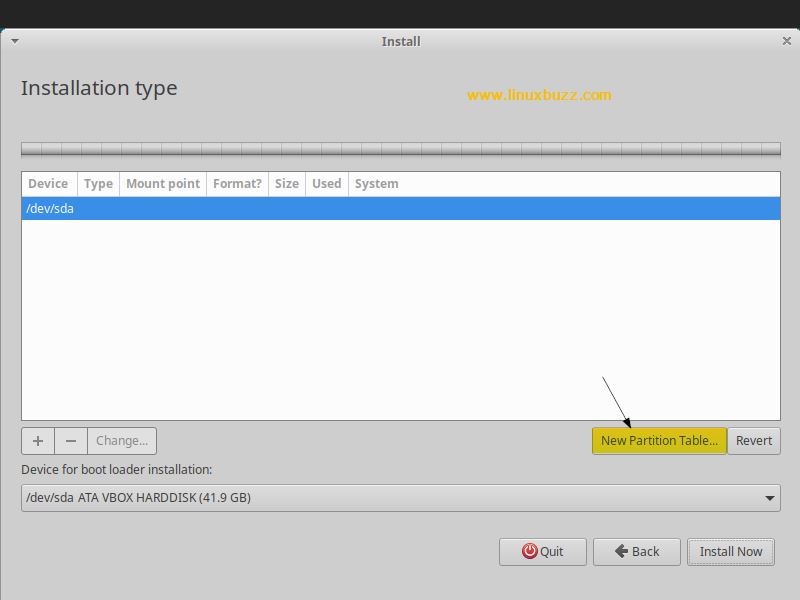
In the Next screen click on “New Partition Table” option
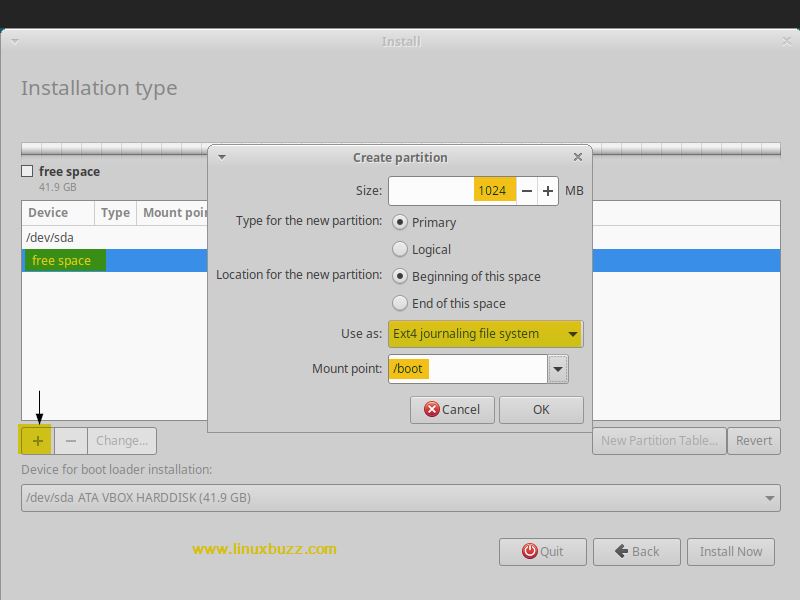
As we can see, we have 40 GB disk available for Xubuntu 18.04, we will create the following partitions on it,
- /boot 1 GB ( Ext 4 File system)
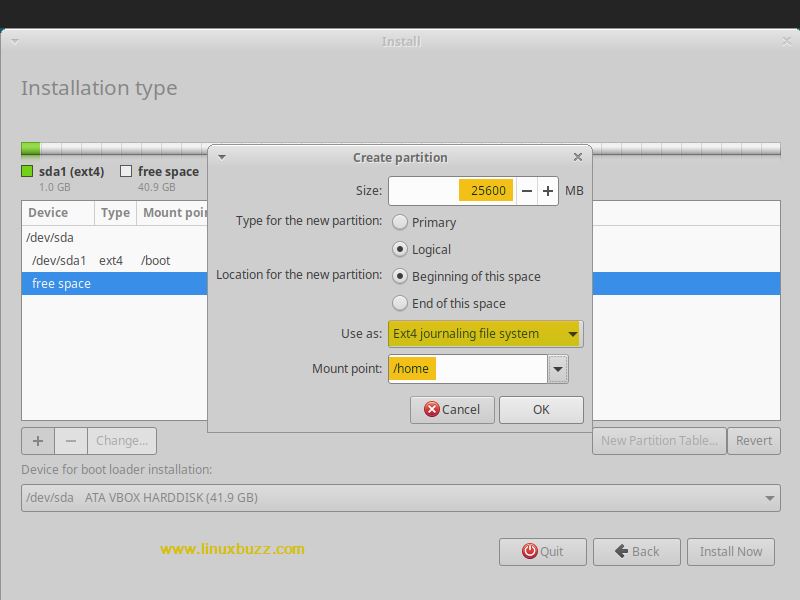
- /home 25 GB ( Ext4 File system)
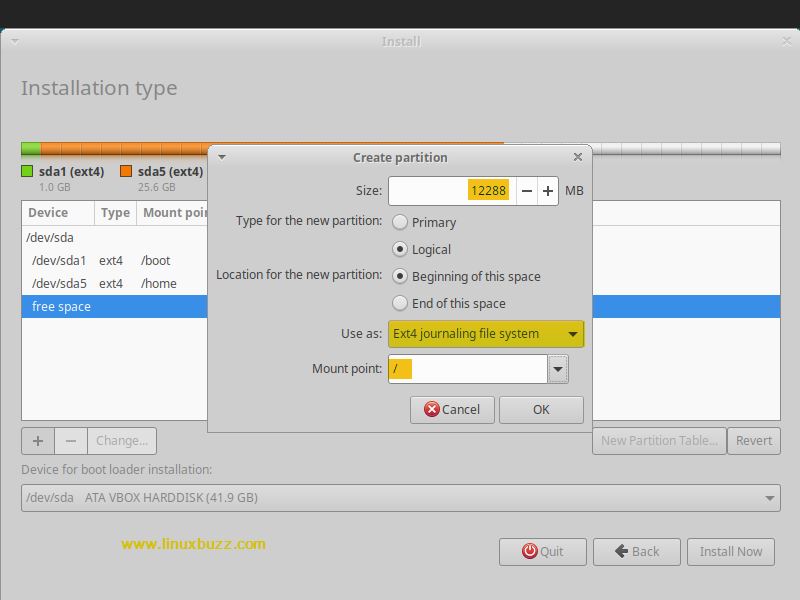
- / 12 GB (Ext4 File system)
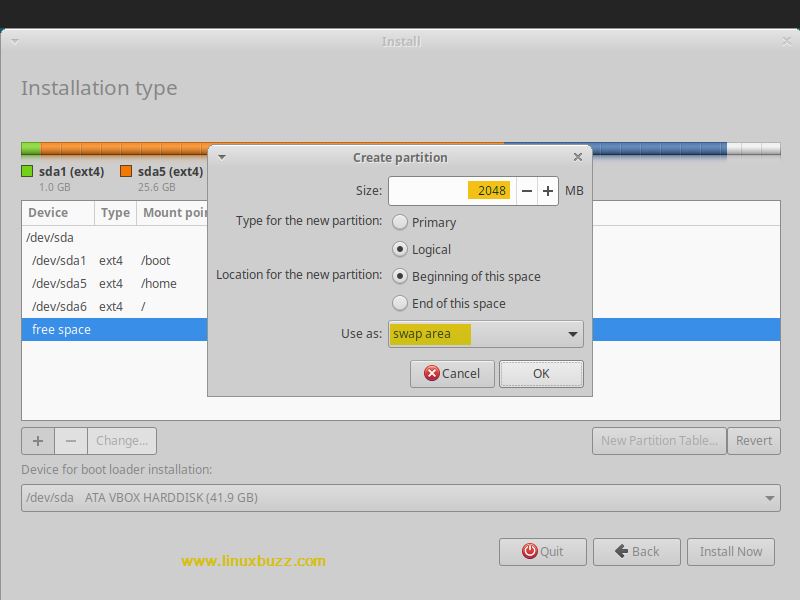
- Swap 2 GB
So Let’s create /boot partition first of size 1 GB . Select the free space and then click on + symbol and specify the file system type as ext4 , mount point as /boot,
Similarly Create /home and / partitions
Create Swap partition of size 2 GB,
Click on OK
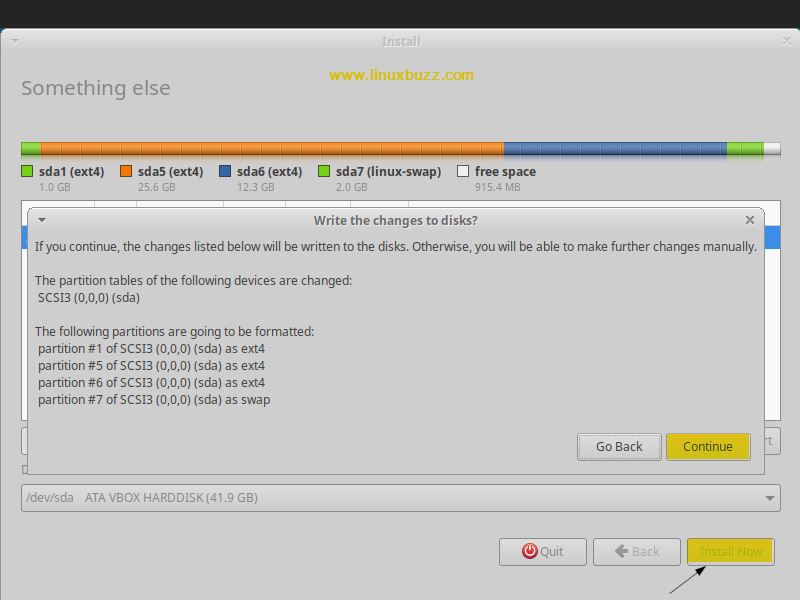
Once you are done with partition scheme, click on “Install Now” option and then select “Continue” to write changes to the disk,
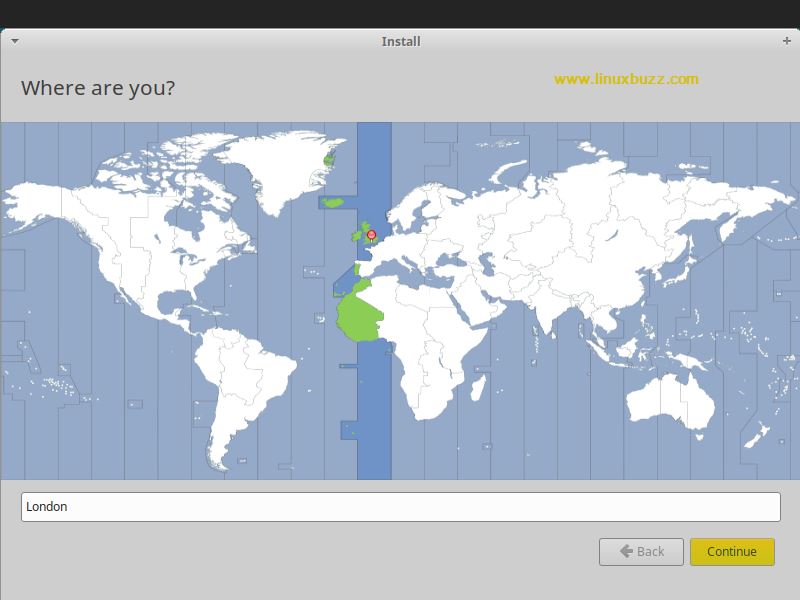
Step:7) Choose your preferred Location
In the next screen, select your location and click “Continue”
Step:8) Specify your Username , password and Hostname
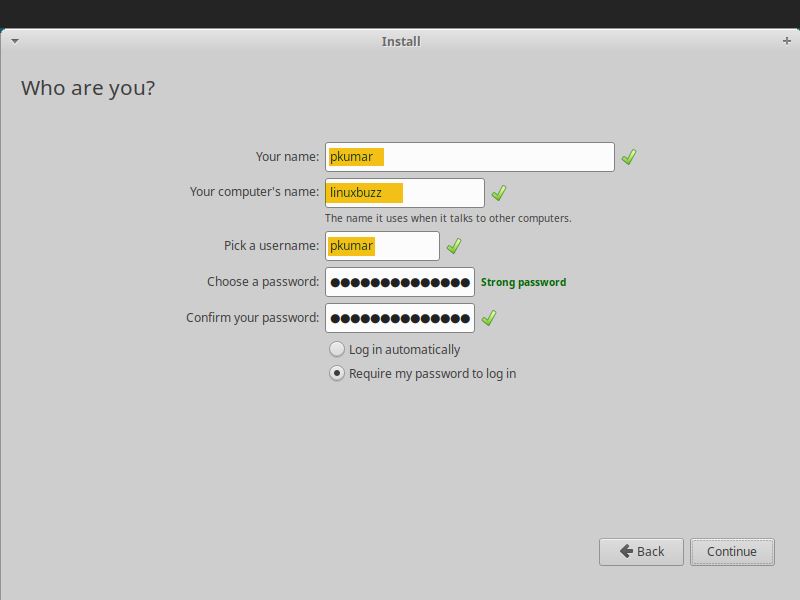
In this step , you will be prompted to enter the User name , its password and your system hostname. So specify these details that suits to your system
Click on Continue to proceed with installation
Step:9) Begin Installation
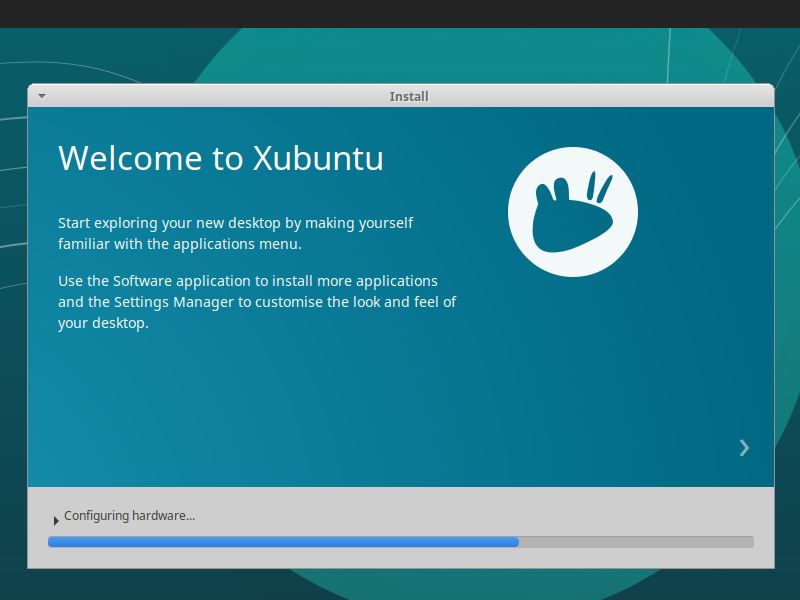
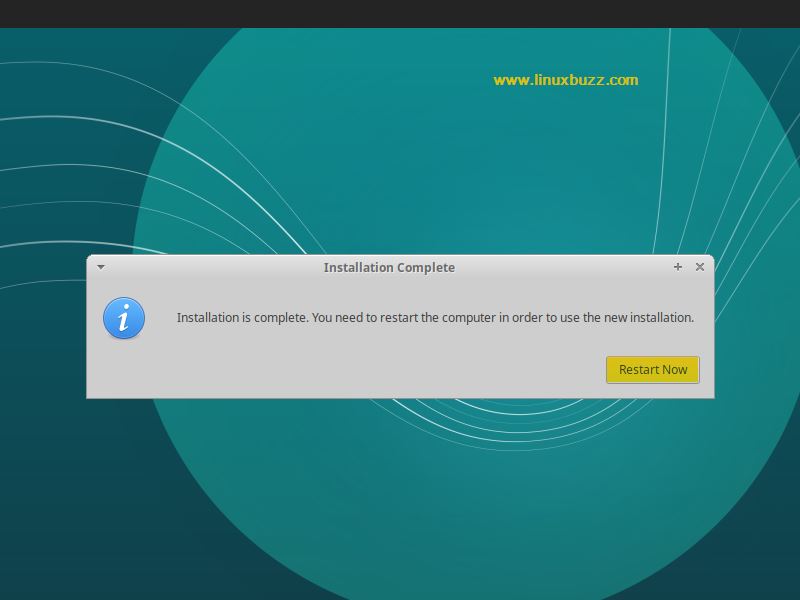
And the installation starts now and within a few minutes once the installation is done, you’ll need to restart your machine to enjoy the new features of Xubuntu 18.04 LTS. Make sure you remove the installation media (USB or DVD) after the installation is completed,
Step:10) Login Screen of Xubuntu 18 04 after reboot
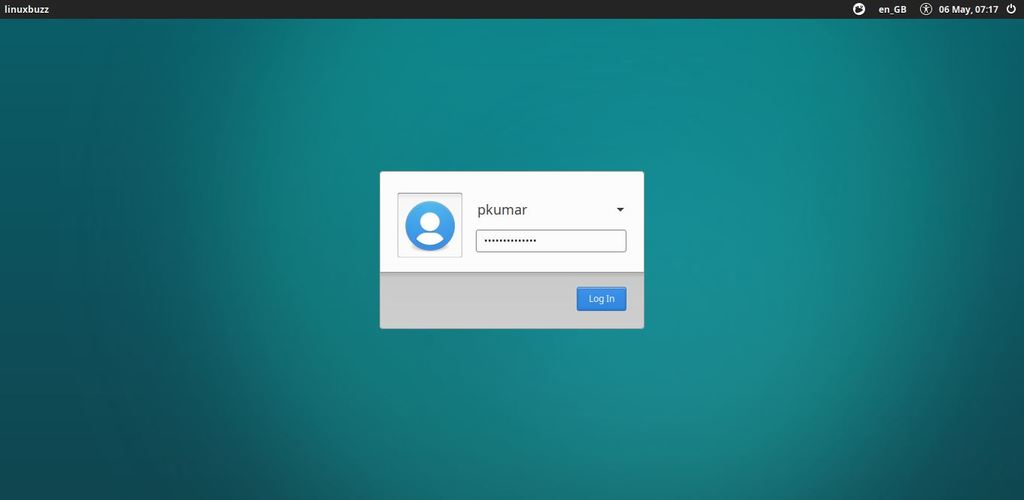
We will get below login screen after successful reboot, Use the same user name & password that you have specified during the installation
That’s all from this tutorial, Explore Xubuntu 18.04 and have fun 🙂

Excellent tutorial ! Especially for manual partitionig.
the last two version I attempted to upgrade to, this verions 18.04.1, does not allow me to install anything in terminal.
I get error messages at the install command. Last time I ended up going back to a version that worked and I may have to do this again. so much for upgrades.
Great tutorial, thanks…
Thanks for the tutorial. It was helpful.
thank you for the tutorial. i decided to erase everything..hahaha…all is well
nice and clean “Standard Manual Tutorial” as it was for all 3 earlier LTS Editions/Versions. Absolutely no changes were made when installing manual along Windows or any other OS along xUbuntu or any other Debian derivation Linux system. Just repeat this steps and make sure you click to select partition after creating and defining all system Linux partitions so INSTALL NOW button can be Available. Otherwise it’s disabled and users often end up restarting or quitting at that point instead of just clicking on newly defined and created ROOT ( / ) Partition and that is the old trick “that is a must” in all 3 previous LTS from 18.04 to 16.04 and 14.04 LTS editions. So just follow the steps, after defining all of the partitions and creating them, just click on ROOT / and INSTALL WILL BE AVAILABLE FOR CLICK – and just wait 5mins to finish – restart your machine and there you go guys, good luck and happy Consoling.
Regards from Serbian Linux community Guru and a 20+ Years of Linux distro testing and playing with in every possible combination and multi-bot variations along other OS like Windows or MacOSX or even all 3 of them on same machine 🙂
PS. Good job Pradeep Antil, very well explained and imagery with screenshots helps a lot to newbies so our community grows faster than it was earlier years, way to go. Keep up the good work and thanx for sharing your experience and installation method – the one I use for last 10 yearas is absolutely the same, along with the steps and partitioning order, which I think is the most important tro follow and go exactly that way:
1. /Boot
2. /Home
3. /Root (/)
4. /Swap Partition (preferably on SSD Drive, prepared or shrink-ed from a system volume if Linux is not completely installed on SSD device because it impacts the speed and caching enormously)
CONFIRMED WORKFLOW INSTALLATION METHOD ON MY MACHINE WITH LAST “xUbuntu 20.04 LTS” WORKING LIKE A BREEZE in this order and device selection:
1, 2 & 3 on WD Caviar 500GB HDD and 4. /Swap Partition on another SSD Drive so it flies like a fly 😀
NAZDRAVLJE DRUGOVI I SRECNO OPEN SOURCING-ovanje 🙂