Virtual Network Computing (VNC) is a technology that allows to control another computer remotely over an internet connection using the Remote Frame Buffer (RFB) protocol. The system operates in the client-server technology as the VNC client needs to be installed in your local system and the VNC server software needs to be installed on the machine that you need to manage remotely. In this step-step tutorial, we’ll help you understand, install and configure VNC Server on Ubuntu 18.04 LTS and Debian 9 Server
Requirements:
You just need a user with sudo privileges and of course a local system to install the VNC client and remote server to manage.
Step:1) Installing the Desktop Environment(Xfce) and VNC Server
For Ubuntu 18.04 LTS server
Ubuntu 18.04 server doesn’t come installed with a desktop environment, so lets start the tutorial by installing Xfce, a lightweight desktop environment which is pretty much quick, stable and low on resources as well.
a) Update Package Repositories Index
First step is your update your system’s package repositores with the following command:
pkumar@linuxbuzz:~$ sudo apt update
b) Install Desktop Environment (Xfce)
In case you have install minimal Ubuntu 18.04 LTS server then you will not get any desktop environment, so Install the lightweight Xfce environment on your server using the following command:
pkumar@linuxbuzz:~$ sudo apt install xfce4 xfce4-goodies -y
c) Install VNC Server (TightVNC)
Once the desktop environment is installed successfully, install a VNC server in your system, while there are many VNC server software available like TightVNC, TigerVNC, RealVNC, krdc etc, we’ll be using TightVNC for this tutorial. Install TightVNC using the following command
pkumar@linuxbuzz:~$ sudo apt install tightvncserver -y
For Debian 9 Server:
Note: In Debian 9 system, sudo package is not the part of default installation, so if a user wants sudo rights then first install sudo package and then add user to sudo group, examples is shown below:
root@linuxbuzz:~# apt-get install sudo -y
root@linuxbuzz:~# usermod -aG sudo pkumar
Login to your Debian 9 server and run the following commands one after the another to update package repositories index and to install desktop environment (Xfce) and tightvncserver
pkumar@linuxbuzz:~$ sudo apt update
pkumar@linuxbuzz:~$ sudo apt install xfce4 xfce4-goodies gnome-icon-theme tightvncserver -y
d) Set Password & Configuration Files
Use the following command to set a password and create configuration files and complete the VNC server installation process
When you run the vncserver command for the first time, you’ll be asked to create a password to access you server remotely. You also have an option to create a password with only view privileges, in case you need to provide access to someone with only view permissions. And the necessary configuration files and connection information to your server is created. So you have installed the VNC server, but you still need to set-it up correctly.
pkumar@linuxbuzz:~$ vncserver
You will require a password to access your desktops.
Password:
Verify:
Would you like to enter a view-only password (y/n)? n
xauth:  file /home/pkumar/.Xauthority does not exist

New 'X' desktop is linuxbuzz:1
Creating default startup script /home/pkumar/.vnc/xstartup
Starting applications specified in /home/pkumar/.vnc/xstartup
Log file is /home/pkumar/.vnc/linuxbuzz:1.log
pkumar@linuxbuzz:~$
Step:2) Configuring the VNC Server
a) Kill / Stop VNC Server
Before we start configuring the VNC server, kill the VNC server instance using the following command
pkumar@linuxbuzz:~$ vncserver -kill :1
Killing Xtightvnc process ID 7325
pkumar@linuxbuzz:~$
b) Edit Configuration File
Next locate the startup configuration file that can be found in the .vnc folder in your home directory and open in any text editor software:
pkumar@linuxbuzz:~$ vi /home/pkumar/.vnc/xstartup
Add the following line after “xrdb $HOME/.Xresources” in that config file:
startxfce4 &
Save & exit the file
c) Set the Permissions on Configuration File
Now to make sure the xstartup file works correctly, change the permissions to that file using the following command:
pkumar@linuxbuzz:~$ sudo chmod +x ~/.vnc/xstartup
d) Restart VNC Server
Now, restart the VNC server.
pkumar@linuxbuzz:~$ vncserver
New 'X' desktop is linuxbuzz:1
Starting applications specified in /home/pkumar/.vnc/xstartup
Log file is /home/pkumar/.vnc/linuxbuzz:1.log
pkumar@linuxbuzz:~$
Whenever we start the VNC server, it starts listening the request on TCP port 5901, if you restart vncserver service it will start listening its service on tcp port 5902 and so on.
Run the below command to verify the vncserver port
pkumar@linuxbuzz:~$ ss -tulpn | grep -i '590'
tcp   LISTEN  0       5                     0.0.0.0:5901          0.0.0.0:*      users:(("Xtightvnc",pid=8306,fd=3))
pkumar@linuxbuzz:~$
In case OS firewall (ufw) is enabled and running o your Ubuntu 18.04 and Debian 9 system then execute the following to allow VNC server port , if ufw service is not running the you can skip this step,
pkumar@linuxbuzz:~$ sudo ufw allow from any to any port 5901 proto tcp
Rule added
Rule added (v6)
pkumar@linuxbuzz:~$
Step:3) Connecting to the VNC Desktop
To connect to the VNC desktop (Ubuntu 18.04 & Debian 9) from your machine, we should have some tools like vnc viewer or remote desktop viewer, let’s assume we have remote desktop viewer tool on my machine,
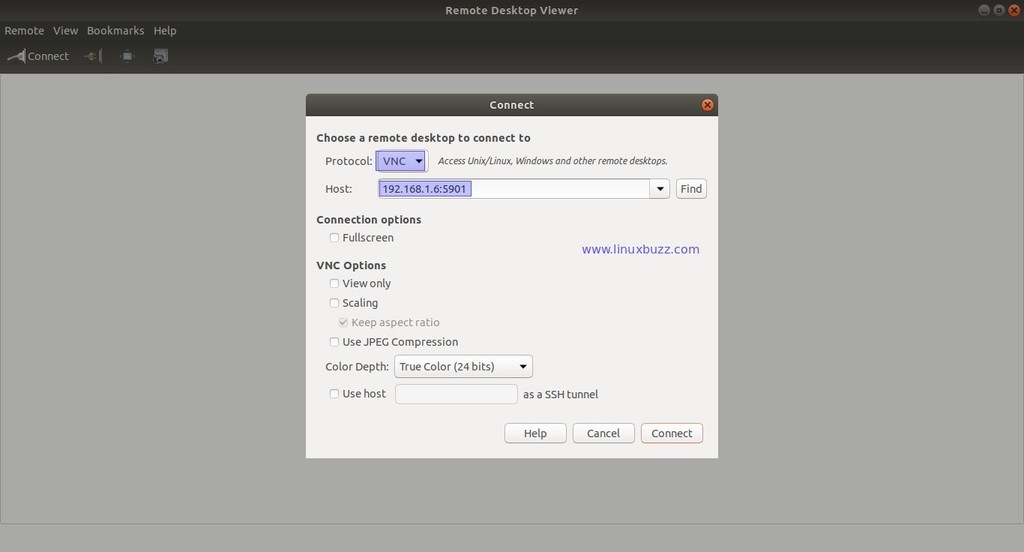
Specify the your Ubuntu 18.04 / Debian 9 System IP address along with vnc port,
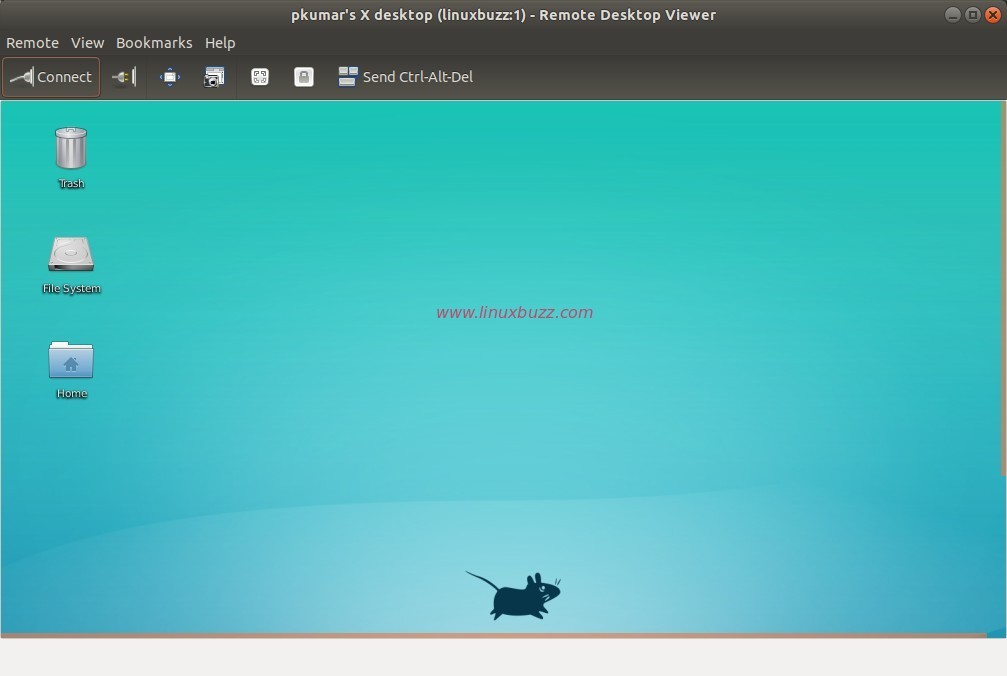
Click on connect and then it will prompt you for the password, enter user password of the user through we have configured the vncserver, in my case I will enter ‘pkumar’ user’s password
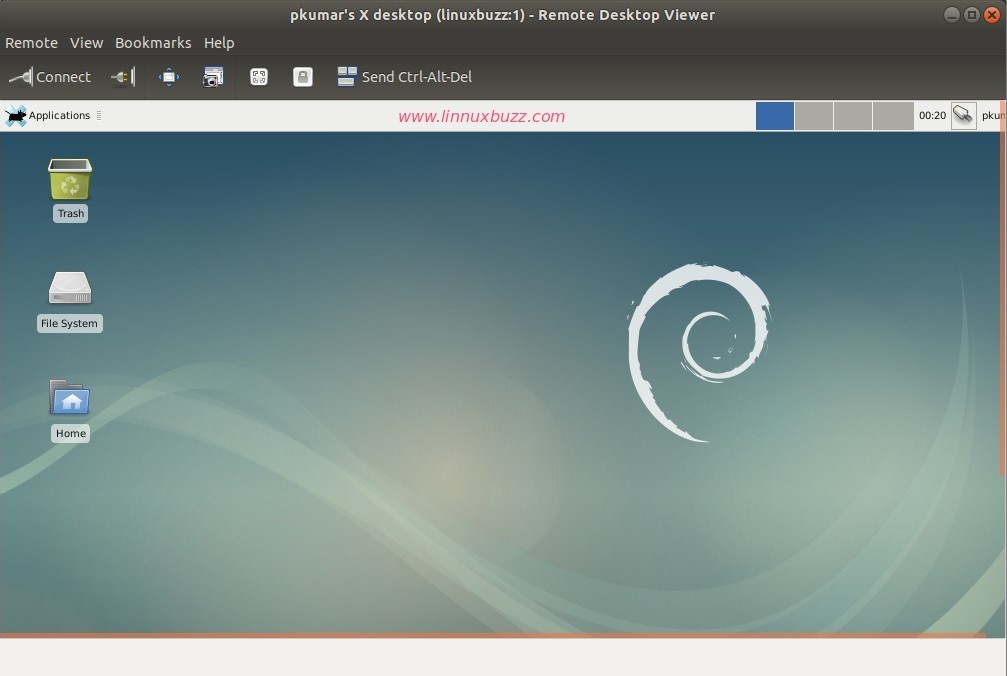
For Debian 9 system we will get below VNC desktop screen,
By default, VNC doesn’t use any secure protocol while connecting, hence we need to tell it to use SSH tunnel whenever making a connection. For that you need to a create an SSH connection in your local desktop.
Create SSH Connection
Use the following command to create SSH connection:
$ ssh <User_Name>@<Your-Server-IP> -L 5901:127.0.0.1:5901
Make sure to replace your_user_name with a sudo non-root username and your_server_ip with your server IP address. Example is shown below
:~$ ssh pkumar@192.168.1.6 -L 5901:127.0.0.1:5901
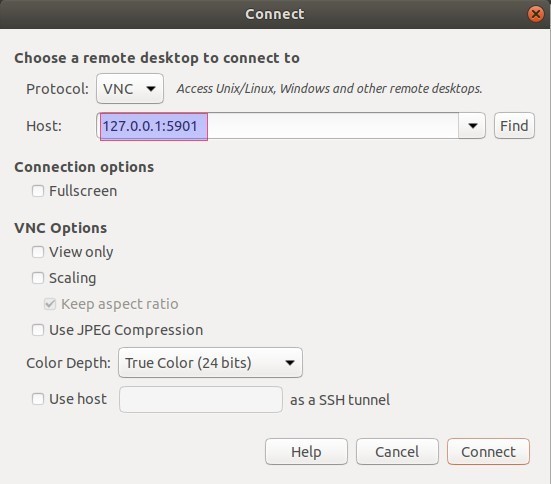
Now open your VNC client and enter 127.0.0.1:5901 and just click on connect. You will be prompted for a password, enter it and you are ready to manage your Xfce desktop from your local machine remotely.
Conclusion
Hope this step by step tutorial has provided you the all the information about setting up VNC Server on Ubuntu 18.04 LTS / Debian Server easily. Please put forward all your queries, suggestions and your experiences in installing the VNC Server in your end in the feedback section provided below. We’ll be happy to respond at the earliest.
Read Also : 9 Quick ‘mv’ Command Practical Examples in Linux


If you want to avoid having to manually setting up the SSH tunnel, as well as getting a nice frontend for initiating the VNC interaction, take a look at the ssvnc package, “Enhanced TightVNC viewer with SSL/SSH tunnel helper”.