In this blog post, you will learn how to setup Bind (DNS Server) on Debian 12 step-by-step.
BIND (Berkeley Internet Name Domain) is a feature-rich, open-source DNS software extensively utilized on Unix/Linux systems because of its optimum performance and stability. Many companies use Bind, which is available for free download, to run authoritative servers and a caching DNS server.
IPv6, split DNS, DNSSEC, Transaction Signatures (TSIG), load balancing, incremental zone transfer (IXFR), DNS Notify, and Transaction Security are among the technologies it supports.
Currently, the latest version of BIND is 9. Nowadays, a lot of system administrators and network administrators utilize Bind9 DNS to perform various tasks such as reverse translation, DNS query resolution, publication of DNS information online, and domain name translation to IP address translation.
Overall, Bind offers admins fine-grained control over a DNS server and has full DNS security extension support.
Prerequisites
- An active running Debian 12 system.
- Sudo or root privileges
- A reliable static IP address
Lab Details
- Bind Server IP: 192.168.1.151
- Domain: linuxbuzz.com
- Private Network: 192.168.1.0/24
Without any further delay, let’s deep dive into Bind 9 or DNS server installation and configuration.
1) Install Bind DNS Server on Debian 12
First, let’s start by updating the apt package manager.
sudo apt update
The Bind DNS package can be found in the Debian 12 default repositories. Run beneath apt command to install bind9 package.
sudo apt install bind9
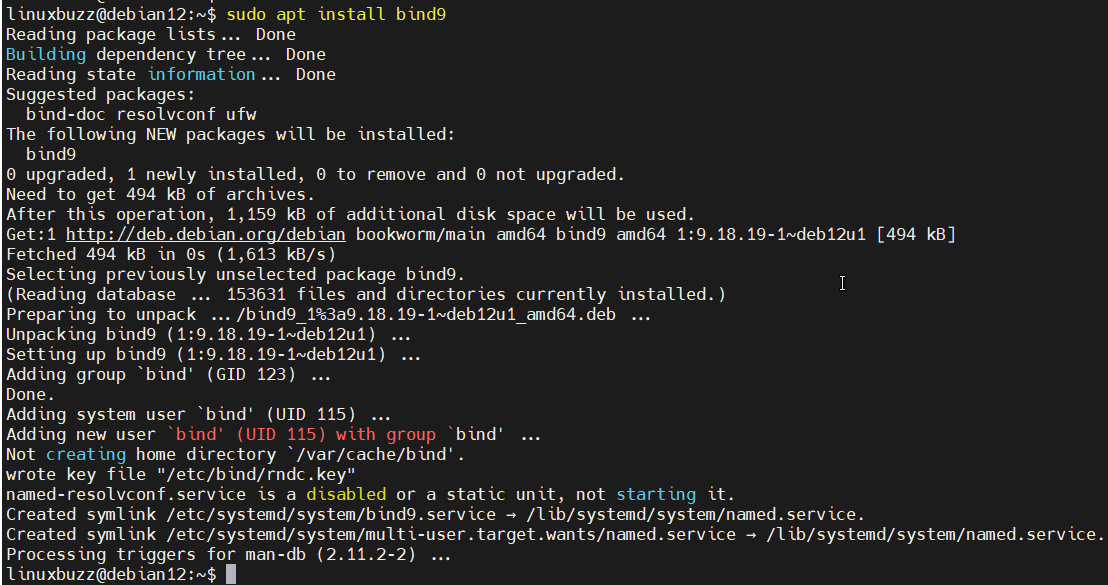
Use the following command to confirm the Bind 9 version after installation:
sudo named -v

Now, run the following command to start and enable the Bind DNS service to start at system boot.
sudo systemctl start named
sudo systemctl enable named
To check the Bind service status, execute the command as shown:
sudo systemctl status named
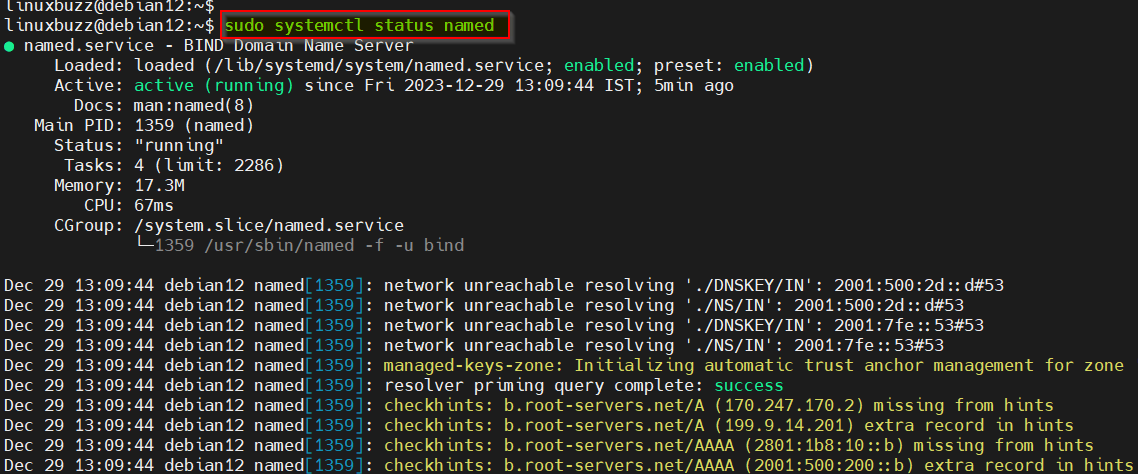
2) Setup Bind (DNS Server) on Debian 12
The Bind DNS server keeps all of its configuration files under the /etc/bind directory. To list all the files, run the command as shown:
ls -l /etc/bind/
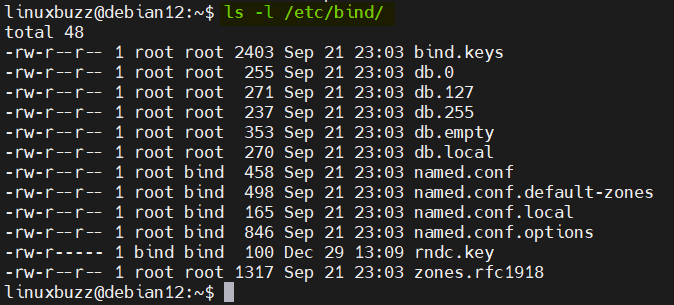
Let’s start modifying the /etc/bind/named.conf.options configuration file by adding forwarders, allow query parameters and acl for private network.
Note: Your local DNS server will attempt to resolve the DNS query; if not, it will be forwarded to the forwarders.
sudo vi /etc/bind/named.conf.options
Add the following parameters:
acl private-network {
192.168.1.0/24;
};

options {
        directory "/var/cache/bind";
        allow-query { localhost; private-network; };
        allow-transfer { localhost; };
        forwarders { 8.8.8.8; };
        recursion yes;
        dnssec-validation auto;
        listen-on-v6 { any; };
};
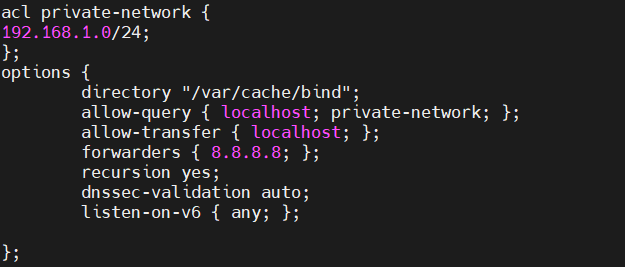
When you’re done, save the changes and exit the file. Next, modify the /etc/bind/named.conf.local file to specify your domain’s forward and reverse lookup zones.
sudo vi /etc/bind/named.conf.local
Add the following lines:
zone "linuxbuzz.com" IN {
        type master;
        file "/etc/bind/forward.linuxbuzz.com";
        allow-update { none; };
};

zone "1.168.192.in-addr.arpa" IN {
        type master;
        file "/etc/bind/reverse.linuxbuzz.com";
        allow-update { none; };
};
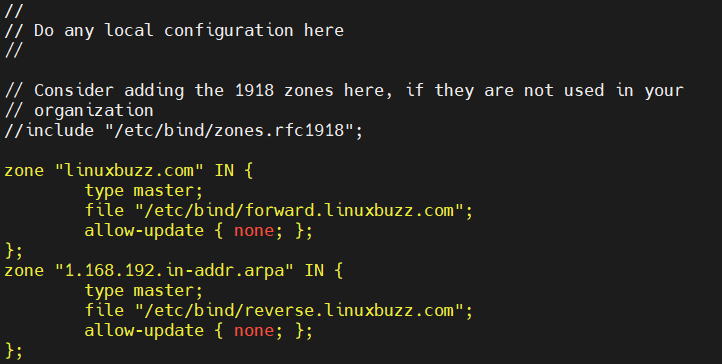
Save and exit the file.
The following explains the contents of the configuration file:
- linuxbuzz.com is your forward zone.
- 1.168.192.in-addr.arpa is your reverse zone.
- forward.linuxbuzz.com is your forward lookup zone file.
- reverse.linuxbuzz.com is your reverse lookup zone file.
Use the following command to check the configuration file for syntax errors:
sudo named-checkconf
If everything is okay, you shouldn’t receive any output.

3) Configure the Zone Configuration Files
The forward and reverse lookup zones require configuration files to be generated for your domain to work. A DNS zone that translates a domain name into an IP address is known as a forward lookup zone, while the reverse lookup zone is the one that changes an IP address into a domain name.
To get started, run the following command to access the /etc/bind directory:
sudo cd /etc/bind/
Now, execute the following commands, which will copy the forward and reverse lookup zone files:
sudo cp db.127 reverse.linuxbuzz.com
sudo cp db.local forward.linuxbuzz.com
Next, configure the forward lookup zone file.
sudo vi forward.linuxbuzz.com
Add the following lines:
$TTL    604800
@       IN      SOA     ns.linuxbuzz.com. root.ns.linuxbuzz.com. (
                              2         ; Serial
                         604800         ; Refresh
                          86400         ; Retry
                        2419200         ; Expire
                         604800 )       ; Negative Cache TTL

;DNS Server Record
@       IN      NS      ns.linuxbuzz.com.
ns      IN      A       192.168.1.151

;Application DNS Records
linuxbuzz.com.  IN  MX 10   mail.linuxbuzz.com.
www             IN  A       192.168.1.190
mail            IN  A       192.168.1.191
ftp             IN  CNAME   www.linuxbuzz.com.
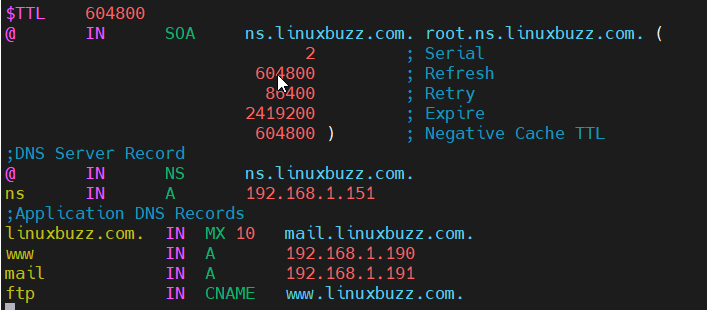
Save and close the file.Next, configure the reverse lookup zone file:
sudo vi /etc/bind/reverse.linuxbuzz.com
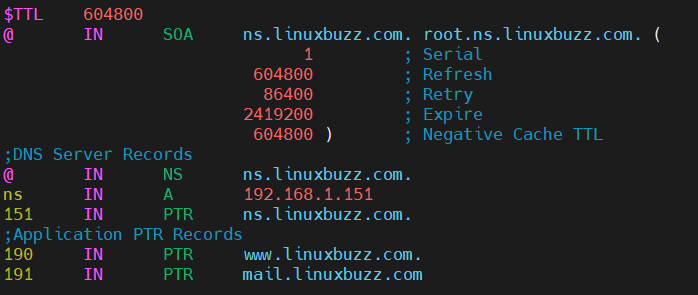
Add the following lines:
$TTL    604800
@       IN      SOA     ns.linuxbuzz.com. root.ns.linuxbuzz.com. (
                              1         ; Serial
                         604800         ; Refresh
                          86400         ; Retry
                        2419200         ; Expire
                         604800 )       ; Negative Cache TTL

;DNS Server Records
@       IN      NS      ns.linuxbuzz.com.
ns      IN      A       192.168.1.151
151     IN      PTR     ns.linuxbuzz.com.

;Application PTR Records
190     IN      PTR     www.linuxbuzz.com.
191     IN      PTR     mail.linuxbuzz.com.
Save the configuration and exit the file.
Now, to implement above modifications, restart the Bind DNS service.
sudo systemctl restart named
To verify the forward zone file for syntax errors, run the named-checkzone command:
sudo named-checkzone linuxbuzz.com forward.linuxbuzz.com
If there are no errors, the resulting screen should look like this:

Also, check the reverse lookup zone file for any syntax errors:
sudo named-checkzone linuxbuzz.com reverse.linuxbuzz.com

Great, output above confirms that zone files are configured correction with respect to syntax.
Note : In firewall is enabled on your bind server then execute the below ufw command to allow bind port (53).
sudo ufw allow 53
Rule added
Rule added (v6)
$
4) Test Bind DNS Server Installation
We have installed and set up the Bind DNS server so far. You must now test it to see if it is up and running. To test the DNS server, you can decide to use the dig or nslookup command-line tools.
Before start testing, make sure your system points to the DNS server “192.168.1.151” for resolution. For the most of the Linux distributions, we add nameserver details in /etc/resolv.conf file. In my case, I am testing it on RHEL 9 system.
dig -t ns ns.linuxbuzz.com
This command should provide DNS related information regarding your configured domain.
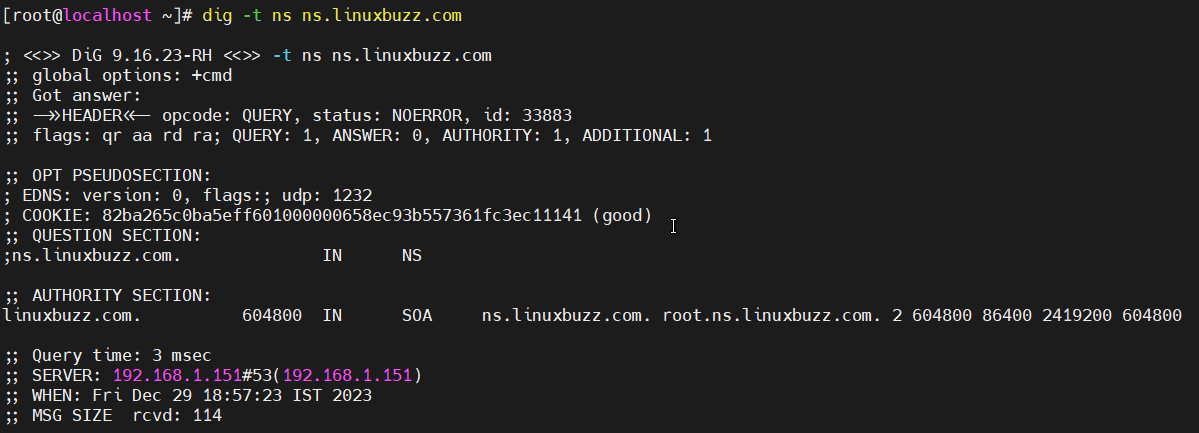
To do the reverse lookup query, run the dig command against the IP address of the DNS server, as indicated below:
dig -x 192.168.1.151
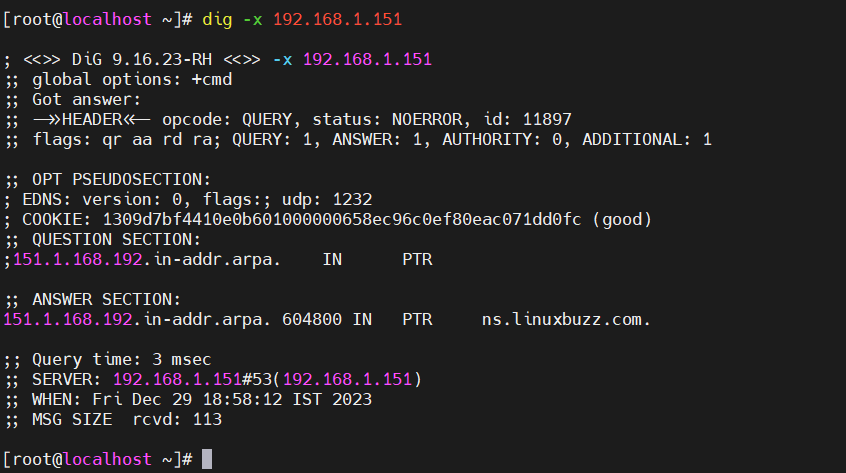
Similarly using nslookup command, we can verify DNS records as shown below:
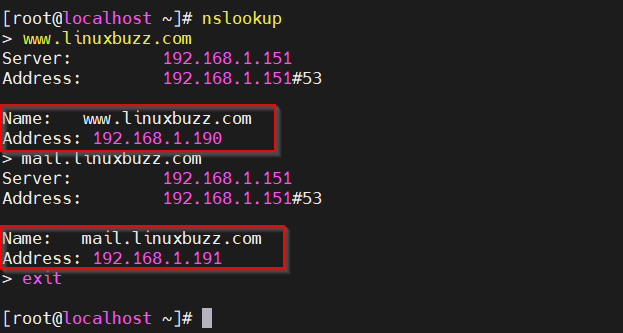
That’s it! The above outputs indicate that the Bind DNS Server is operational.
Conclusion
This post has just walked through how to set up Bind DNS Server on Debian 12. You can now set up the Bind DNS Server in your environment to resolve local DNS server queries. Feel free to post your queries and feedback in below comments section.
Also Read: How to Install Docker Desktop on Debian 12