The Linux Mint team has come out with another popular release of the Linux Mint 18.3 Cinnamon and Mate version that has been much welcomed by the Linux Family. The 18.3 version of the Linux Mint is considered to be a long-term support release and it means that the team will provide its support and updates for a long time until 2021. This new version comes with a lot of new features along with major enhancements to the existing features as well. In this article, we’ll be looking at the new features of Linux 18.3 Mate version along with a step-by-step guide to install Linux Mint 18.3 Mate in your system.
Linux Mint 18.3 Mate – New Features
Linux Mint 18.3 “Sylvia” Mate comes with a lot of new features and improvements to existing features as described below:
- A much improved software manager that is simple, lightweight and easy to use along with the inclusion of the latest software applications like WhatsApp, Spotify, Skype, Google Earth etc.
- Inclusion of Flatpak to enable installing applications that are not compatible with Linux Mint
- Complete makeover of the Backup Tools to ensure that backup and restore is a simple and quick than before
- Inclusion of a new tool called System Reports that generates crash reports and to provide information on your system
- Many improvements have been made to the XApps including changes to Xed, Xreader and also the XPlayer etc.
- Other improvements include enhancements to the spell-check, upload manager and domain blocker are not installed by default, mintmenu also lists the recently used applications and Redshift is now installed by default.
Step-by-Step Guide to Install Linux Mint 18.3 Mate
Step 1) Download Linux Mint 18.3 Mate edition
If you haven’t already downloaded then ensure that you download the latest version of linux Mate 18.3 Mate edition into your system. You can download it from here.
Step 2) Verify the ISO Image
It is always good to verify the ISO image for its integrity and authenticity so that you won’t run into any problems during the installation process. The integrity check ensures that the complete ISO file is downloaded and the authenticity check confirms whether the ISO is duly signed by Linux Mint.
Step 3) Create a Bootable Disk
To install Linux Mint 18.3 Mate edition in your system, you need to have a bootable disk handy. Copy the ISO image into a USB / DVD to create a bootable disk and make sure to alter the boot sequence to boot using the bootable disk.
Step 4) Install Linux Mint
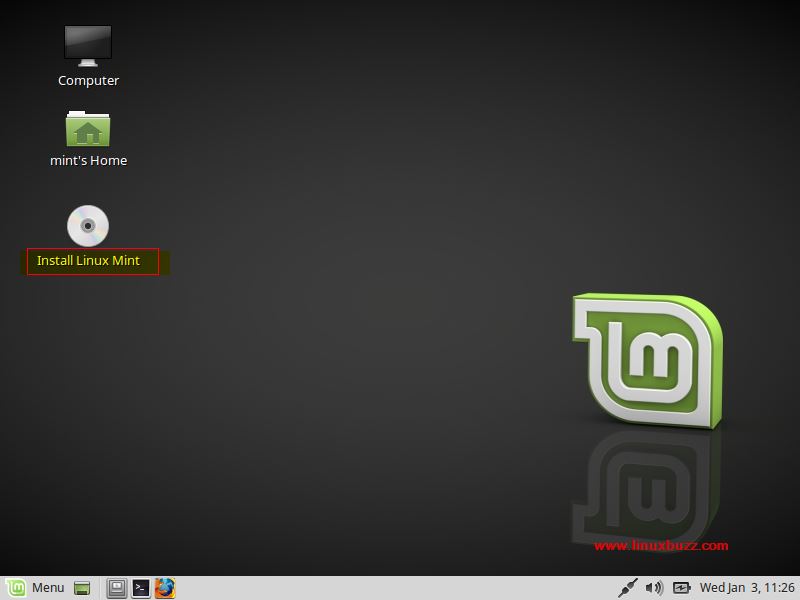
Once you’ve restarted the system using the bootable disk, Linux Mint starts itself with a Live Session. And you’ll be automatically logged into the Live Session. The Live session is a pre-install session that is almost similar to the normal Linux Mint session after installing and the only difference is all changes made in the Live Session is temporary and it is particularly slow when compared to a normal session as it loads from a USB disk DVD. Also, only some applications works in the Live Session.
To start the installation process, click on “Install Linux Mint”
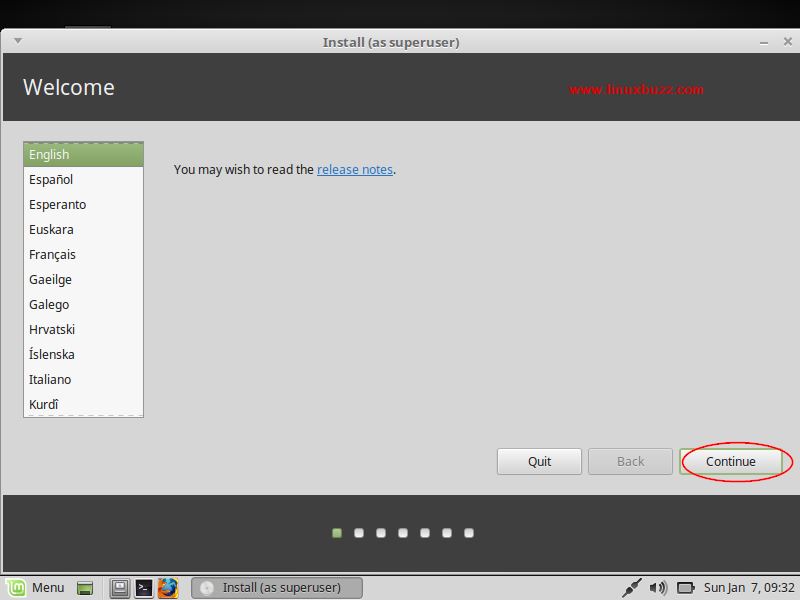
You’ll be presented with a screen to select the language. Choose your referred language and click “Continue”
Step 5) Preparing to Install Linux Mint 18.3
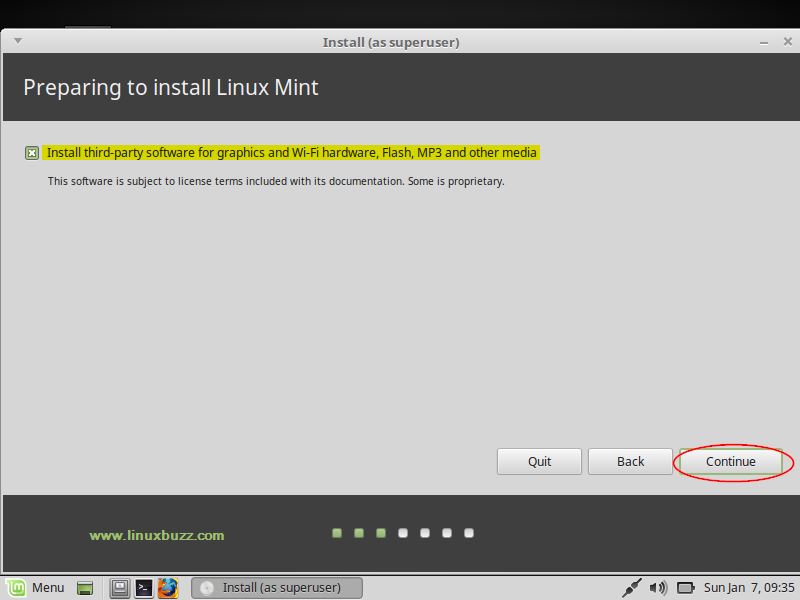
If you want to install third party software for graphics, Wi-Fi and Multimedia during the installation then select the option provided in below screen.
Click on “Continue”
Step 6) Choose the Installation Type
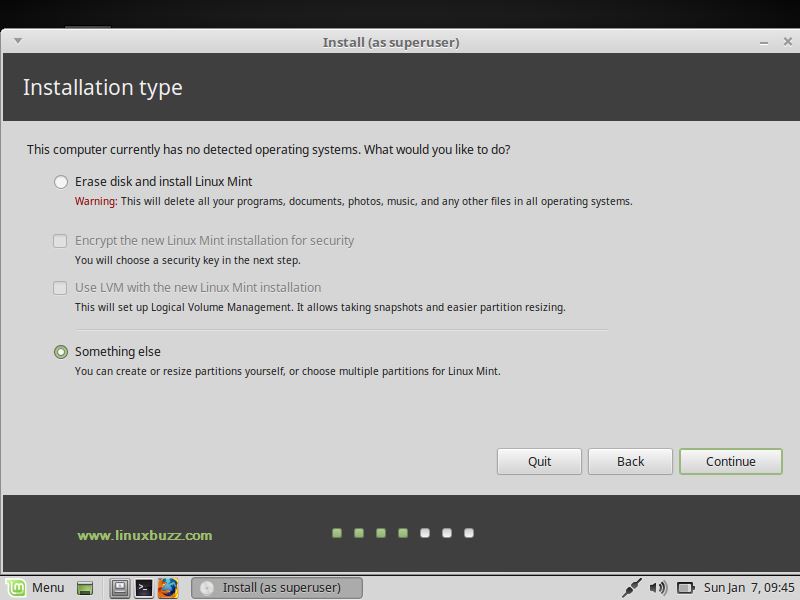
Next the installer presents you with the following installation options including:
- Erase Disk and Install Linux Mint
- Encrypt the new Linux Mint installation for security
- Use LVM with the new Linux Mint installation
- Something Else
Where,
Erase Disk and Install Linux Mint option can be chosen if you your computer is running only Linux Mint and you are ok with erasing everything on your computer and install a fresh Linux Mint 18.3 Mate version.
Encrypt the new Linux Mint installation for security can be chosen if you need complete disk encryptions. Please be aware that this option is intended only for advanced users and some options won’t be working in this installation type. So if you are not sure, don’t choose this type of installation type as you can enhance security later after the installation
Use LVM with the new Linux Mint installation: If your computer is running another operating system and if you intend to run Linux Mint alongside that OS, then you need to go for this option. Once installed, you’ll be presented with both OS during startup, so you can select which OS you need to log into.
Something Else: If you choose specify the partition yourself, then you can go for this type of installation.
Note : Linux Mint requires upto 15GB and hence it is recommended to provide at least 100GB of partition size to
In this tutorials we will also choose this option and will create our own customize partitions
As we can see , I have around 42 GB Disk space, so I will create following partitions on it
- /boot = 1 GB (ext4 file system)
- /home = 15 GB (ext4 file system)
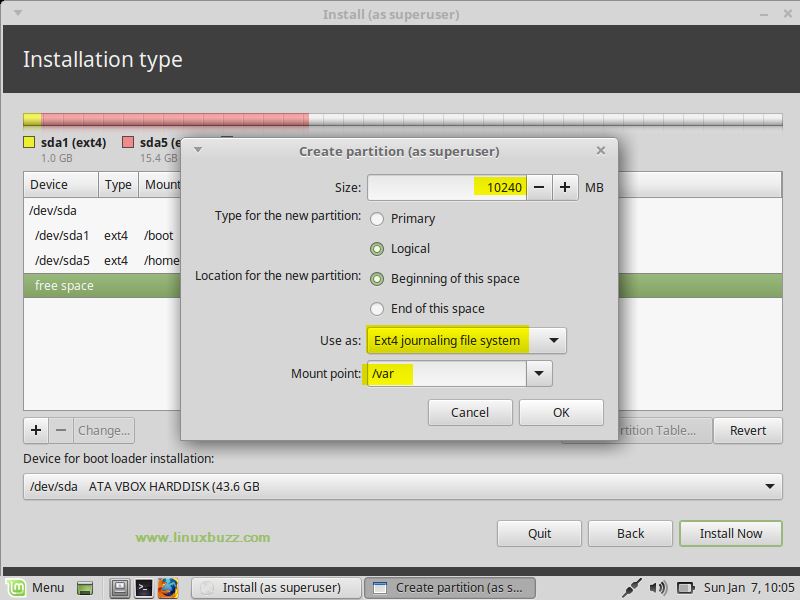
- /var = 10 GB (ext4 file system)
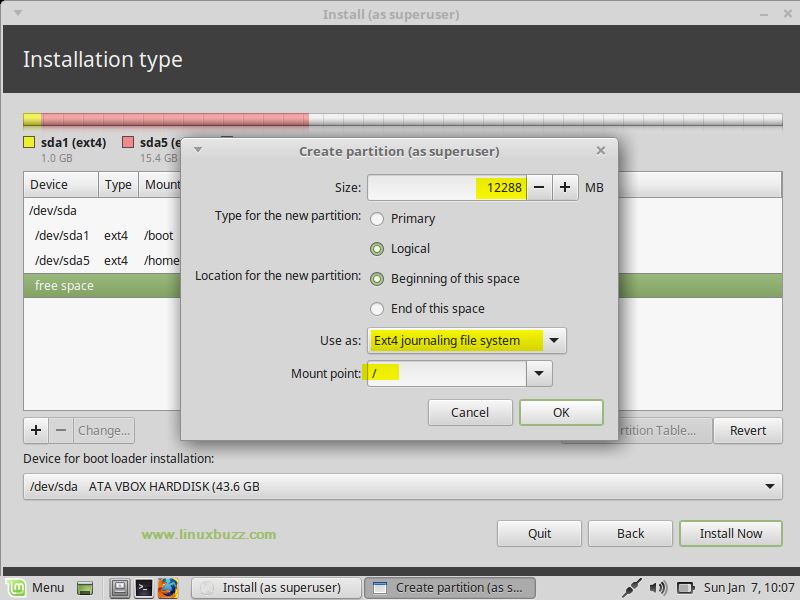
- / = 12 (ext4 file system)
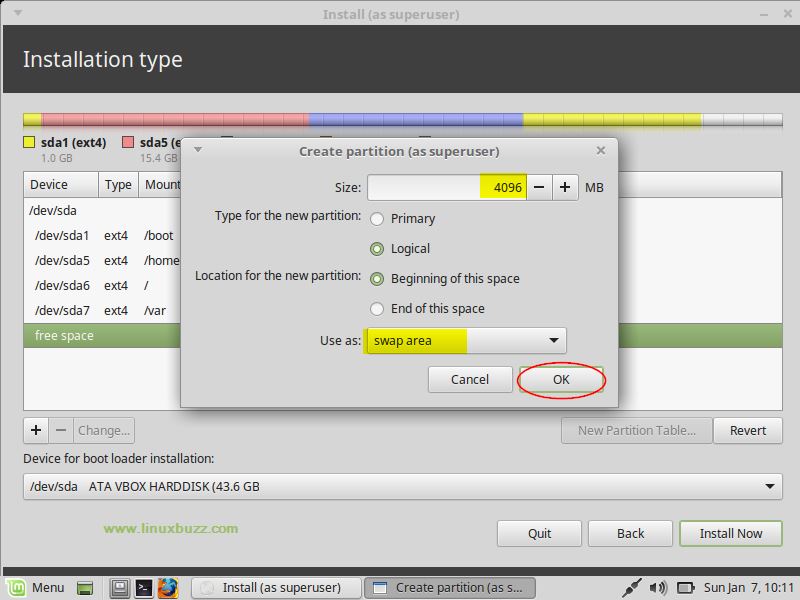
- Swap = 4 GB
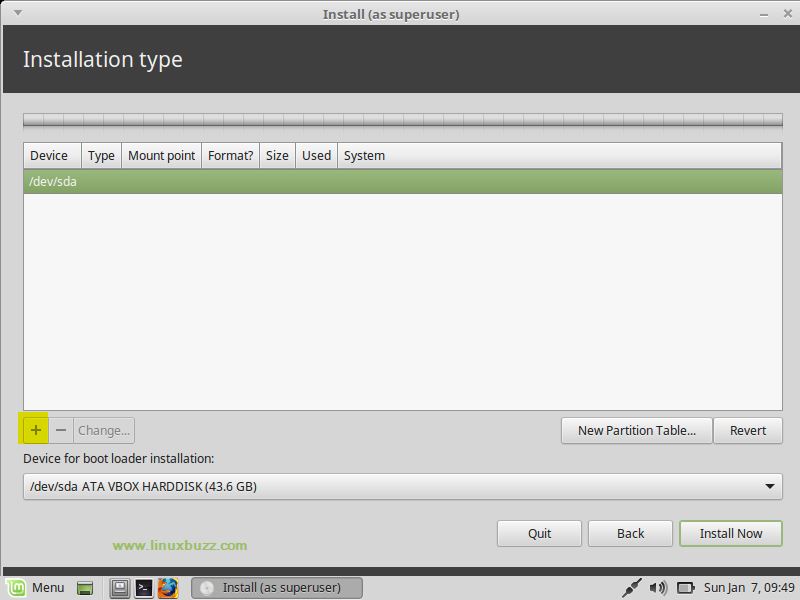
To Start creating partitions, click on “New Partition Table” and select the disk and then click on plus ‘+’ symbol,
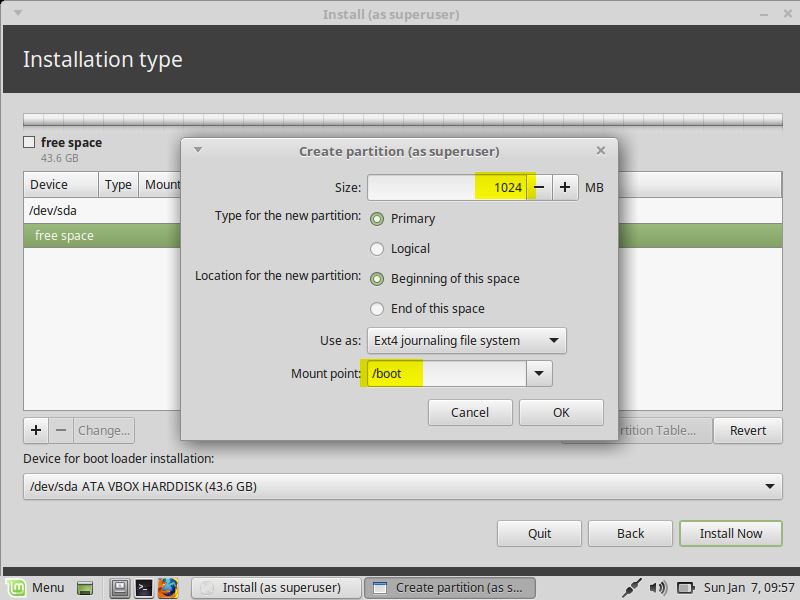
Let’s first create /boot partition of size of 1 GB and format it as ext4 file system
Click on OK
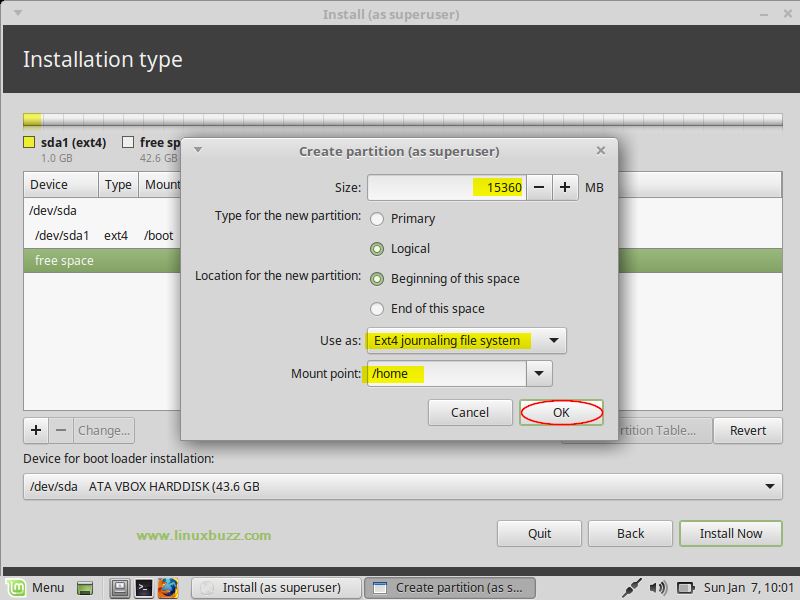
Create /home partition of size 15 GB and format it as ext4
Similarly create /var & / partitions
In the last create swap partition of size 4 GB, to ensure keeping a safety buffer of space in case you run out of memory.
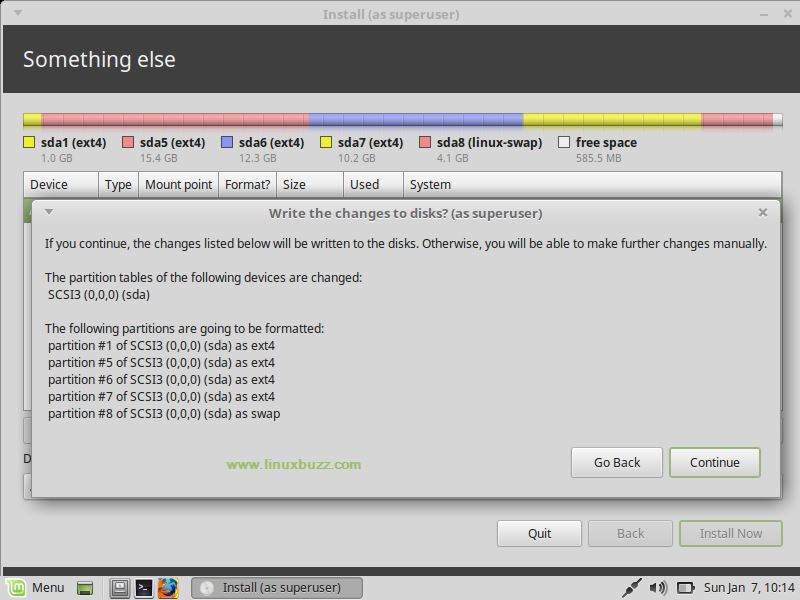
Once you are done with partitions, click on “Install Now” and then click on continue to accept the changes
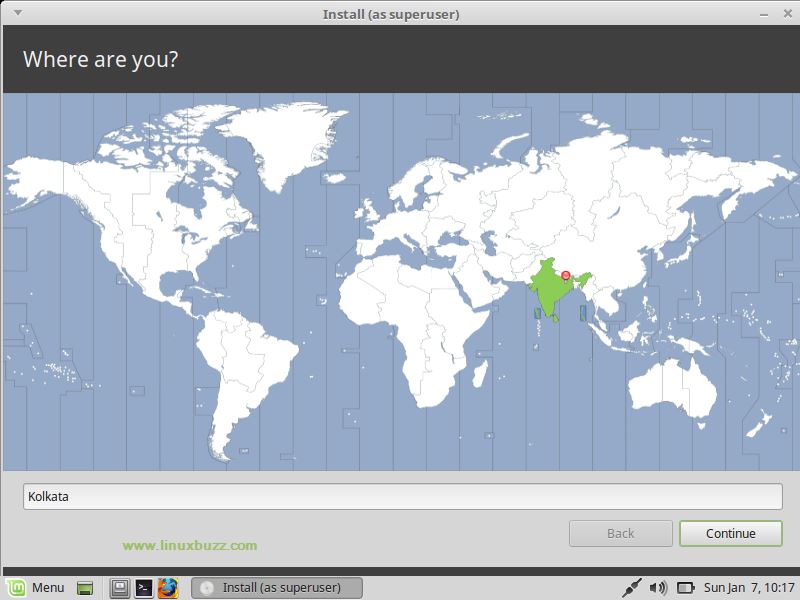
Step 7) Select Your Time zone
Choose your preferred time zone and click “Continue”
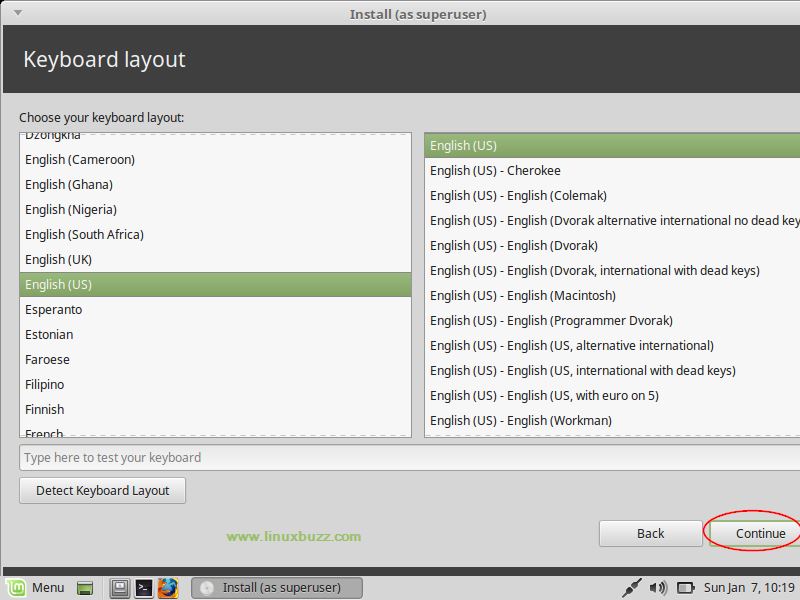
Step 8) Select Your Keyboard Layout
Choose your preferred keyboard layout and click continue
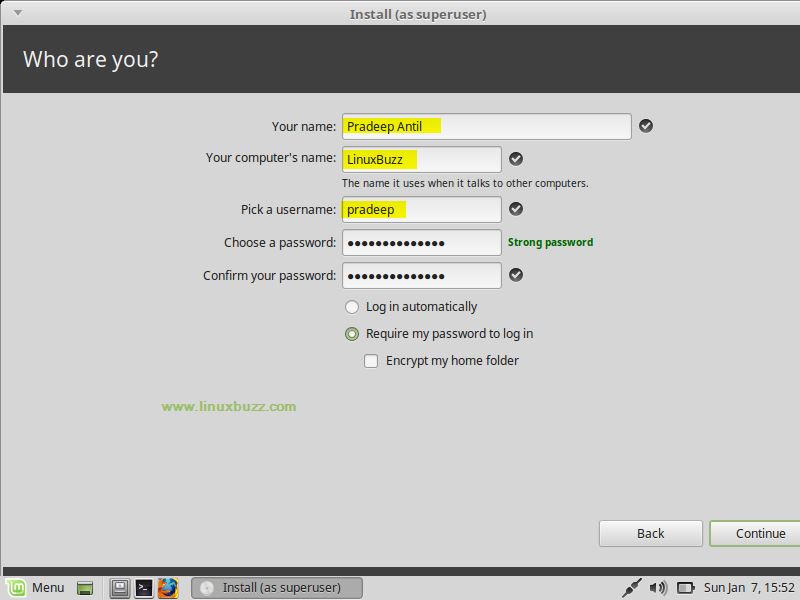
Step 9) Provide your User Credentials
In the next screen, enter your user details including your name, computer name, username and password. Check ‘Encrypt my home folder” if you need to encrypt your root folder of Linux Mint for added security. Click “Continue” to begin the installation process.
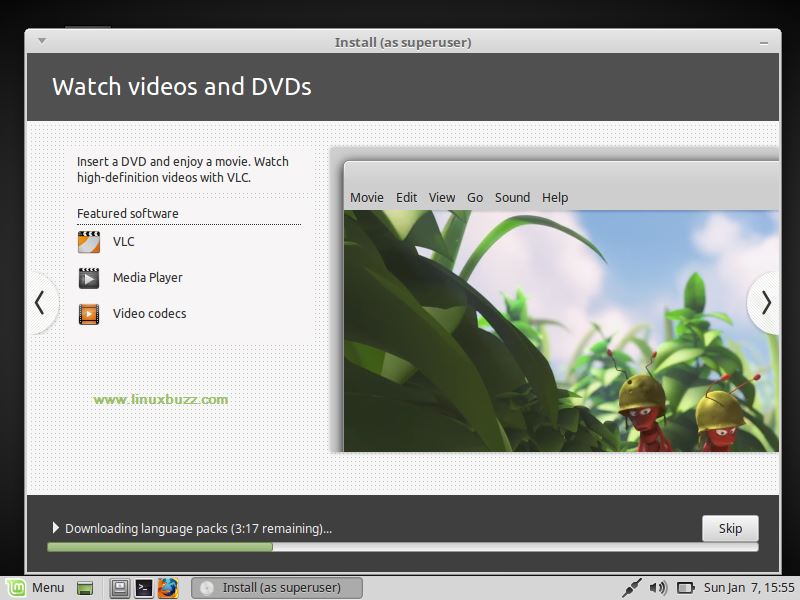
Step 10) Installation Begins
During the installation process, Linux Mint presents you with a slideshow about the new features available in the Linux Mint 18.3 Mate.
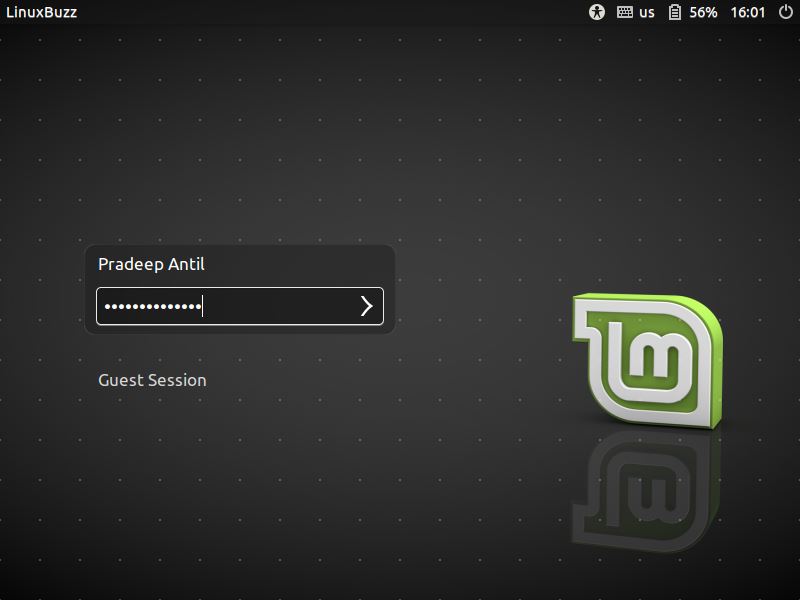
Step 11) Restart and Login to Your System
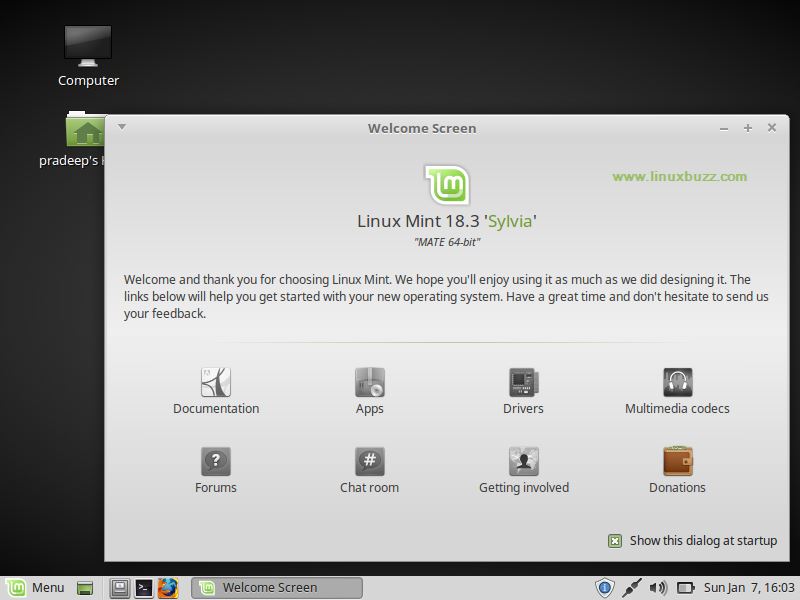
Once the installation completes, Click “Restart Now” to restart your system and start enjoying the awesome features of the newly installed Linux Mint 18.3 Mint operating system.
Use the same user name and password that we specify during the user creation step.
Hope this article helps in installing Linux Mint 18.3 Mate version in your system. Explore Linux Mint 18.3 Mate and have fun :), please provide your valuable feedback and suggestions.
This was exactly what I wanted for reinstalling 18.3 after 19.1 was unsuccessful due to nvidia on Acer. Wanted to keep my data separate to be more secure and easy to archive. Now have to figure out how to reroute automatically.
Why does this installation process not allow you to set up “root” account? How do you accomplish tasks in terminal that require root permissions?