Linux lite is one of the top and one of the most downloaded Linux distros and recently it has released its latest version in Linux Lite 4.0. In this article, we are going to look into the new features and enhancements that is made available in Linux Lite 4.0 along with a step by step guide to install Linux Lite 4.0 in your system.
Linux Lite 4.0 – New Features
Linux Lite has come up with a host of new features including a fresh new theme, a new system to manage menu entries, manage sound and also to manage icons etc. Now let’s look in detail the new features that come with Linux Lite 4.0:
- All-New Fresh Outlook
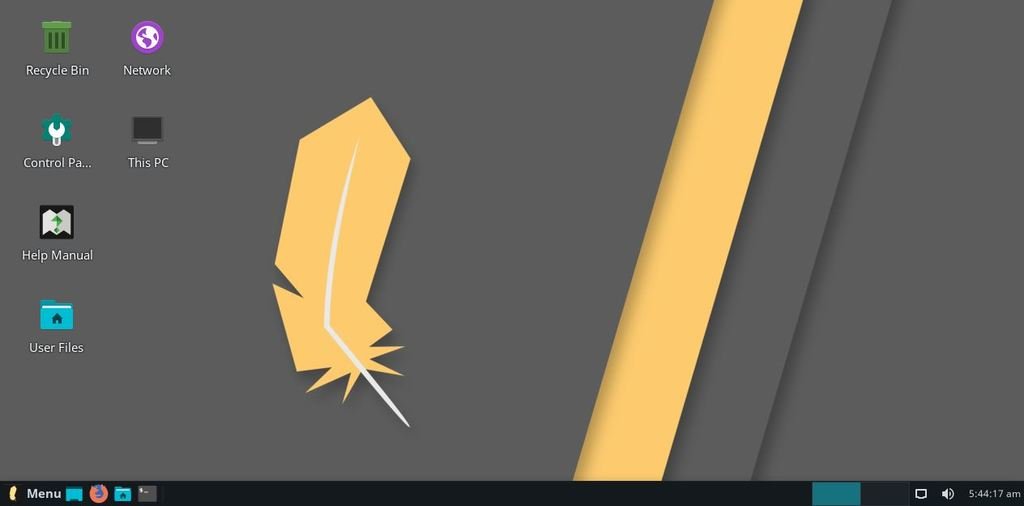
One of the important changes that comes with the Linux Lite 4.0 is the introduction of new outlook for the distro with a new icon and system theme. By default the Linux Lite 4.0 uses the Adapta theme along with the Papirus icon them. And users can change the theme anytime they want with another theme.
- Lite Desktop
The Lite Desktop is another new feature with Linux Lite 4.0 that is mainly like a dashboard that allows you to easily access the various applications along with the frequently used ones.
- Updated Help Manual
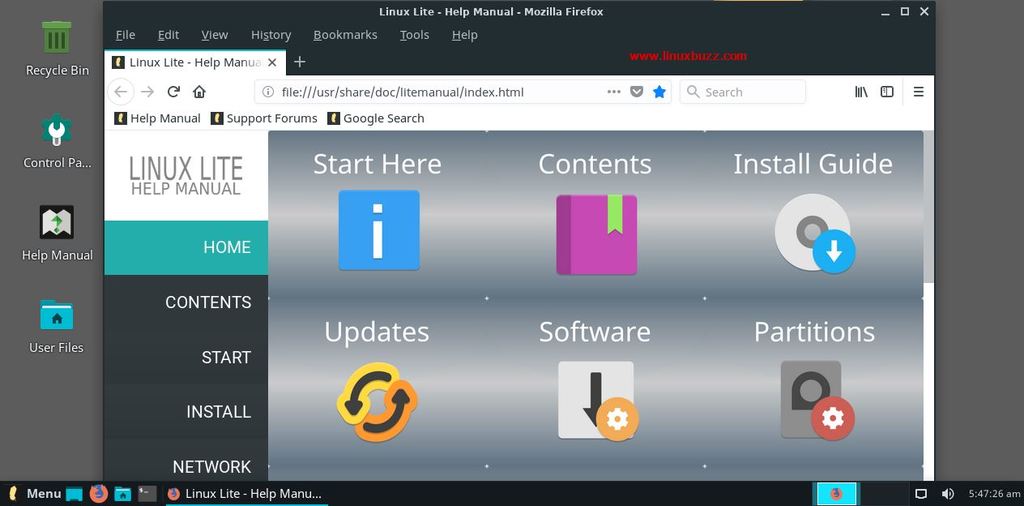
New users only rely on the help manual to quickly understand the various features and functionalities of any system. And based on various requests from several users, Linux Lite 4.0 has updated its help manual with more information related to the operating system, how to operate it, features etc.
- Lite Sounds
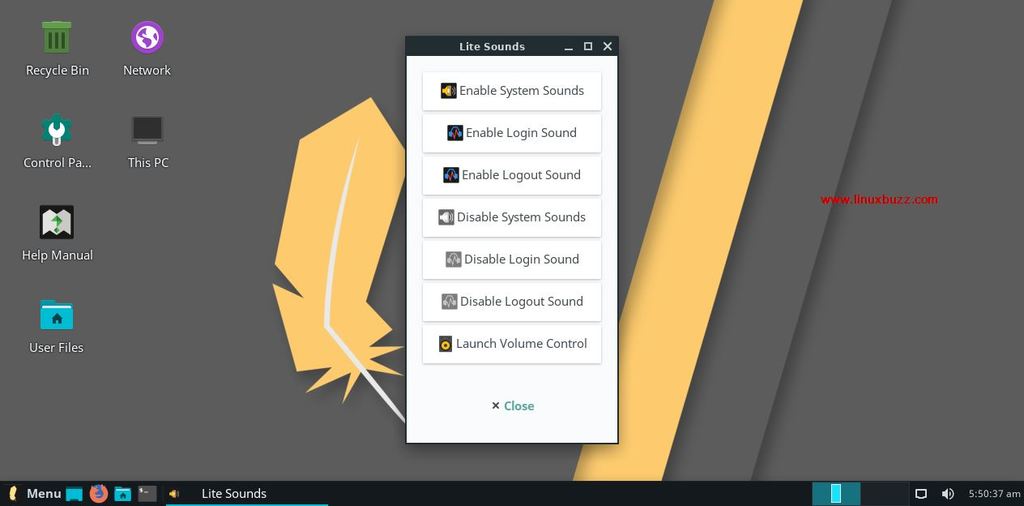
The all-new Lite Sounds introduced in Linux Lite 4.0 is to allow users to change the various sound in the system including system sounds and other sounds including login/logout sounds etc. With a click of a button, you can enable/disable all the system sounds.
- Timeshift
- Introduction of Xfce terminal
Based on popular demand, the LXTerminal has been dumped and the all-new Xfce Terminal has been used. Powerline has also been added to the prompt and some system information also has been added on the top of the terminal to provide some basic system information to the user including date, time, disk usage and system usage.
- MenuLibre
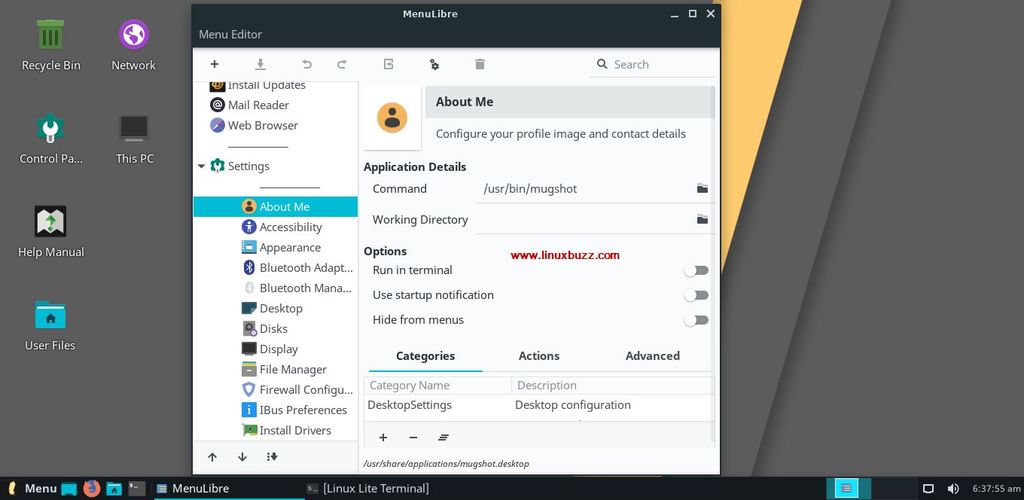
A new system called MenuLibre has been introduced to manage the all the menus in your system. The sub menu applications also can be sorted alphabetically and the menu editor can be accessed from Settings –> Menu Editor.
Other changes include:
- Shotwell application to edit images
- Linux Lite Branding to enable linux lite applications like lite Desktop, Lite Sounds, MenuLibre to be identified easily with an icon with black background
- 32bit ISO release not supported
- Minimum recommended specifications have been increased from the previous version
- Does’ allow you to set swap partitions
- Linux Kernel: 4.15.0-22
Step by Step Installation Guide
To install Linux Lite 4.0 in your system, please follow this step by step installation guide.
Prerequisites
- 1.5GHZ processor
- 20GB storage
- 1024mb RAM
- DVD/USB Drive for ISO image
Step 1) Download Linux Lite 4.0
First step is to download the Linux Lite 4.0 into your system. Please note that the 32 but version has been stopped and only the 64 bit version is available for download. Please click the link here to download Linux Lite 4.0
Burn the downloaded ISO file either into a USB stick or DVD and make it bootable. Reboot your system, go to bios settings and change the boot medium of your system either as USB or DVD.
Step 2) Start the Installation
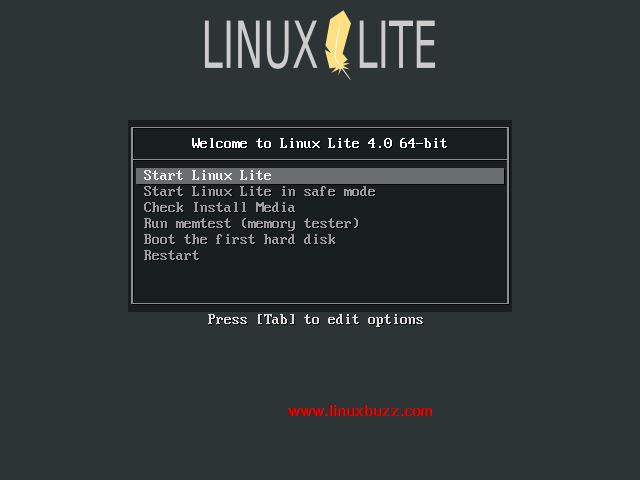
Now it’s time to start the installation process, you’ll be presented with the Linux Lite 4.0 welcome screen as shown below. Click “Start Linux Lite”
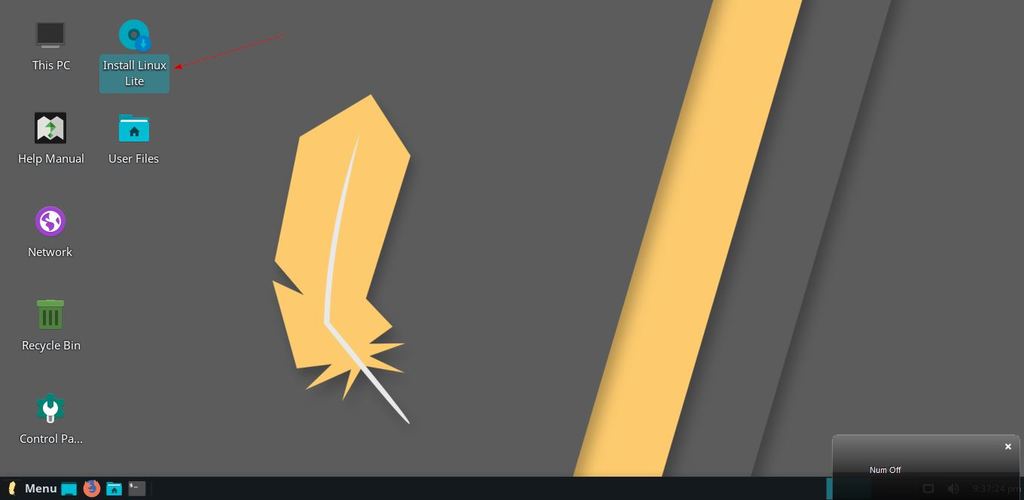
You will get next windows something like below, Click on “Install Linux Lite”
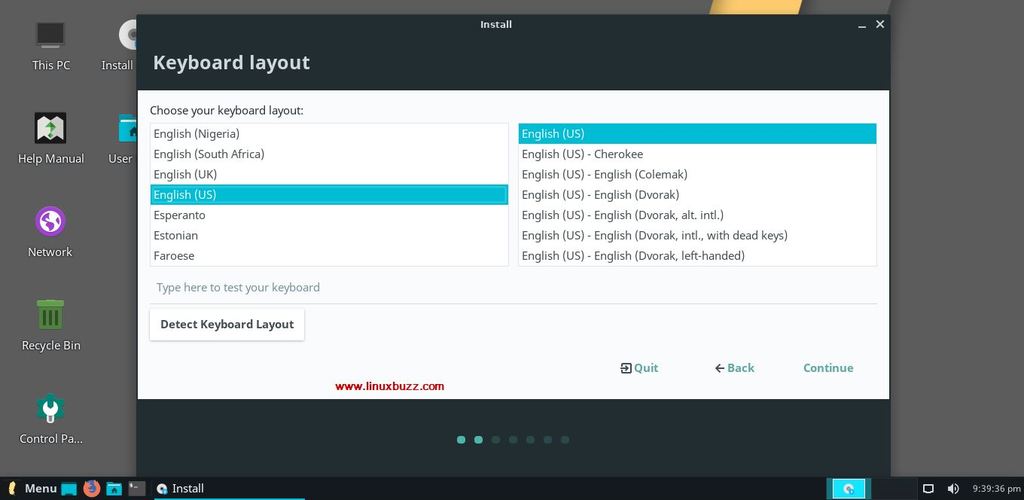
Step 3) Choose your preferred Keyboard
In my case I am selecting the default keyboard layout, but you can it as per your setup
Click on Continue
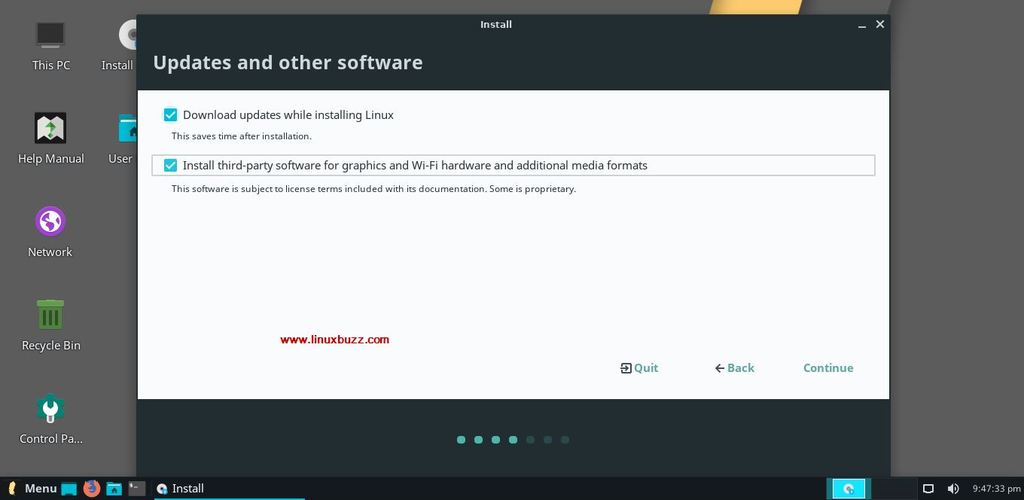
Step 4) Install Updates and third party software
If your system is connected to the internet and want to install all the new updates and third party software like additional media support and graphics drivers during the installation, then you select both the options else you untick both of them and click on Continue
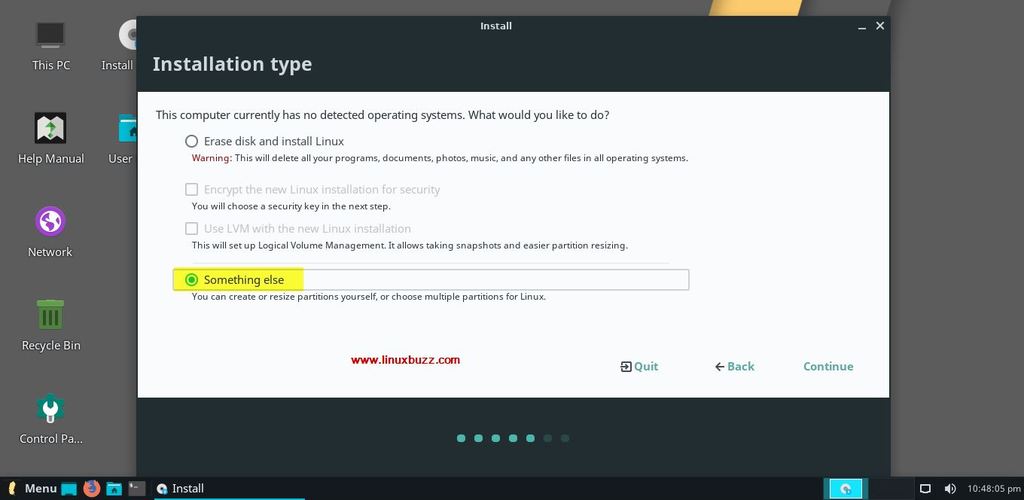
Step 5) Choose Installation Type
Here also you’ll be provided with options including:
- Erase Disk and Install Linux: Once you select this option, the installer choose the default partitioning scheme
- Encrypt the new Linux installation for security
- Use LVM with the new Linux installation
- Something Else (If you want to create your own partitions scheme then you should select this option)
If you are installing Linux Lite 4.0 for the first time in a fresh machine or want to delete everything in the disk and start with only Linux Lite 4.0, then you can choose the first option.
And if you are a beginner, better to leave both the 2nd and 3rd options. And if you are looking to create a custom partition, select “Something Else” to create your own partition for Linux Lite 4.0
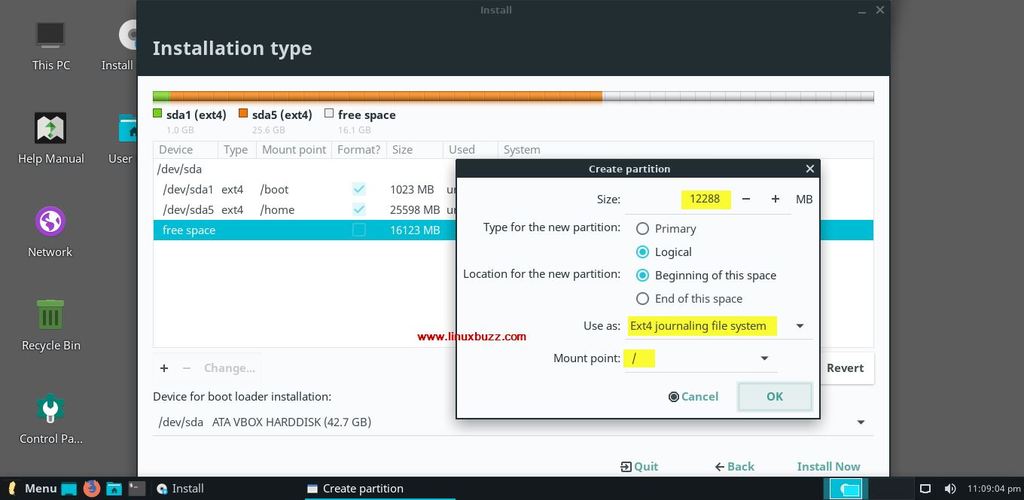
In this tutorial I will choose “Something Else” and will create the following partitions.
In my case , I have around 40 GB disk space for Linux Lite Installation
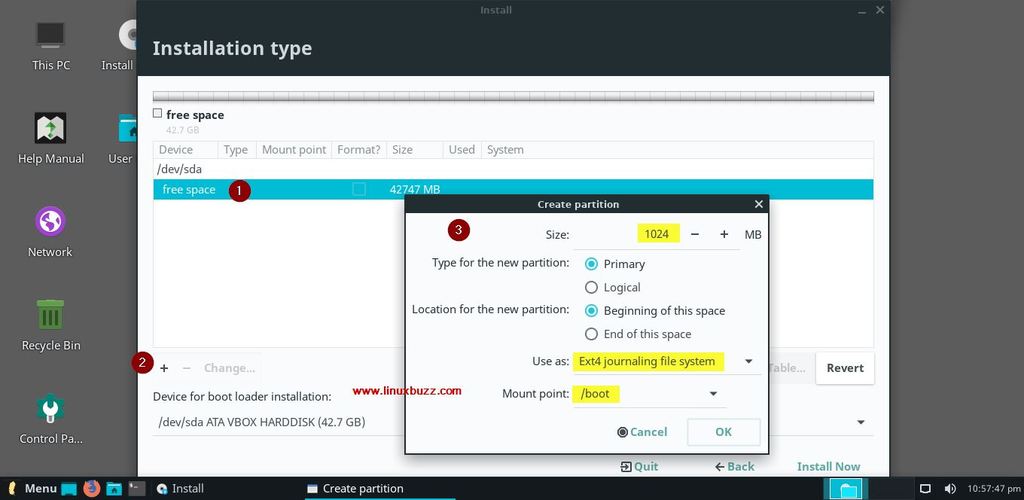
- /boot = 1 GB (ext4 file system)
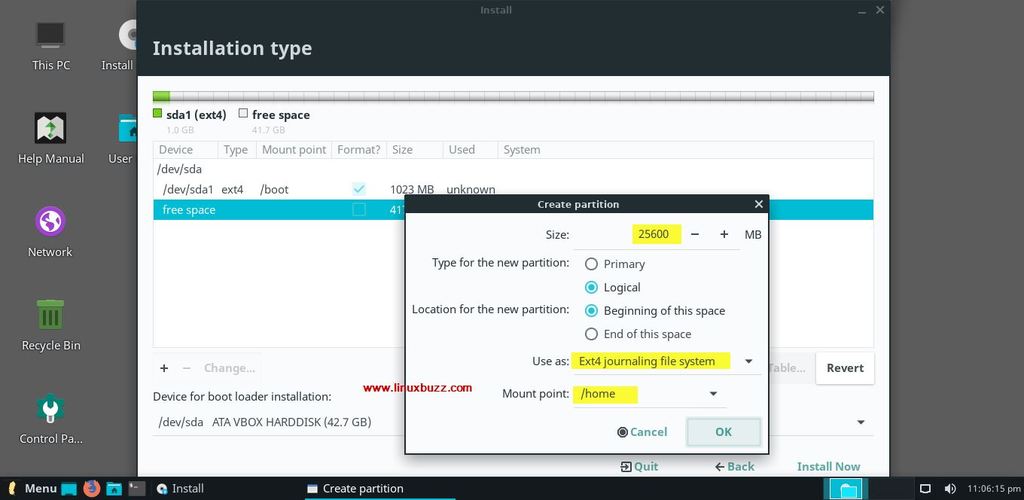
- /home = 25 GB (ext4 file system)
- / = 12 (ext4 file system)
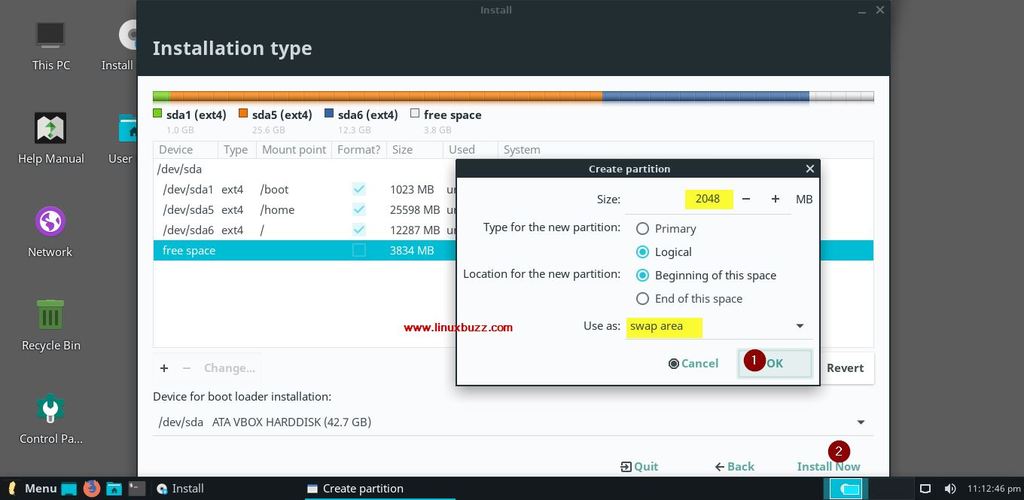
- Swap = 2GB
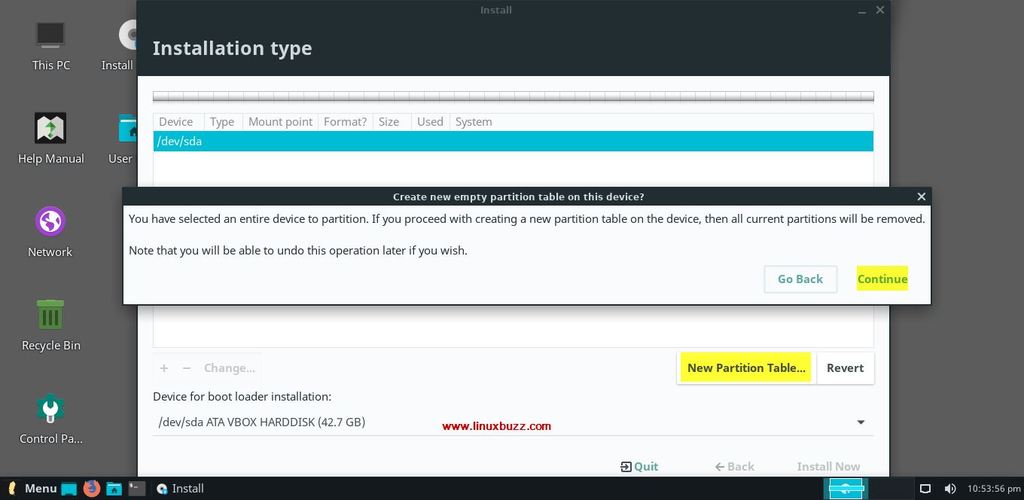
When we select the “Something Else” option and click on continue, we will get the below window
First Choose “New Partition Table” and then click on Continue
Now let’s create our first partition as /boot, Select the free space and then click on plus icon (+) and then in the windows specify the size of the partition, mount and its file system type,
Similarly create /home and / partition with their respective size,
Create the last partition as swap of a size 2 GB
Click on OK and then click on “Install Now” option
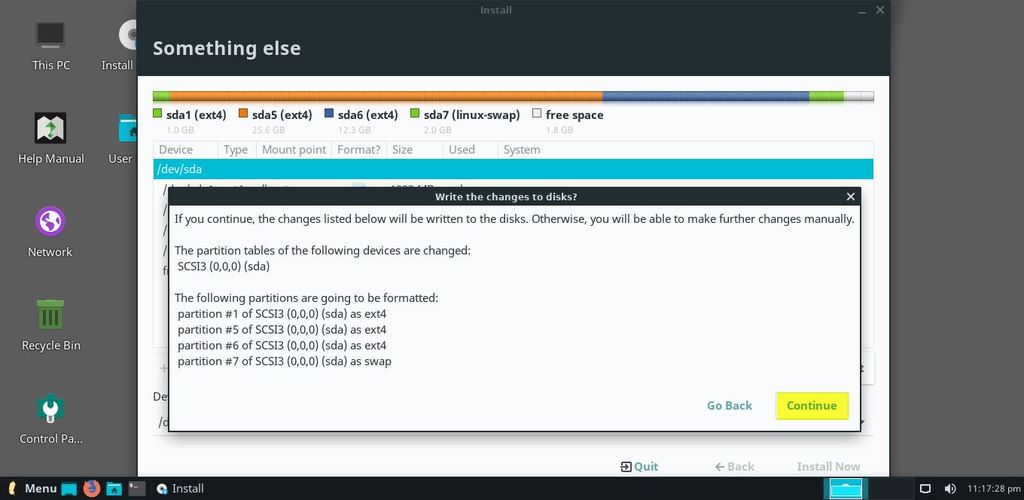
Click on Continue to Write changes to the disk
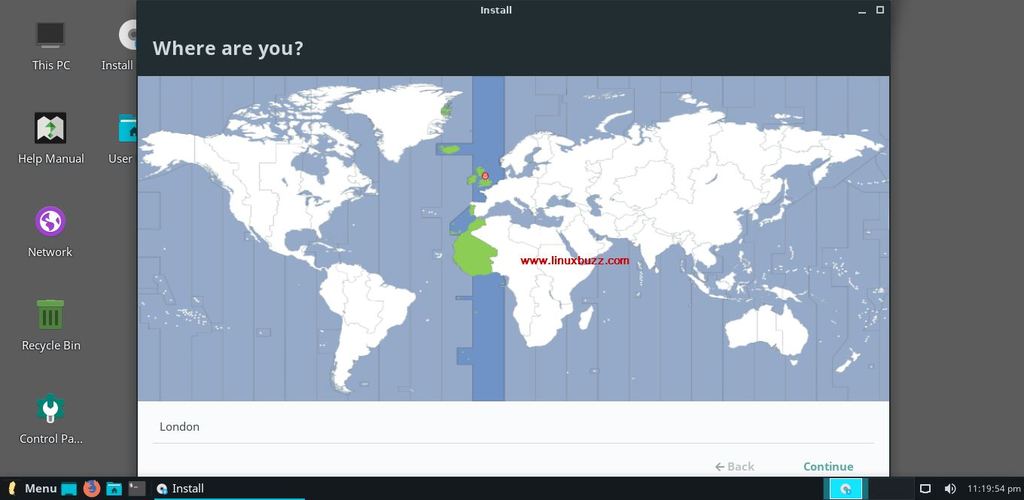
Step 6) Choose Your Location
Choose your location along with your time zone and click “Continue”
Step 7) Provide your Personal Details
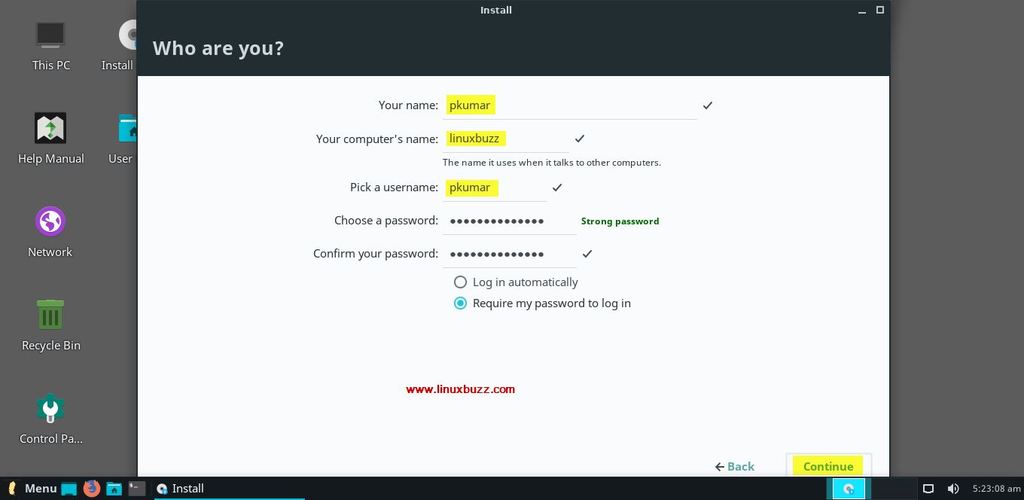
Next screen will require to provide your personal details like your system hostname, user name and its password and then click “Continue” to start the installation
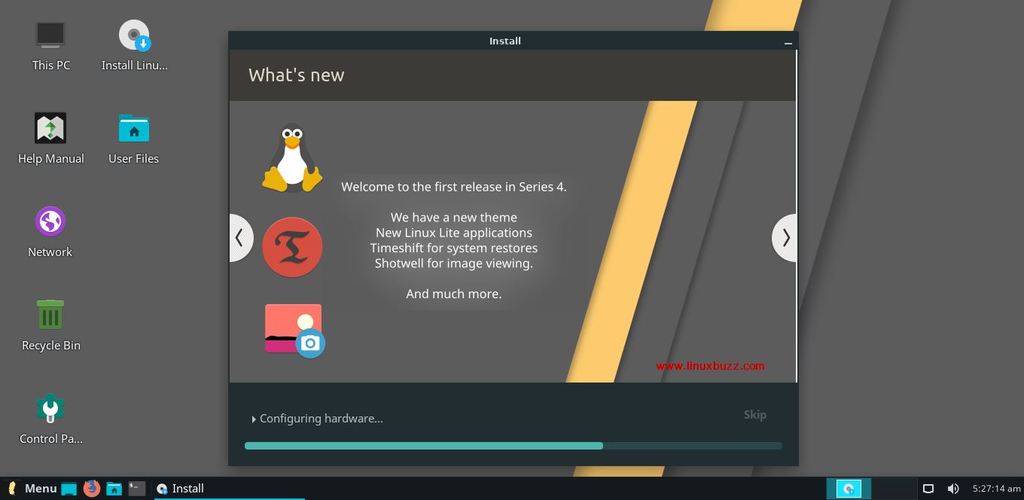
Step 8) Installation Begins
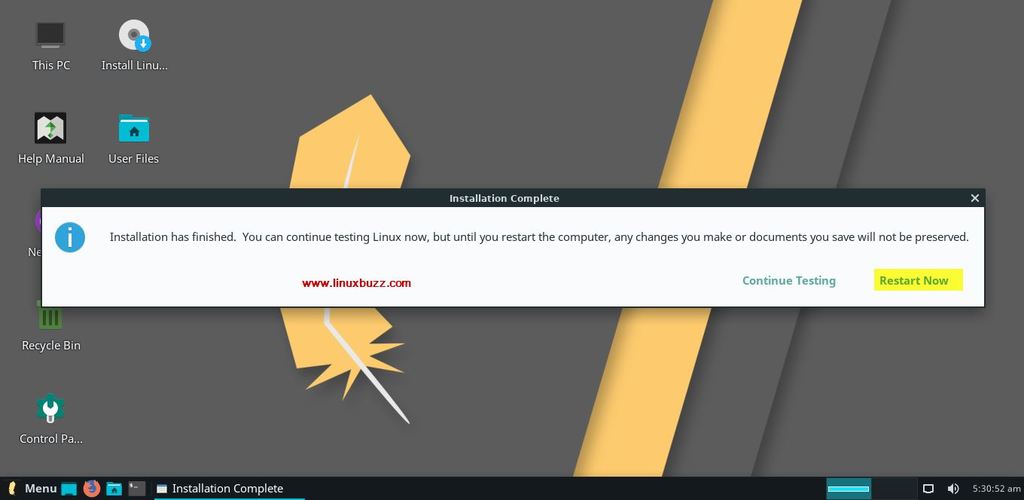
Now the actual installation begins which should take hardly 5 mins and you’ll be required to restart your computer after the installation process.
Step 9) Login into Linux Lite 4.0
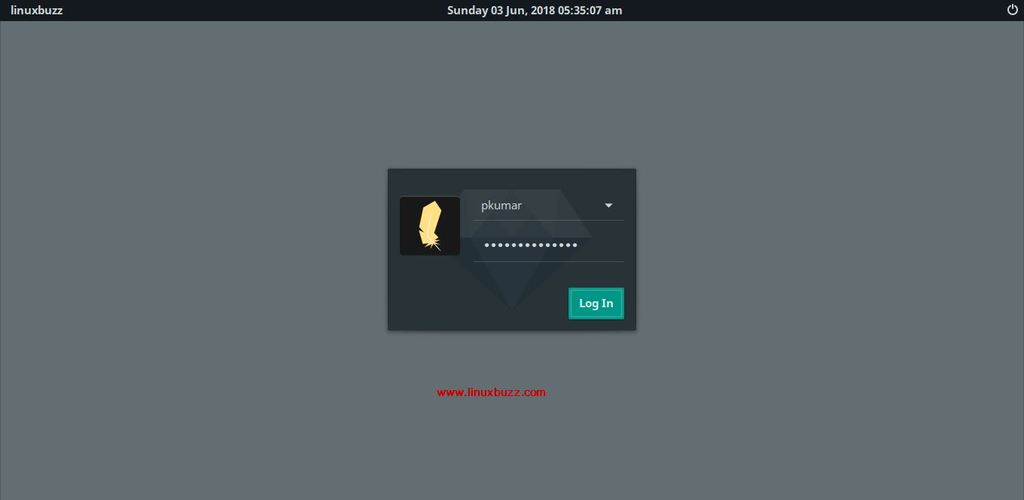
You would be required to login after you restart your computer to start working with Linux Lite 4.0.
Use the same user name and password that you have set during the installation.
Step 10) Welcome to Linux Lite 4.0
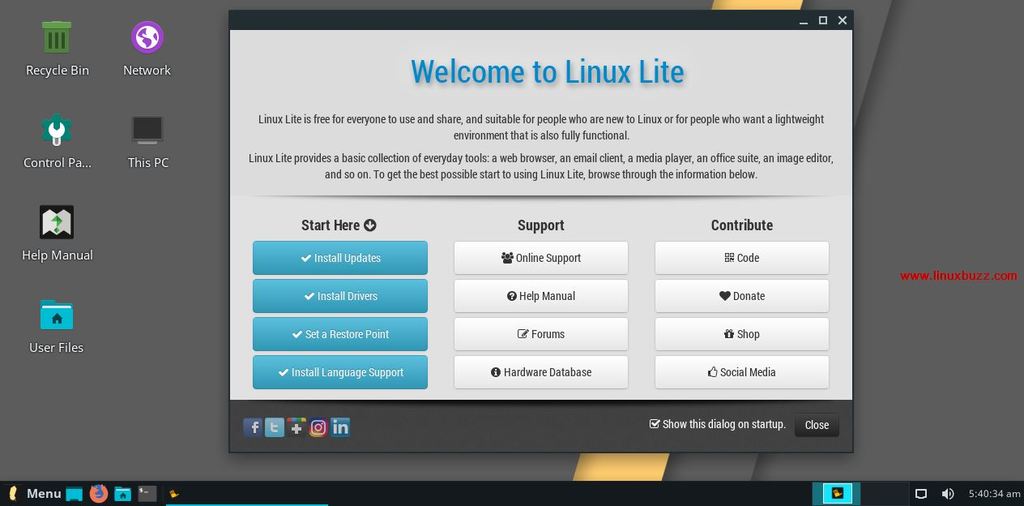
And finally your installation process is completed successfully and you could see the welcome screen of Linux Lite 4.0. Here you’ll be presented with various options including Install Updates, drivers, language support and also allows you to set a restore point. The Help manual is updated with lots of information, so just take a couple of minutes to go through the manual to understand more about Linux Lite 4.0
And hope you’ve successfully installed Linux Lite 4.0 in your machine with the help of this step-by-step guide. As always, we would be happy to answer all your queries and suggestions. Please provide your feedback in the comments section below.

I am deeply dissapointed by the fact that Linux Lite discontinued their 32bit support!
Let me make it public that this is the reason I am abandoning Linux Lite for Linux Mint xfce, that has promised lately to continue their support for older systems, that is their 32bit version!
I installed all apps on LL4, so I have a full system.
Now I like to put a bootable Iso on pendrive. I don’t see systemback.
How do I do that simpel?
Helpful instructions and what seems a very good and Secure OS.
Please once i select` “something else” does that mean am installing linux alongside with my current os (window 7) or everything would also be erased cause at first an option with install alongside was there all of a sudden it disappeared.
I am extremely disappointed that Linux Lite is following in the foot steps of Microsoft by creating Users, Admins and Super Users that all require privileges that the user never seems to have.
If you insist on following Microsoft, then at least in the Control Panel make it simple way to assign privileges. Such as Click Here to assign XYZ Admin privileges and the person downloading and setting up Linux Lite should automatically be the Super User unless assigned otherwise.
I have noticed that Linux lite is not as highly ranked as it once was and you can say otherwise, but the sites I visit show users are leaving… ask yourself why.
I cannot sneeze with putting in my code on Linux Lite 4. I am now shopping for a less burdensome Distro.