Are looking for an easy guide on how to setup VNC on Ubuntu Server 22.04 LTS (Jammy Jellyfish)?
The step-by-step guide on this page will show you how to install and configure VNC on Ubuntu Server 22.04.
VNC (Virtual Network Computing) is a desktop screen-sharing feature that allows users to remotely access and control the desktop environment of a remote system using a keyboard and mouse.
Prerequisites
Before you get started, make sure you have the following in place.
- An instance of Ubuntu server 22.04 with SSH access.
- A sudo user configured on the server instance
- A local PC with a VNC client installed such as TigerVNC or RealVNC
Step 1) Install Desktop Environment on Ubuntu Server
By default, the Ubuntu server does not come with a desktop environment. So, the first step will be to install one. In this guide, we will install XFCE which is a lightweight desktop environment and easy on the consumption of system resources.
First, update the package lists:
$ sudo apt update
Next, install the XFCE desktop environment using the following command:
$ sudo apt install xfce4 xfce4-goodies
Step 2) Install TightVNC Server
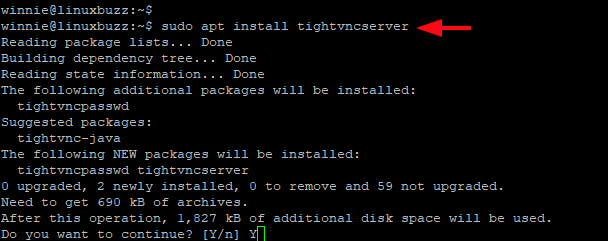
The TightVNC package is provided by the Official Ubuntu repositories. Therefore, install it using the APT package manager as shown.
$ sudo apt install tightvncserver
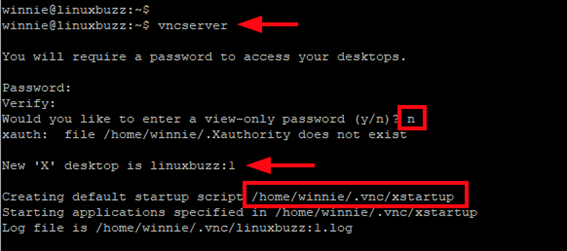
Thereafter, run the vncserver command to create a VNC password to access the remote desktop, create initial configuration files and initialize a VNC server instance.
$ vncserver
First, you will be prompted to enter an access password. Provide one and verify it.
NOTE: The password should have a range of between 6 to 8 characters. A password having more than 8 characters will be truncated.
Next, you get an option to choose whether or not you want to create a view-only password. The view-only password only grants you access to the desktop and does not allow you to interact with the remote desktop using the keyboard and mouse. As such, simply decline this option by pressing ‘n’ and pressing ENTER.
Thereafter, an instance of the VNC Server will be created on the display port which is port 5901, and referenced by :1 notation. In addition, all the necessary VNC Server configuration files will be created and placed in your home directory in the ~/home/user/.vnc path.
Step 3) Configure TightVNC Server
After the installation and initialization of the VNC server, some additional steps are required. You need to specify the graphical environment that VNC will connect to as well as the commands to run when it starts.
The commands required during startup are located in the xstartup file located in the .vnc folder in your home directory. We already have this file in place from the previous step after running the vncserver command.
To configure the VNC server, first, kill the current VNC server instance.
$ vncserver -kill :1
Next, we are going to edit the xstartup file. Be sure to make a backup first.
$ mv ~/.vnc/xstartup ~/.vnc/xstartup.bak
Next, create a new configuration file using the text editor of your choice.
$ nano ~/.vnc/xstartup
Next, add the following code.
#!/bin/bash
xrdb $HOME/.Xresources
startxfce4 &
Save and exit. Next, make the script executable by assigning execute permissions.
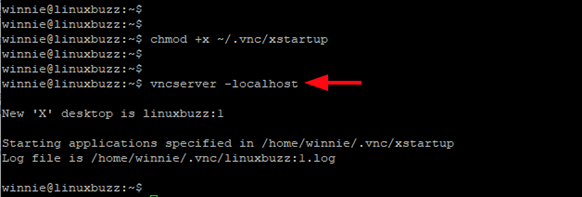
$ chmod +x ~/.vnc/xstartup
Restart the VNC Server, this time with the -localhost flag.
$ vncserver -localhost
The -localhost argument binds the VNC server to the server’s loopback address (127.0.0.1). It causes the VNC server to only allow connections emanating from the server itself. But don’ worry about this. In the next step, we will establish an SSH tunnel from the local machine to the server and trick the server into thinking that the connection from the local machine is originating from the server itself.
Step 4) Secure VNC Connection
VNC does not use secure protocols when initiating a connection. To connect securely to your server, establish an SSH tunnel and then instruct your VNC client to connect using that tunnel instead of making a direct connection.
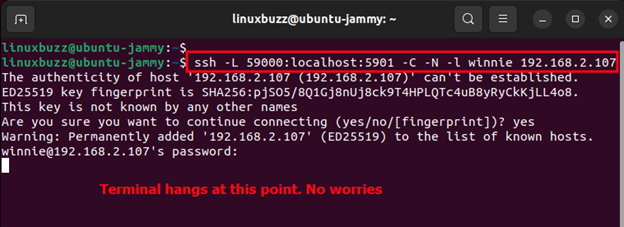
To do so, run the following command on the client-side Linux system.
$ ssh -L 59000:localhost:5901 -C -N -l winnie vnc_server_ip
-L 59000:localhost:5901: This signifies that port 59000 on the local computer will be forwarded to the VNC server host and port (localhost:5901). The 59000 port is just arbitrary. You can provide a unique port provided it is not bound to any service.
-C: Ths flag enables compression which helps in the optimization of resource usage.
-N: Instructs SSH that you don’t intend to execute any remote commands.
-l: Specifies the login user and the VNC server IP address.
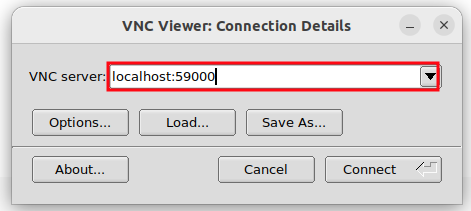
Once you have established the SSH connection from your client PC, launch a VNC viewer client. Here, we are using TigerVNC Viewer.
On the popup dialogue, enter the address shown. Then click ‘connect’
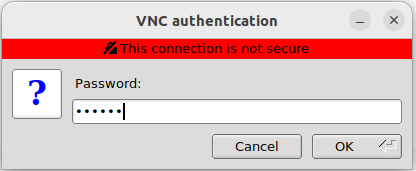
Provide the remote user’s password and click ‘OK’
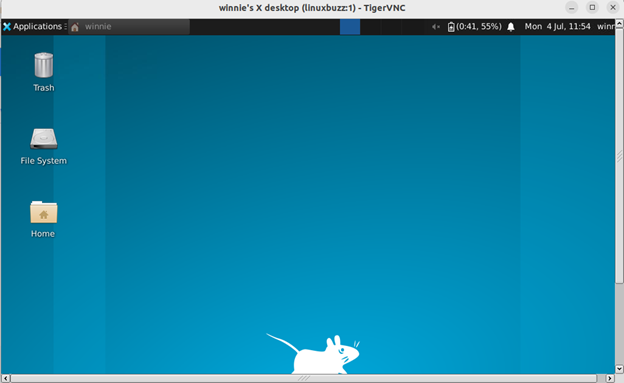
Finally, a VNC connection to the remote VNC server will be established.
Step 5) Configure VNC to Run as Systemd Service
To get the most out of using the VNC server, you can configure it as a systemd service. This way you can start, stop restart and enable the service to start on boot. Therefore, create a systemd file as shown.
$ sudo nano /etc/systemd/system/vncserver@.service
Paste the following lines of code, and replace every instance of winnne with your own user.
[Unit]
Description=Start TightVNC server at startup
After=syslog.target network.target

[Service]
Type=forking
User=winnie
Group=winnie
WorkingDirectory=/home/winnie
PIDFile=/home/winnie/.vnc/%H:%i.pid
ExecStartPre=-/usr/bin/vncserver -kill :%i > /dev/null 2>&1
ExecStart=/usr/bin/vncserver -depth 24 -geometry 1280x800 -localhost :%i
ExecStop=/usr/bin/vncserver -kill :%i

[Install]
WantedBy=multi-user.target
Save and exit the file. Next, reload the system
$ sudo systemctl daemon-reload
Be sure to enable VNC service to automatically start on boot.
$ sudo systemctl enable vncserver@1.service
Then kill the current instance of VNC
$ vncserver -kill :1
Finally, start the VNC service.
$ sudo systemctl start vncserver@1
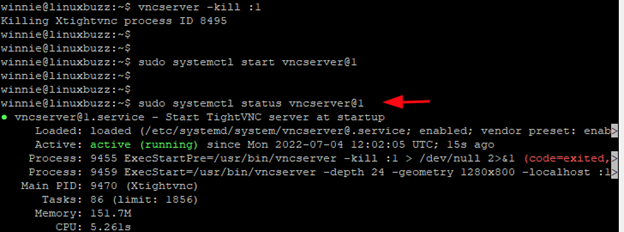
And finally, verify that the service is running.
$ sudo systemctl status vncserver@1
The only thing remaining is to, once again re-establish an SSH secure as previously seen and connect using a VNC client.
$ ssh -L 59000:localhost:5901 -C -N -l winnie vnc_server_ip
Conclusion
This brings us to the end of this guide. We have successfully installed and configured VNC server and managed to initiate a secure connection to the server using SSH tunneling and a VNC client.
Also Read: How to Install Docker on Ubuntu 22.04 / 20.04 (Step by Step)

