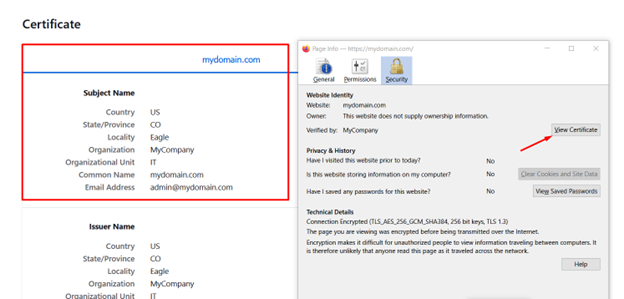
In this tutorial, we will cover how to generate self-signed SSL certificate using openssl command in Linux.
SSL certificates play a significant role in ensuring secure communication between a web server and clients. In certain situations such as testing or internal use, a self-signed SSL certificate may be a suitable alternative to a commercial certificate.
1) Check and Install OpenSSL
Before proceeding, ensure OpenSSL is installed on your computer. Most Linux distributions come with OpenSSL pre-installed. To check if it’s available, run:
$ openssl version
If OpenSSL is not installed, you can add it using the following commands based on your operating system:
Ubuntu/Debian:
$ sudo apt update && sudo apt install openssl -y
RHEL / Fedora / Rocky Linux
$ sudo dnf install openssl -y
2) Generate a Private Key
To create an SSL certificate, you first need to generate a private key:
$ openssl genrsa -out mydomain.key 2048
This command creates a 2048-bit RSA private key named mydomain.key. If you need a stronger key, replace 2048 with 4096.
3) Create a Certificate Signing Request (CSR)
Next, generate a CSR using the private key:
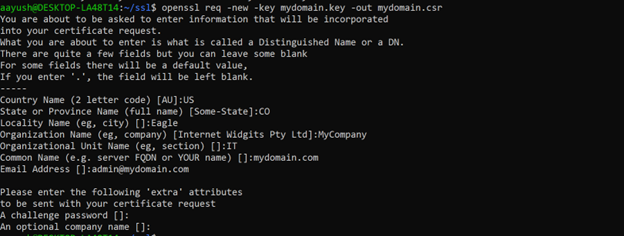
$ openssl req -new -key mydomain.key -out mydomain.csr
During the process, you’ll be prompted to provide details such as:
Country Name (2 letter code) [AU]:
State or Province Name (full name) [Some-State]:
Locality Name (eg, city) []:
Organization Name (eg, company) [Internet Widgits Pty Ltd]:
Organizational Unit Name (eg, section) []:
Common Name (e.g. server FQDN or YOUR name) []:
Email Address []:
Enter all the details and then submit.
4) Generate Self-Signed Certificate Using OpenSSL
Now, create the self-signed certificate using the CSR and private key:
$ openssl x509 -req -days 365 -in mydomain.csr -signkey mydomain.key -out mydomain.crt
The -days 365 option sets the certificate’s validity to one year. The output file mydomain.crt contains the generated self-signed certificate.
5) Set Up the SSL Certificate in Nginx
To use the self-signed SSL certificate with Nginx, move the certificate and key to /etc/nginx/ssl/:
$ sudo mkdir -p /etc/nginx/ssl
$ sudo cp mydomain.crt /etc/nginx/ssl/
$ sudo cp mydomain.key /etc/nginx/ssl/
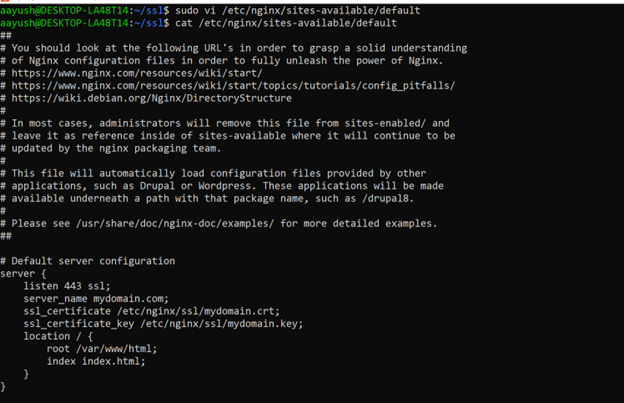
Next, edit the Nginx configuration file using vi editor, usually found in /etc/nginx/sites-available/default or /etc/nginx/nginx.conf.
Modify the server block to enable SSL:
server {
    listen 443 ssl;
    server_name mydomain.com;
    ssl_certificate /etc/nginx/ssl/mydomain.crt;
    ssl_certificate_key /etc/nginx/ssl/mydomain.key;
    location / {
        root /var/www/html;
        index index.html;
    }
}
Ensure that Nginx is set to listen on port 443 (HTTPS). Save your changes and test the Nginx configuration and then restart the service
$ sudo nginx -t
$ sudo systemctl restart nginx
Or
$ sudo service nginx restart
6) Verify the SSL Configuration
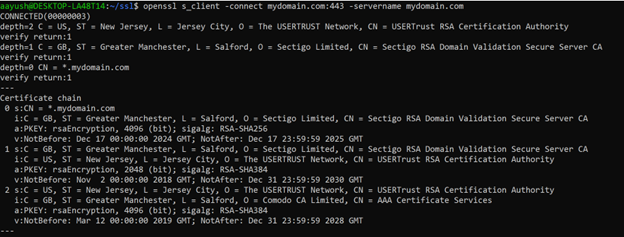
Check if the SSL certificate is installed correctly with:
$ openssl s_client -connect mydomain.com:443 -servername mydomain.com
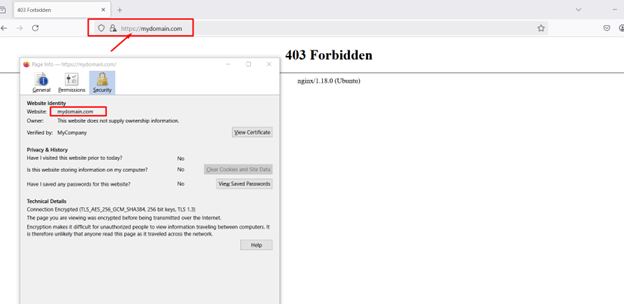
Alternatively, open a web browser and navigate to https://mydomain.com. Since the certificate is self-signed, the browser may display a security warning. You can bypass this warning by adding the certificate to your browser’s trusted list.
Conclusion
Creating a self-signed SSL certificate with OpenSSL is a simple and effective solution for testing or internal applications. However, in production environments, it’s best to obtain an SSL certificate from a trusted Certificate Authority (CA) to prevent security warnings in web browsers.
Also Read: How to Install Ubuntu 24.04 on WSL2


