In Ansible, Playbook files are usually used in executing tasks in remote hosts. These tasks range from installing and configuring services such as web and database servers to simple tasks such as checking uptime. However, when it comes to executing simple tasks in Ansible, ad hoc commands come very much in handy. Ad hoc commands enable you to quickly execute simple tasks on the fly without writing playbook files. In this guide, we show you how you can make the most of Ansible ad hoc commands.
Ansible ad hoc commands
Ad hoc commands are extremely used in performing quick tasks and tests. They are simple operations that can be run without the need for a playbook file. For example, you can use an ad hoc command to check the disk usage or create a user on a group of servers. Additionally, you could use another ad hoc command to restart a service or update a particular software package.
Syntax
The syntax used when running an ad hoc command is as shown:
$ ansible [pattern] -m [module] -a “[module options]”
The [pattern] argument specifies the remote hosts on which the ad hoc commands are run. This could be a host group or a single host specified in the Ansible inventory file. Just a by-the-way, you can check the hosts listed in your inventory file using the –list-hosts option as shown in the command below:
$ ansible hostgroup –list-hosts
Assuming that you have a hostgroup called webservers, run:
$ ansible webservers --list-hosts
Back to our Ansible ad hoc syntax.
The -m option takes the module name that should be run on the managed host. Modules are Ansible built-in programs that are used to execute specific tasks. Some of the modules require some additional arguments to specify the finer details of a task.
Finally, the -a option accepts a list of arguments as quoted strings. This happens when the module requires the just discussed additional arguments
One of the most commonly used Ansible modules is the ping module. And no, it doesn’t send an ICMP echo request to verify the availability of a host. Instead, it is a trivial test module that checks the ability to login and the presence of a usable Python module. It returns a pong message upon successful verification.
Let’s take an example.
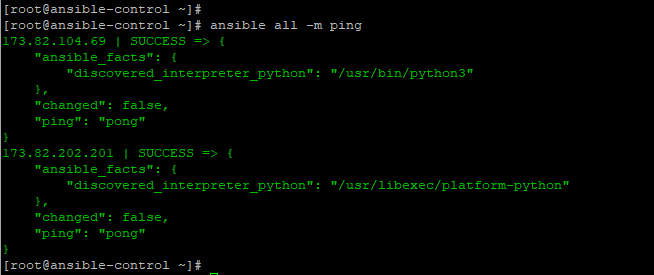
$ ansible all -m ping
The output below confirms positive test connectivity to 2 remote servers with IP addresses 173.82.104.69 and 173.82.104.69
Defining targets for command execution
When running ad hoc commands, a user can decide to target an individual host using the host’s IP or hostname or specify a host group that contains a list of hosts. These hosts or host groups need to be defined in Ansible’s inventory file located in the /etc/ansible/hosts file.
The example below targets a single host using its IP address.
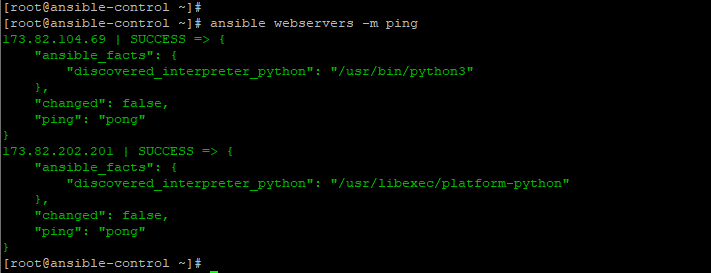
In the second example, we have specified the webservers host group which contains 2 managed hosts.
Use cases of Ansible ad hoc commands
In this section, we will try to highlight a few use cases where the ad hoc commands can be useful.
Example 1) Create a user on a managed host
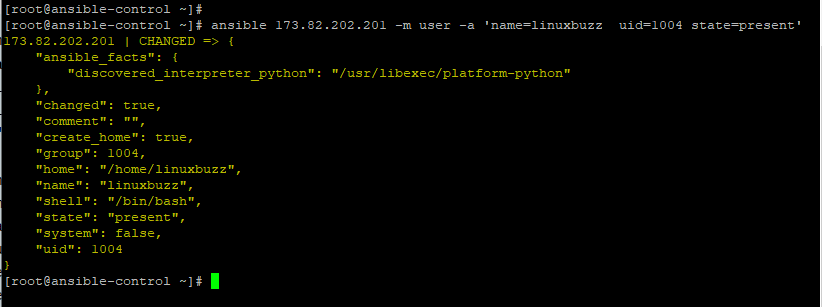
One of the easiest tasks to perform using Ansible ad hoc commands is to create a user on a remote target. To create a new user, use user the module as shown in the command below.
$ ansible 173.82.202.201 -m user -a 'name=linuxbuzz uid=1004 state=present'
Example 2) Gather system metrics
In this section, we will look at some of the ways you can display system metrics from remote hosts.
To check disk usage, use the shell module and the df command
$ ansible 173.82.202.201 -m shell -a 'df -Th'
To check memory, use the free command alongside the shell module
$ ansible 173.82.202.201 -m shell -a 'free -m'
Example 3) File Transfer to remote system
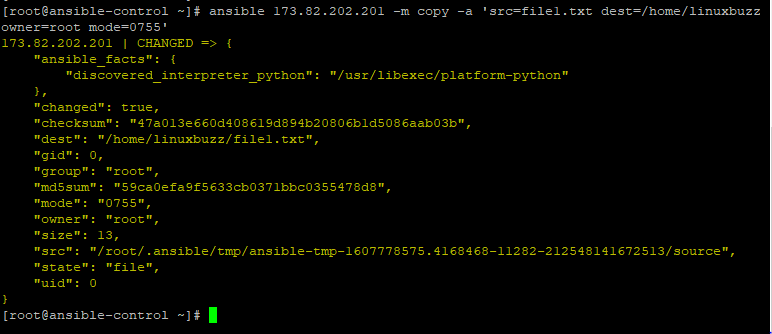
Ansible ad hoc commands can also be used to transfer files from the control node to the managed node using the copy module by defining the source and destination paths.
$ ansible 173.82.202.201 -m copy -a 'src=file1.txt dest=/home/linuxbuzz owner=root mode=0755'
Additionally, you can fetch files from the managed node using the fetch module shown.
$ ansible 173.82.202.201 -m fetch -a 'src=/etc/ssh/sshd_config dest=/tmp/'
As you might have noticed, the fetched file was placed in /tmp/173.82.202.201/etc/ssh/sshd_config. This is because the fetch module placed files into separate directories for each hostname you are fetching from. The reason for this is to prevent a file from one managed node from overwriting a file from another managed node.
To prevent this from happening, pass the flat=yes option:
$ ansible 173.82.202.201 -m fetch -a 'src=/etc/ssh/sshd_config dest=/tmp/ flat=yes'
Example 4) Managing packages on remote system
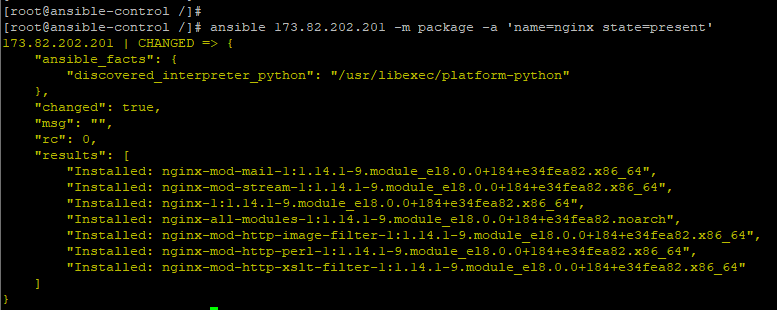
You can also install packages using using the package module. In the example below, we are installing Nginx web server on CentOS server.
$ ansible 173.82.202.201 -m package -a 'name=nginx state=present'
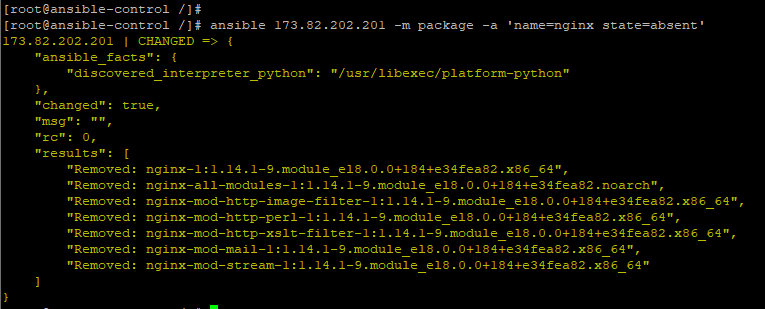
To uninstall a package, pass the state=absent option
$ ansible 173.82.202.201 -m package -a 'name=nginx state=absent'
Example 5) Managing Services on remote system
To start and enable a service, for example nginx, use the service module as shown:
$ ansible 173.82.202.201 -m service -a 'name=nginx state=started enabled=yes'
To stop a service, simply change the state to stopped.
$ ansible 173.82.202.201 -m service -a 'name=nginx state=stopped'
Example 6) Gathering facts of remote system
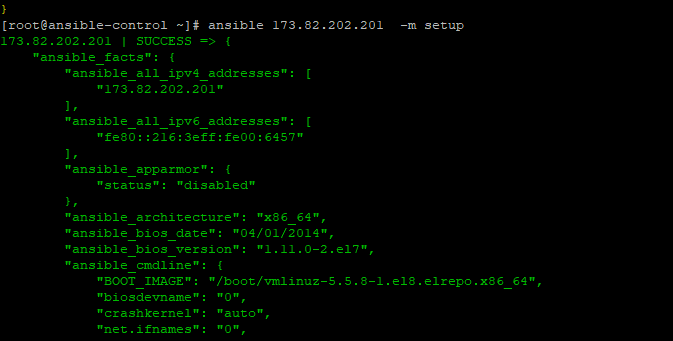
To retrieve detailed information about a managed host, use the setup module as shown
$ ansible 173.82.202.201 -m setup
Conclusion
We have highlighted just a few examples of Ansible ad hoc commands and the operations you can carry out. To have a glance of all the modules, run the command:
$ ansible-doc -l
Ad hoc commands are very handy when executing simple and quick tasks, however, you will want to use playbooks to realize the full power of Ansible. That’s all from this article, please do share your feedback and comments.

