WordPress is one of the most popular free and open source CMS available in the market and every new release gets people excited. And with the release of WordPress 5.0, it gets more exciting as it comes with the all new block-based editor in Gutenberg. Yes, it is an enhanced version of the existing WordPress editor providing users with a completely new and easy editing experience.
WordPress 5.0 – New Features
WordPress 5.0 comes with a lot of new and improved features as described below in detail:
- With the launch of WordPress 5.0, the team has moved closer to providing a renewed and much improved site-building experience to regain the lost market share
- WordPress 5.0 also comes with various improvements made to the REST API as well. Now developers can find posting and pulling data from your website much easier
- Custom theme building is made easier
- And finally the all-new and one of the major updates in WordPress 5.0 is the Gutenberg block based editor
Step-by-Step Guide to Install WordPress 5 on Ubuntu 18.04 LTS / 18.10
To get started with installing WordPress, follow the steps below:
Step:1) Install Apache Web Server
Before you start installing WordPress, you need to have a web server running in your system. Apache is one of the most used open source web server available in the market today:
Use the following apt-get command to install Apache Web Server on your system
pkumar@linuxbuzz:~$ sudo apt-get update
pkumar@linuxbuzz:~$ sudo apt-get install apache2 -y
Once apache2 package is installed then you need to start and enable the apache service. Use the following command to start the service:
pkumar@linuxbuzz:~$ sudo systemctl start apache2
pkumar@linuxbuzz:~$ sudo systemctl enable apache2
Synchronizing state of apache2.service with SysV service script with /lib/systemd/systemd-sysv-install.
Executing: /lib/systemd/systemd-sysv-install enable apache2
pkumar@linuxbuzz:~$
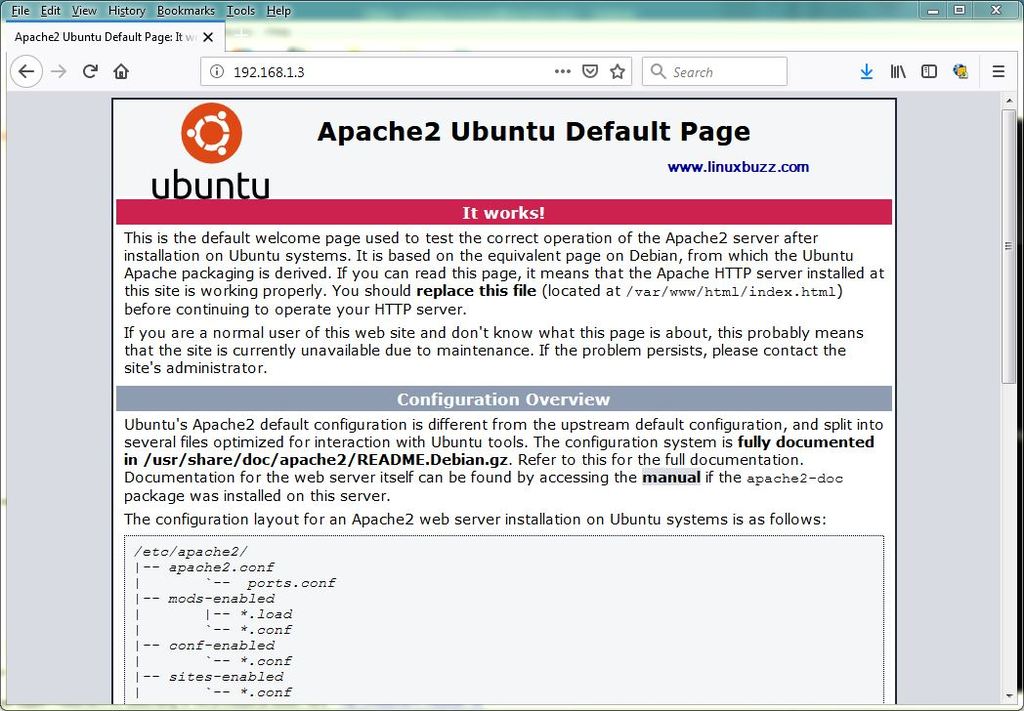
Now you have successfully completed installing a webserver in your system. But to ensure that the webservice is working fine, open your web browser (Firefox, Chrome or any other browser) and type in http://{Your-System-IP} and if you see Apache home page, then your webserver is working fine and let’s move on to the next step.
Step:2) Install MariaDB Database Server
And now it’s time for us to install a database server. Even though MySQL is the popular database used for WordPress, MariaDB is making rounds in the industry as it is a community driven fork of MySQL and also been created by the one who developed MySQL.
Use the following command to install MariaDB in your system:
pkumar@linuxbuzz:~$ sudo apt-get install mariadb-server mariadb-client -y
Now use the following systemctl commands to start and enable MariaDB service in your system
pkumar@linuxbuzz:~$ sudo systemctl start mariadb
pkumar@linuxbuzz:~$ sudo systemctl enable mariadb
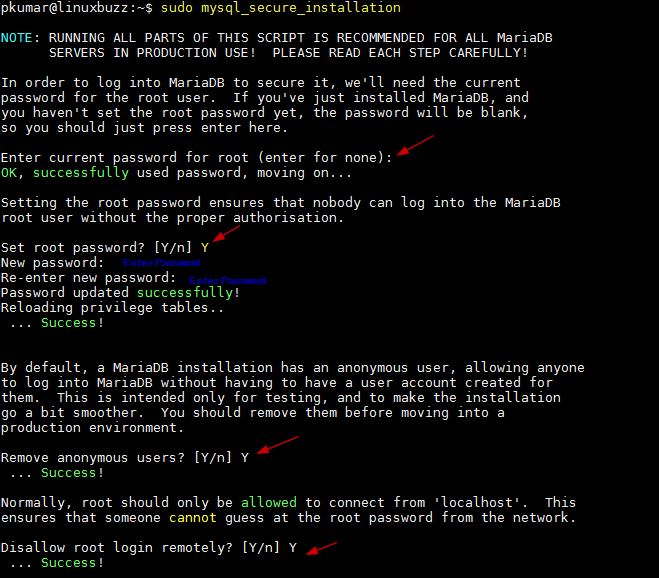
And it is always good to secure your database as you don’t need anyone accessing your data without your knowledge. Add a root password and other safety aspects using the following command:
pkumar@linuxbuzz:~$ sudo mysql_secure_installation
And just type Y to all other questions like Remove anonymous users, reload privilege tables etc.
Once the database server is installed, it is time for you check whether it is working properly. Use the following command to login to MariaDB server and provide the password when prompted:
pkumar@linuxbuzz:~$ sudo mysql -u root -p
Enter password:
Welcome to the MariaDB monitor.  Commands end with ; or \g.
Your MariaDB connection id is 49
Server version: 10.1.34-MariaDB-0ubuntu0.18.04.1 Ubuntu 18.04
Copyright (c) 2000, 2018, Oracle, MariaDB Corporation Ab and others.
Type 'help;' or '\h' for help. Type '\c' to clear the current input statement.
MariaDB [(none)]>
And if you see “Welcome to the MariaDB monitor”, then you are good to go.
Step:3) Install PHP and other associated modules
So now we’ve successfully installed a webserver (apache2) and a database server (MariaDB) on our system. Now the only thing between you and WordPress installation is PHP. Use the following commands to install PHP into your system.
pkumar@linuxbuzz:~$ sudo apt install php7.2 libapache2-mod-php7.2 php7.2-common php7.2-mysql php7.2-gmp php7.2-curl php7.2-intl php7.2-mbstring php7.2-xmlrpc php7.2-gd php7.2-xml php7.2-cli php7.2-zip -y
Once the above php packages are installed, run the below command,
pkumar@linuxbuzz:~$ php --version
PHP 7.2.10-0ubuntu0.18.04.1 (cli) (built: Sep 13 2018 13:45:02) ( NTS )
Copyright (c) 1997-2018 The PHP Group
Zend Engine v3.2.0, Copyright (c) 1998-2018 Zend Technologies
    with Zend OPcache v7.2.10-0ubuntu0.18.04.1, Copyright (c) 1999-2018, by Zend Technologies
pkumar@linuxbuzz:~$
Great! You’ve successfully installed PHP 7.2 in your system.
To check whether your PHP installation works fine, do the following:
Create a sample test file called phpinfo.php with following content,
pkumar@linuxbuzz:~$ sudo vi /var/www/html/phpinfo.php

<?php phpinfo( ); ?>
Save and exit the file
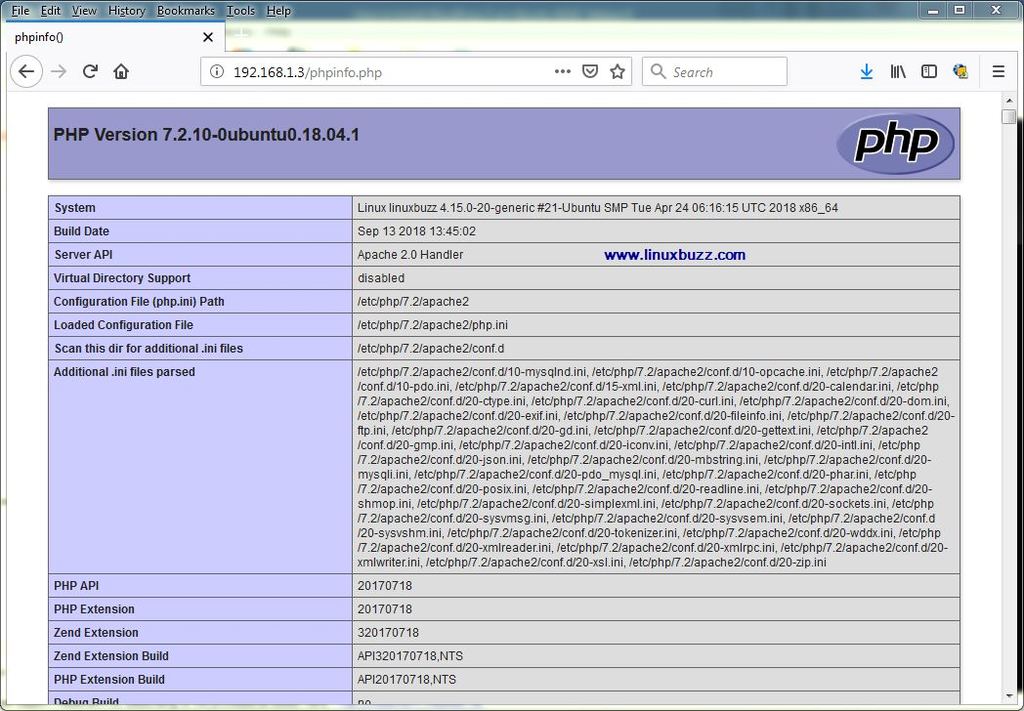
Now open your web browser and type in http://{Yous-System-IP}/phpinfo.php
If you see a page like above, then your PHP installation is working fine
Step:4) Create a Database for Your WordPress Website
So now you have successfully installed Apache, MariaDB and PHP in your system now it’s time to create a new database to hold your WordPress information.
Use the following command to login to our MariaDb server and create a new database called “buzzdb”
pkumar@linuxbuzz:~$ sudo mysql -u root -p
Enter password:
Welcome to the MariaDB monitor.  Commands end with ; or \g.
Your MariaDB connection id is 50
Server version: 10.1.34-MariaDB-0ubuntu0.18.04.1 Ubuntu 18.04
Copyright (c) 2000, 2018, Oracle, MariaDB Corporation Ab and others.
Type 'help;' or '\h' for help. Type '\c' to clear the current input statement.
MariaDB [(none)]> CREATE DATABASE buzzdb;
Query OK, 1 row affected (0.01 sec)
MariaDB [(none)]>
Now that you have created a database, add a new user to the database and grant all privileges to the database.
Syntax :
# CREATE USER ‘yourusernamehere’@’localhost’ IDENTIFIED BY ‘addpasswordhere’;
# GRANT ALL ON buzzdb.* TO ‘yourusernamehere’@’localhost’ IDENTIFIED BY ‘addpasswordhere’ WITH GRANT OPTION;
MariaDB [(none)]> CREATE USER 'pkumar'@'localhost' IDENTIFIED BY 'D$%gb^&!&Db#';
Query OK, 0 rows affected (0.00 sec)
MariaDB [(none)]> GRANT ALL ON buzzdb.* TO 'pkumar'@'localhost' IDENTIFIED BY 'D$%gb^&!&Db#' WITH GRANT OPTION;
Query OK, 0 rows affected (0.00 sec)
MariaDB [(none)]>
Step:5) Start WordPress 5.0 Installation
Now we’ve finally arrived at a stage where we start installing WordPress in our system. Use the following commands below to download latest WordPress and copy it to your document root path of your Apache Web server (/var/www/html) and remember to delete the index.html file that is created by default. Now run the following commands one after the another,
pkumar@linuxbuzz:~$ cd /tmp/
pkumar@linuxbuzz:/tmp$ wget http://wordpress.org/latest.tar.gz
pkumar@linuxbuzz:/tmp$ sudo tar zxpvf latest.tar.gz -C /var/www/html/
pkumar@linuxbuzz:/tmp$ sudo rm /var/www/html/index.html
And now its time to set the required permissions using the following command.
pkumar@linuxbuzz:~$ sudo chmod -R 775 /var/www/html/
pkumar@linuxbuzz:~$ sudo chgrp -R www-data /var/www/html/
pkumar@linuxbuzz:~$ ls -la /var/www/html/
total 16
drwxrwxr-x 3 root   www-data 4096 Jan 28 17:43 .
drwxr-xr-x 3 root   root     4096 Jan 28 15:06 ..
-rwxrwxr-x 1 root   www-data   21 Jan 28 17:23 phpinfo.php
drwxrwxr-x 5 nobody www-data 4096 Jan 10 00:02 wordpress
pkumar@linuxbuzz:~$
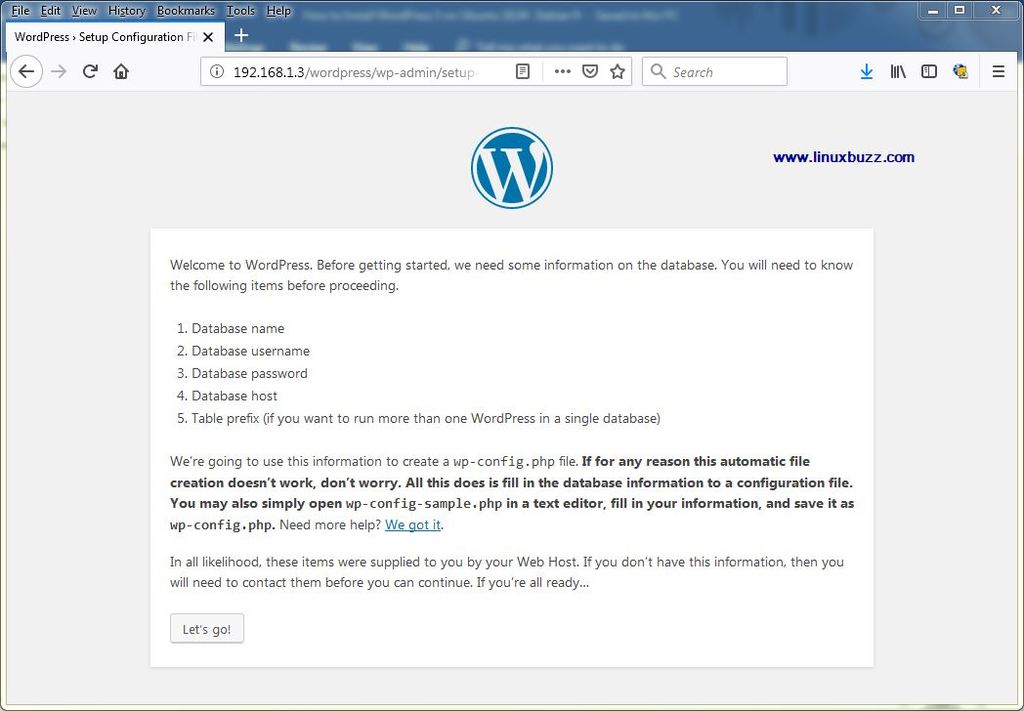
So now you are all set to install wordpress in your system. Open a web browser and type in the following http://{Your-System-IP}/wordpress and you can see the WordPress installation screen.
Click on “Let’s go!” option
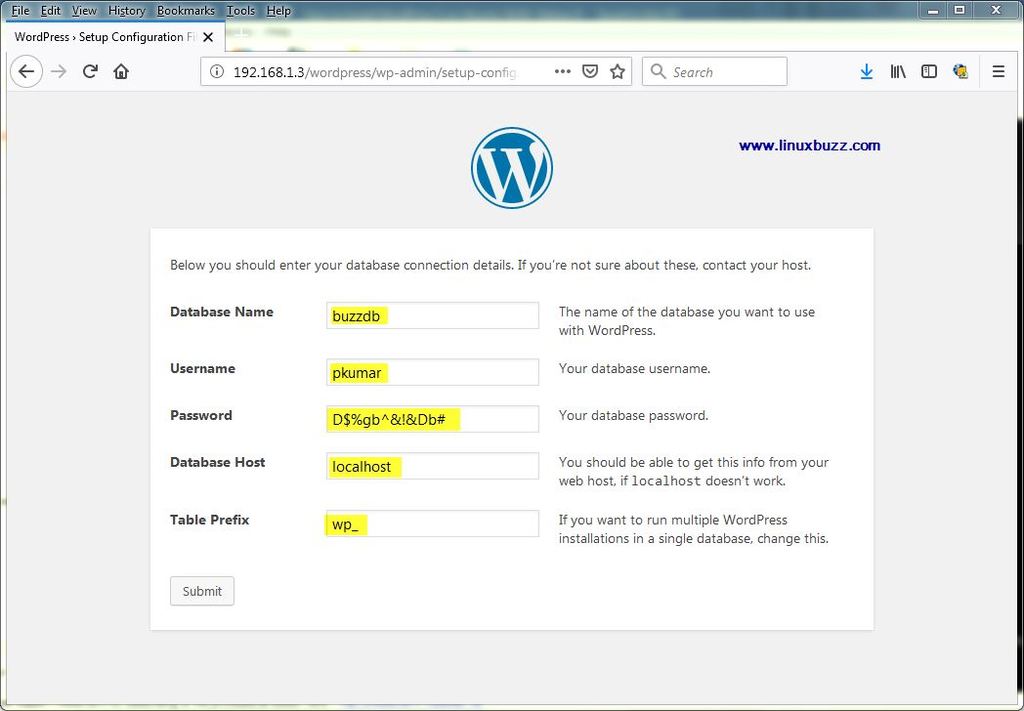
Provide the name of the database “buzzdb” which we created earlier along with user name as pkumar and its password and host as localhost and then click on “Submit”
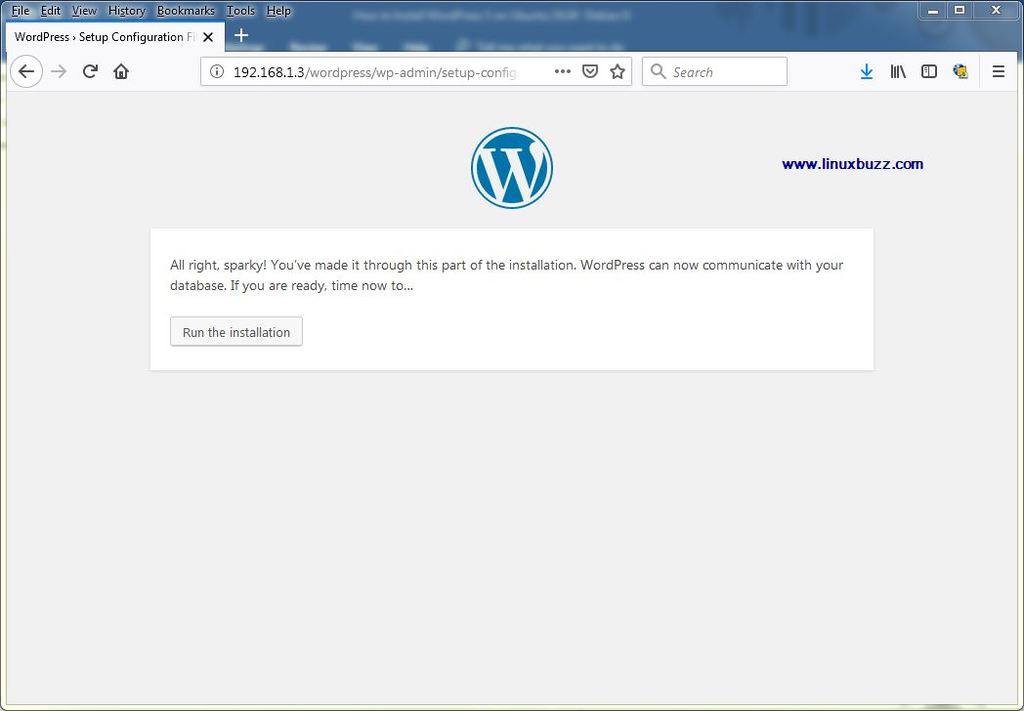
In the next screen click “Run the Installation” to start the installation process
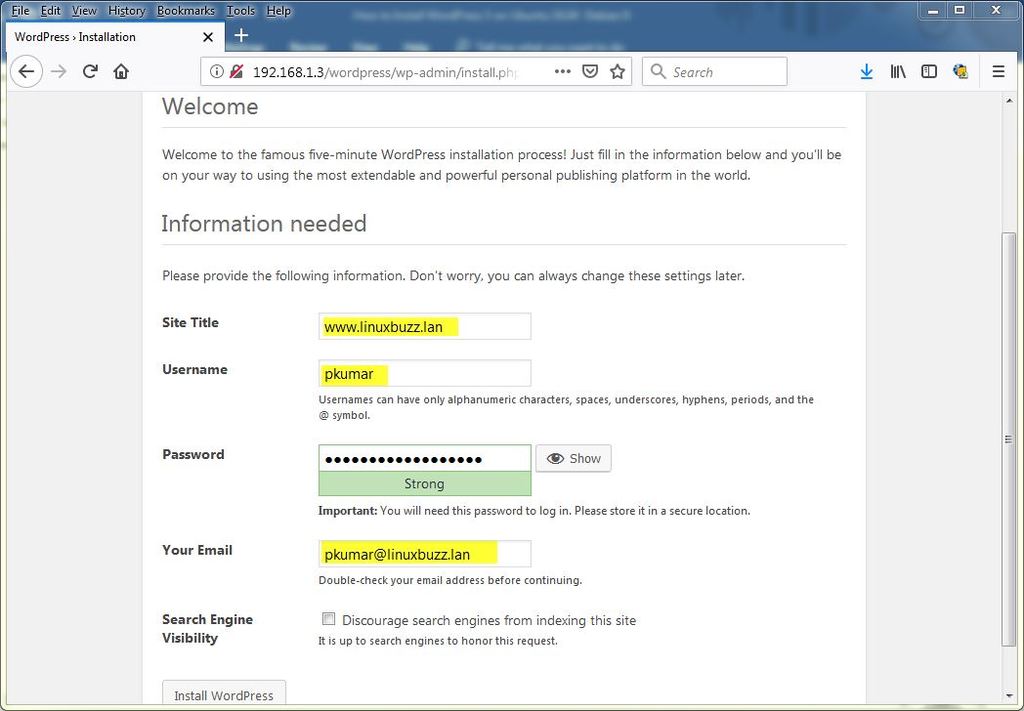
Once the installation is underway, you’ll be required to provide certain details including your new website name, username to access wordpress, password and email address.
Click on “Install WordPress”
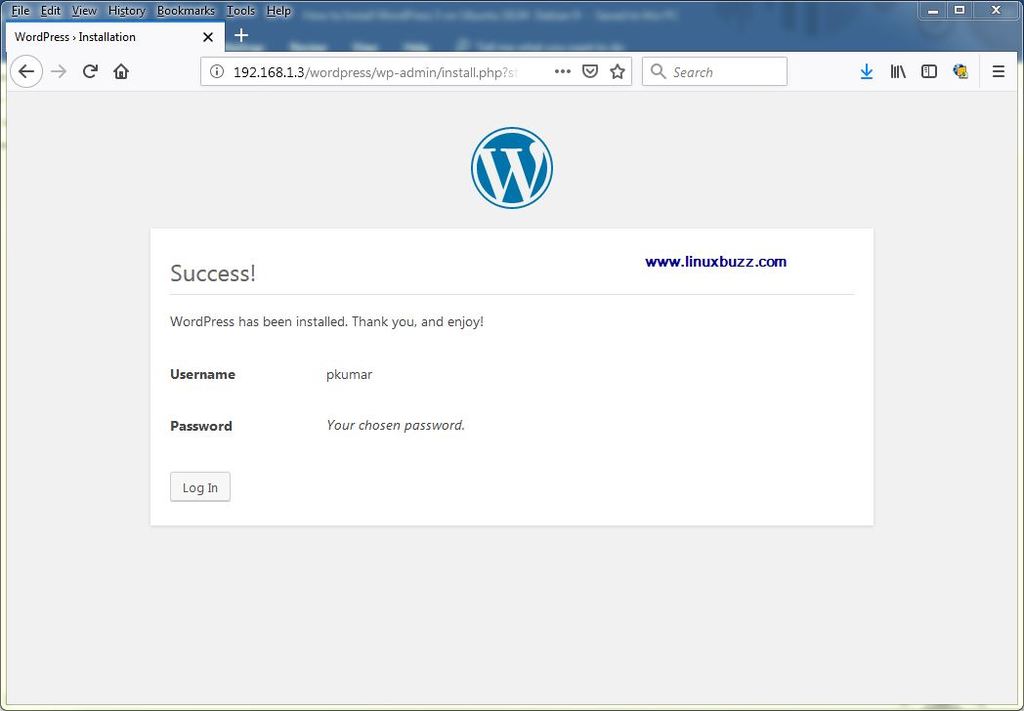
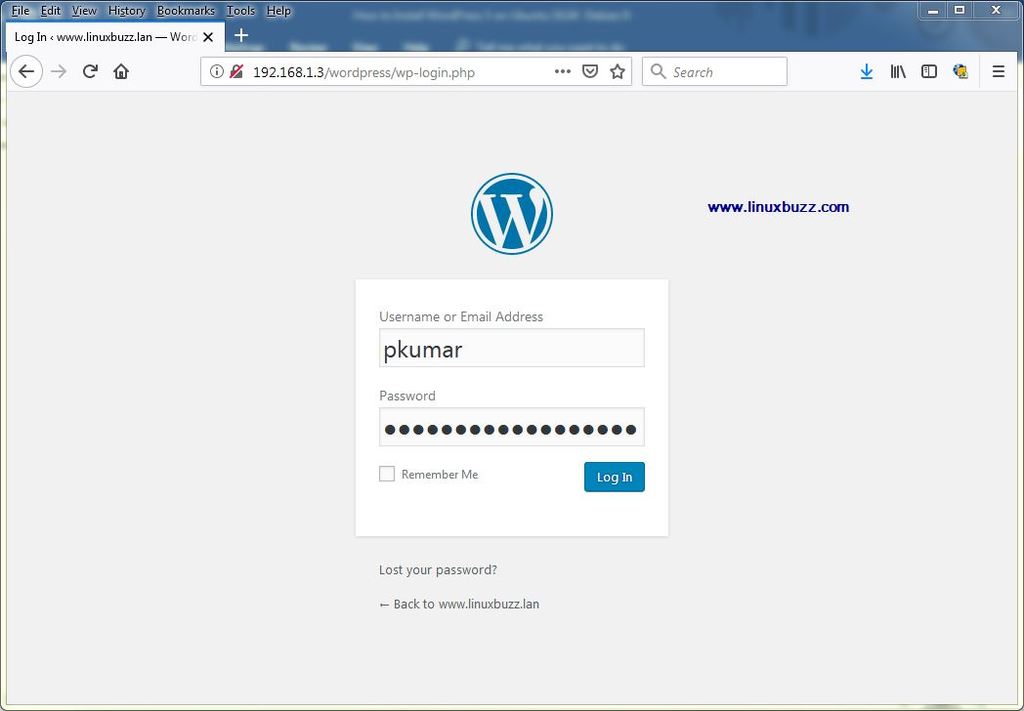
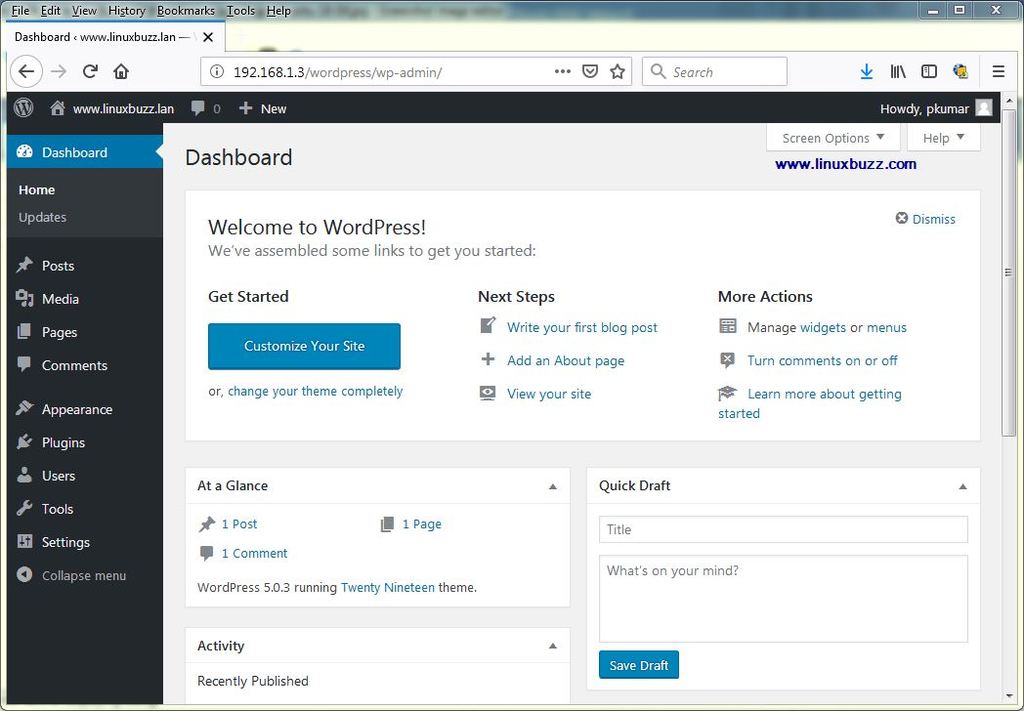
Now you’ve successfully installed WordPress, login to your WordPress site using the credentials which you provided above.To login to your WordPress admin, use the following url:
http://{Your-System-IP}/wordpress/wp-admin/
And through WordPress admin you can add a new theme to your website, create new categories, posts, images, videos and lot more.
This confirms that you’ve successfully installed WordPress 5.0 in Ubuntu 18.04/ Ubuntu 18.10. Please do share your feedback and comments.
