In this guide, we will show you how to install Git on Debian 12 step-by-step.
If you’re a developer or involved in any software-related projects, you’ve probably heard of Git – the version control system that allows you to track changes in your codebase efficiently.
Prerequisites
- Pre-Install Debian 12
- Regular User with admin rights
- Internet Connectivity
1) Update Your System
Before installing any new software, it’s always a good idea to ensure that your system is up to date. Open a terminal and run the following commands:
$ sudo apt update
$ sudo apt upgrade -y
This will update the package lists and upgrade the existing packages on your Debian 12 system.
2) Install Git on Debian 12
Now that your system is up to date, you can proceed to install Git. Debian’s package manager, APT, makes this process straightforward. Run the following apt command.
$ sudo apt install git

This command will download and install Git along with its dependencies. You may be prompted to confirm the installation; simply type ‘Y‘ and press Enter.
3) Verify the Installation
To ensure that Git has been successfully installed, you can check the version by running the following command:
$ git --version
git version 2.39.2
$
This should display the installed Git version, confirming that the installation was successful.
4) Configure Git
Before you start using Git, it’s a good idea to configure your user information. This information will be associated with your commits. Run the following ‘git config’ commands, specify your actual name and email address:
$ git config --global user.name "Pradeep Antil"
$ git config --global user.email "pradeepantil@gmail.com"

5) Get Started with Git
With Git installed and configured, you’re now ready to start using version control for your projects.
There could be two scenarios, first you have source code of your project locally on your system and want to push it to github and second is that your code is already on github and want to clone it locally on your system. We will cover both scenarios here.
Add existing source code to GitHub
Go to github account and create public repository there. In my case, I have created it with name “automation-code” as shown below.
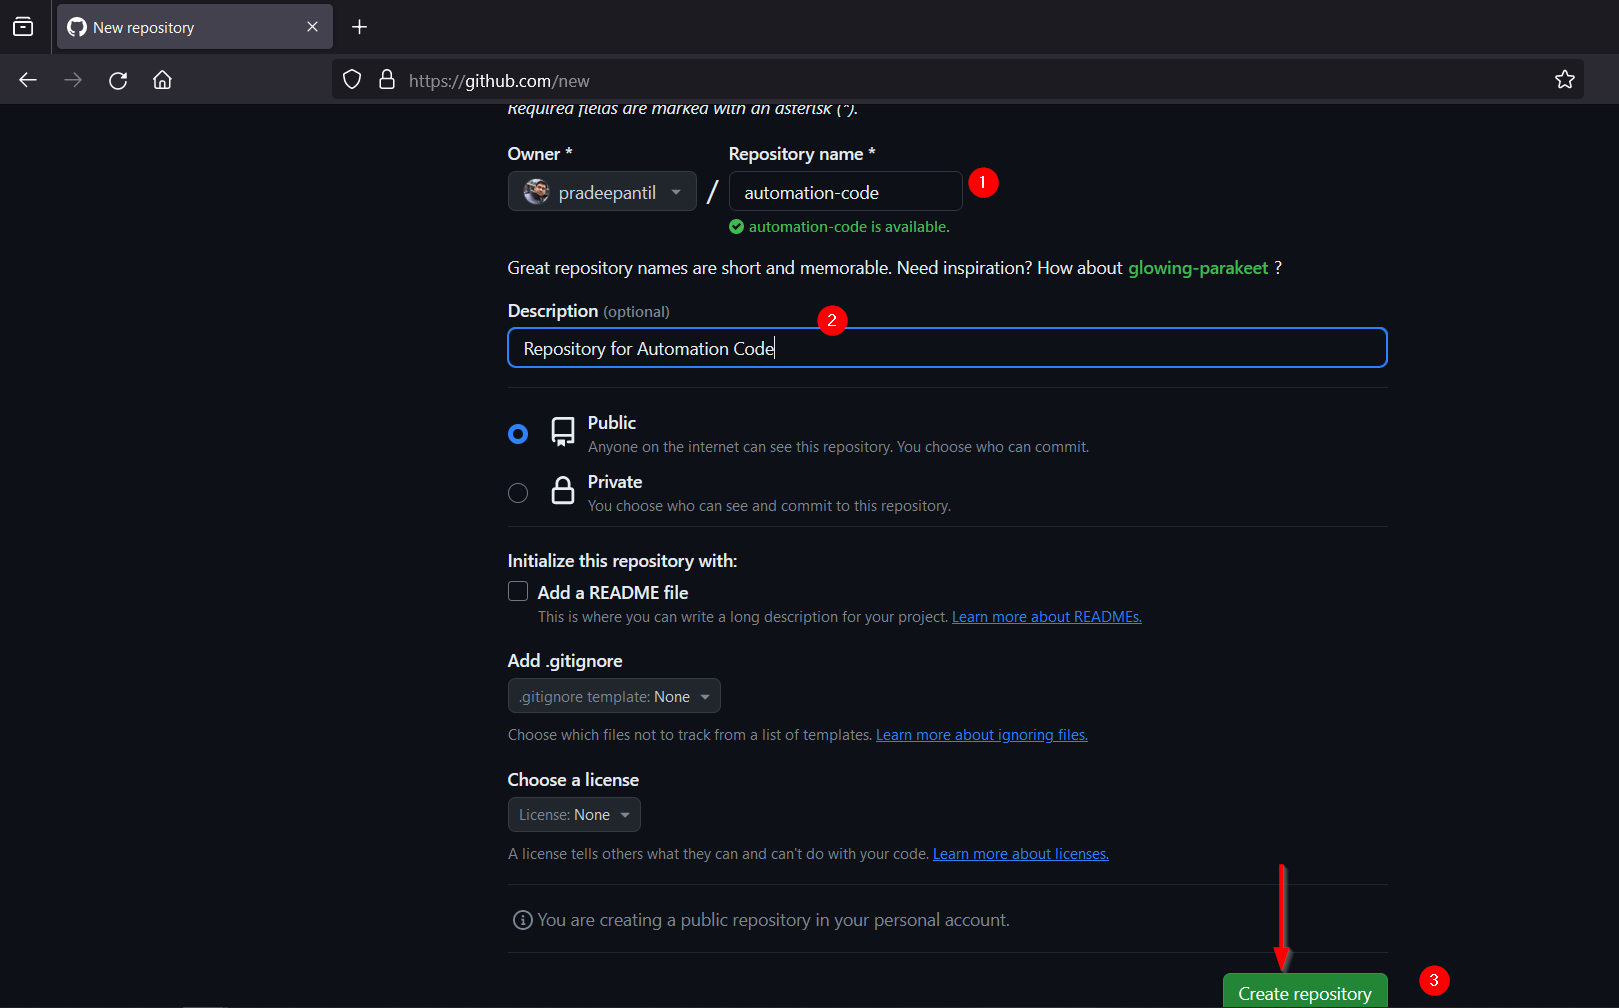
Click on ‘Create repository’
In the next screen you will get commands to be executed from the terminal to push your code to github to this public repository.
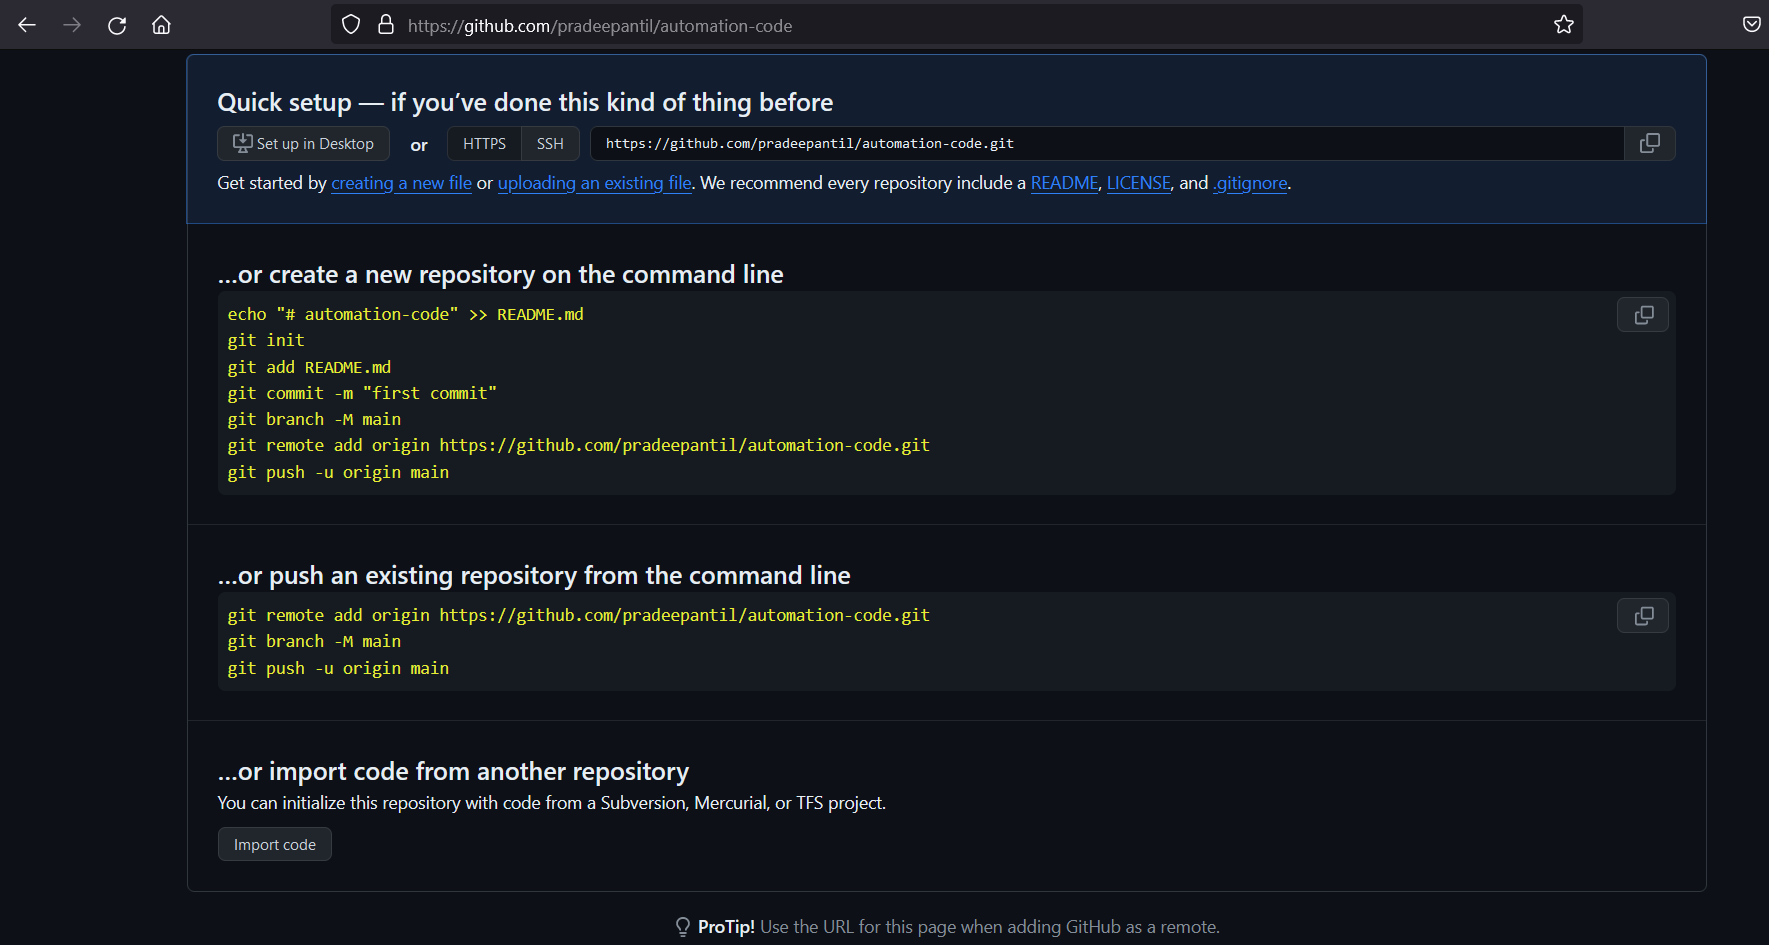
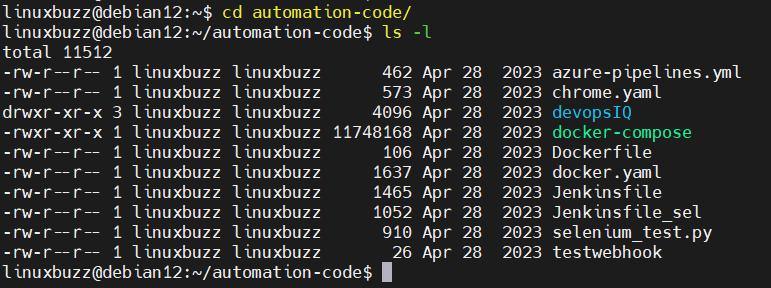
Create your project folder if it does not exist and add your code to it.
$ cd automation-code/
$ ls -l
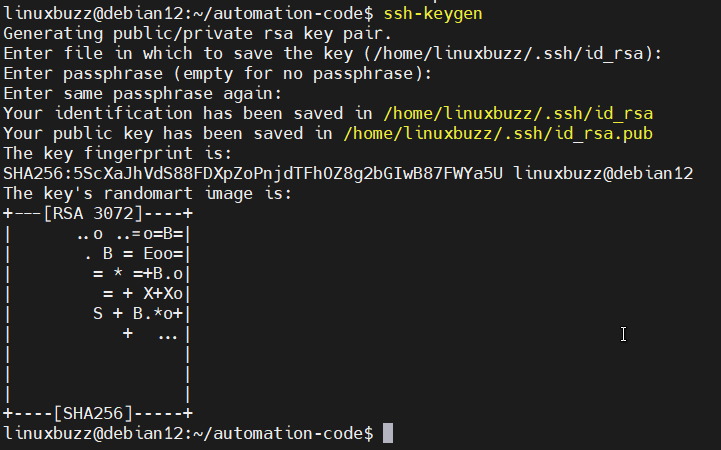
Next generate the SSH keys using ssh-keygen command, these keys will be used for authentication to your github repository.
$ ssh-keygen
Now copy your public key and paste it on github account as shown below:
$ cat /home/linuxbuzz/.ssh/id_rsa.pub

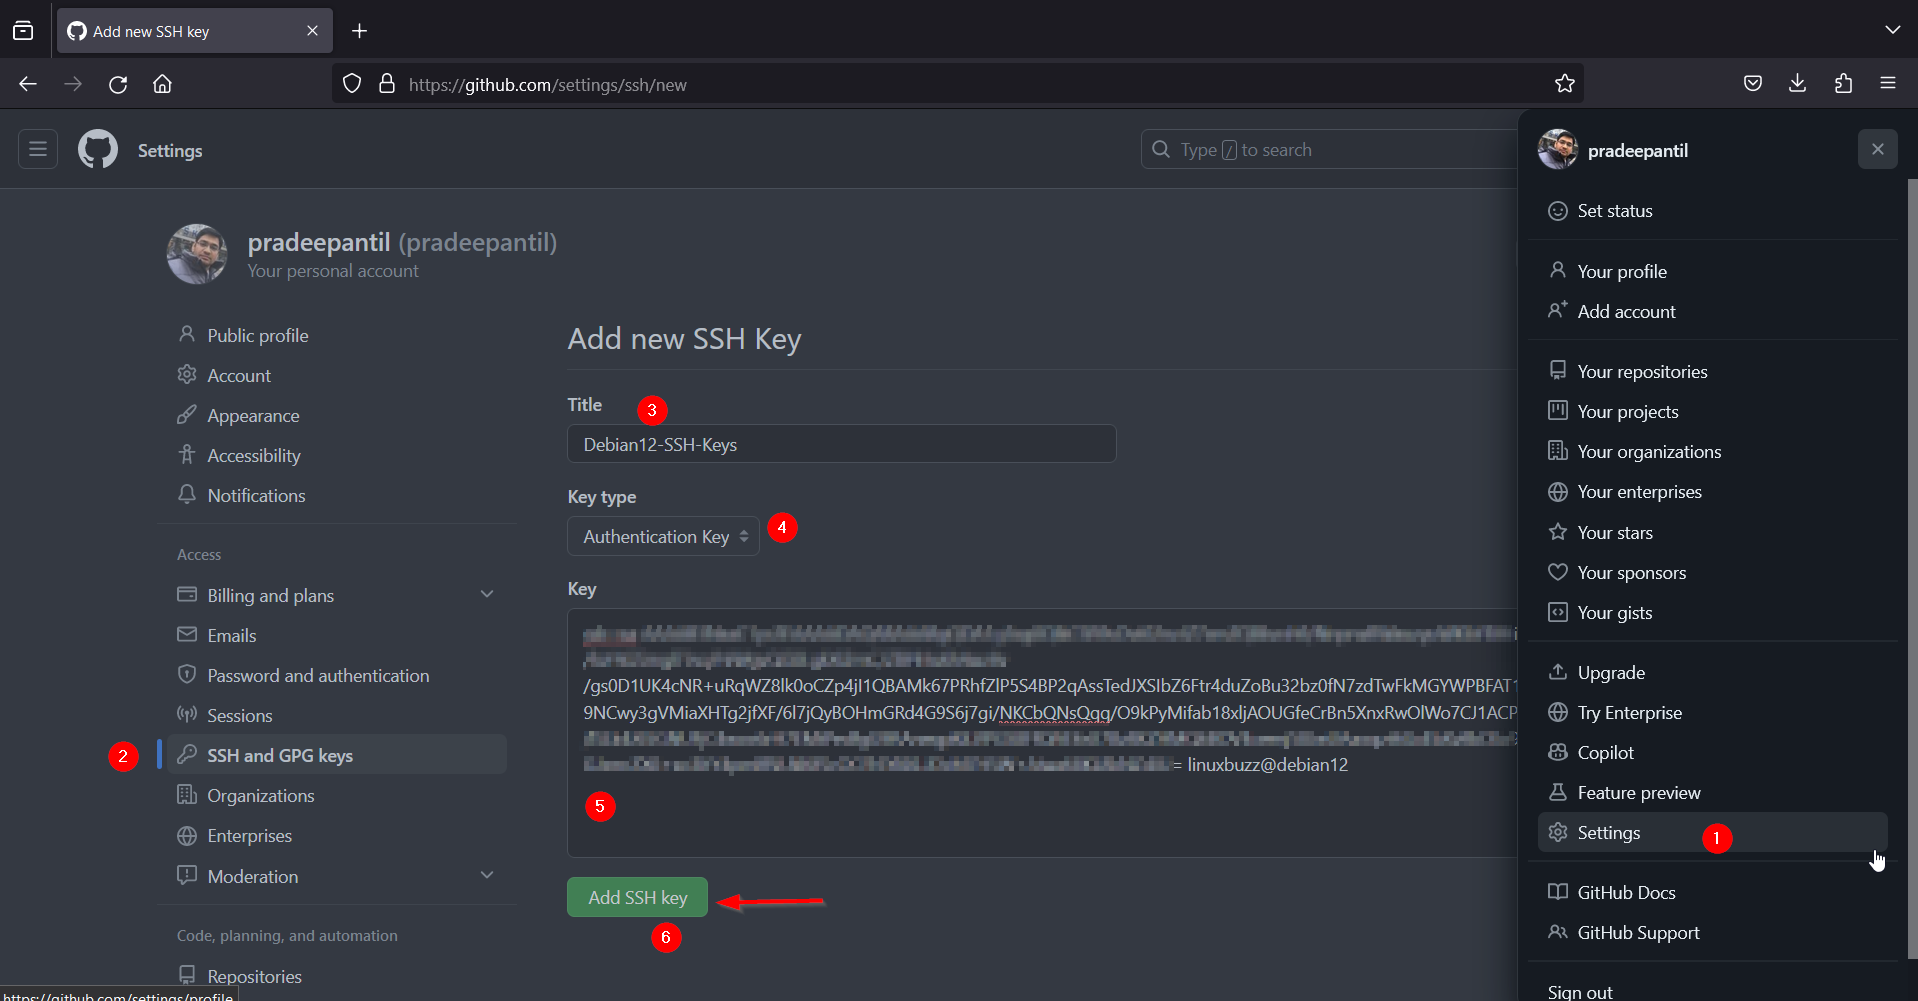
Click on “ADD SSH Key”
Now, we are ready to push the code, Navigate to your project directory and run following set of git commands one after the another.
$ git init
$ git add .
$ git commit -m "commit code to github repo"
$ git branch -M main
$ git remote add origin git@github.com:pradeepantil/automation-code.git
$ git push -u origin main
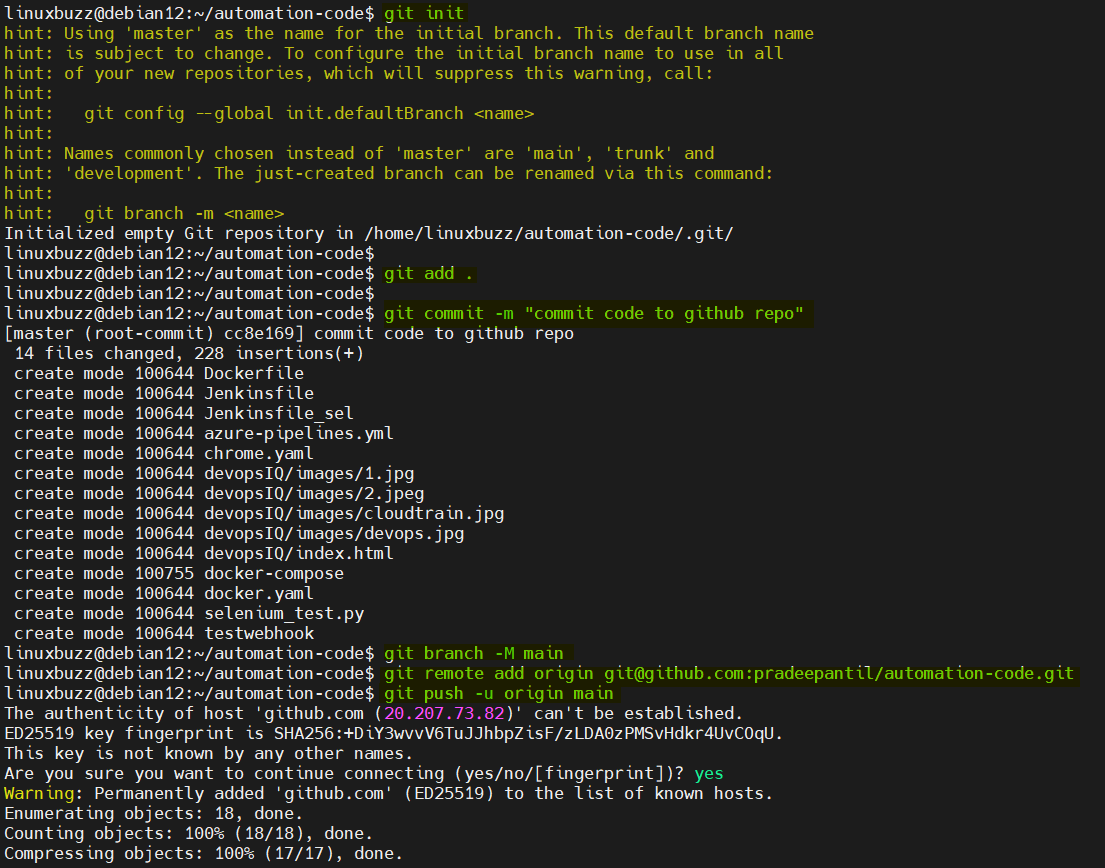
In order to confirm that code is pushed successfully, navigate to your github account and verify the contents of your repository.
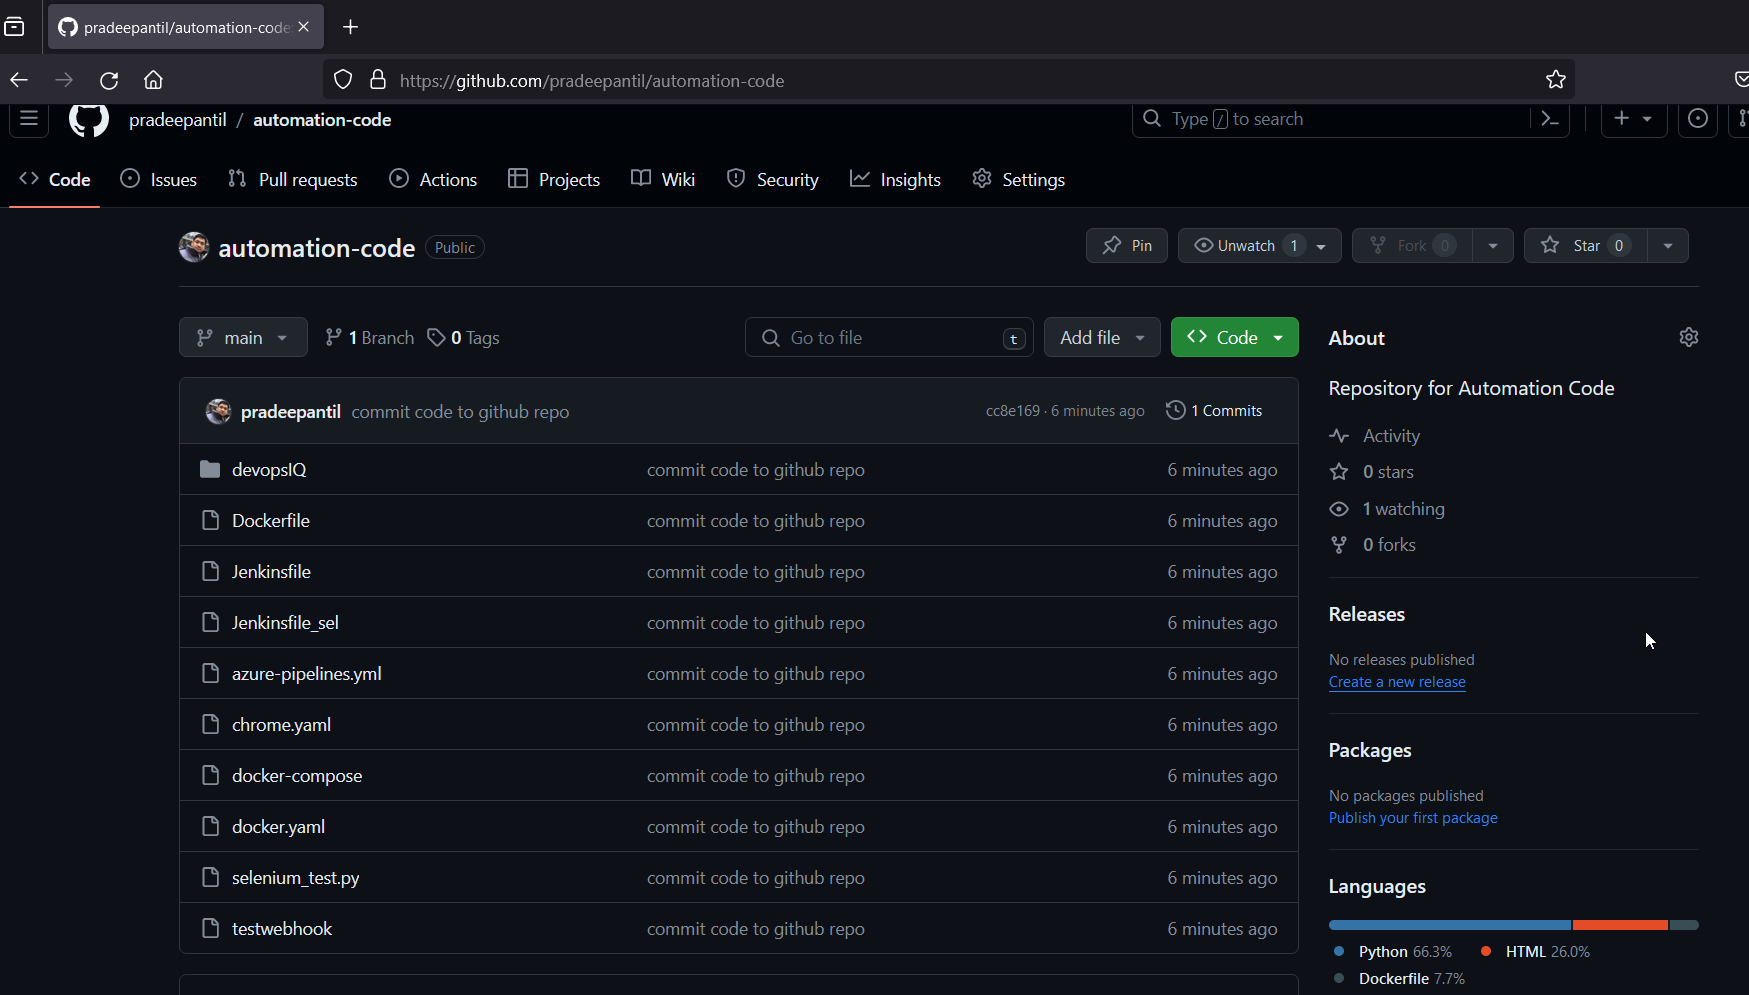
Great, above screen confirms that code has been pushed to github.
Importing Existing Remote Git Repository to Local System
To import existing remote git repository to your local system, run following ‘git clone’ command from the folder where you want to clone.
Let’s suppose, we want to clone SampleAppCodes repo, run
$ git clone git@github.com:pradeepantil/SampleAppCodes.git
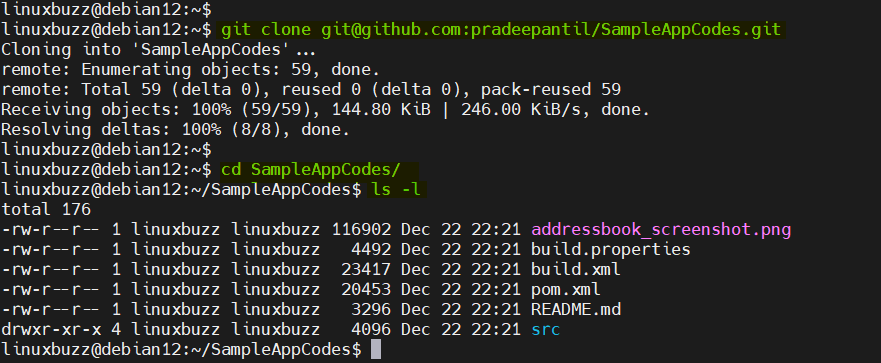
Perfect, above output shows that remote github repository has been clone successfully.
That’s all from this guide, I hope you have found it useful and informative, Feel free to post your queries and feedback in below comments section.
Also Read: How to Install Docker Desktop on Debian 12