In today’s guide, you will learn how to install Kubernetes Cluster on AlmaLinux 9 step-by-step.
Kubernetes, also known as K8s, is an open-source container orchestration platform. The Cloud Native Computing Foundation (CNCF) is currently responsible for its maintenance after Google developed it. Many businesses and organizations rely on Kubernetes to execute their cloud-native applications.
Kubernetes Cluster mainly consists of one master node and numerous worker nodes. The worker nodes are in charge of operating the containers and performing any tasks assigned to them by the master node.
The master node is responsible for running tasks including scheduling and scaling apps, maintaining the cluster’s state, and implementing updates into action.
In addition, Kubernetes is built on a set of primitives or building blocks, such as services, pods, deployments, and so on. These building blocks describe how your containers in the cluster are grouped, scheduled, exposed, and updated.
Prerequisites
- Install two AlmaLinux servers, one for the master node and the other for the worker node
- Minimum of 2 GB of RAM, 2 vCPUs, and 20 GB of disk space on both servers
- Sudo or root privileges
- Internet connectivity
Installing Kubernetes Cluster on AlmaLinux
Kubernetes installation involves setting the operating system and getting the dependencies required for cluster configuration. The steps in this tutorial outline how to prepare your AlmaLinux workstations for a Kubernetes cluster deployment.
Note: Perform each step in this guide on both nodes you want to add to the Kubernetes cluster.z
Step 1: Configure the Hostname and Host file
Kubernetes cluster nodes must have distinct hostnames. Change the hostnames of your master and worker machines by doing the two procedures below on each node:
Run the hostnamectl command in order to set the hostname for both nodes:
$ sudo hostnamectl set-hostname [hostname]
Next, navigate in the /etc/hosts file and add the following parameters:
[master-node-ip] [master-node-hostname]
[worker-node-ip] [worker-node-hostname]
To avoid future confusion, make sure the naming pattern is logical. The setup below, for example, shows the respective names and IPs for the master node and the worker node:

Step 2: Configure the SELinux and Firewall
Configure SELinux permissions and add the required ports to the list of firewall exceptions to enable uninterrupted network traffic between cluster nodes.
To get started, set SELinux mode to permissive on each node using the following commands:
$ sudo setenforce 0
$ sudo sed -i --follow-symlinks 's/SELINUX=enforcing/SELINUX=permissive/g' /etc/sysconfig/selinux
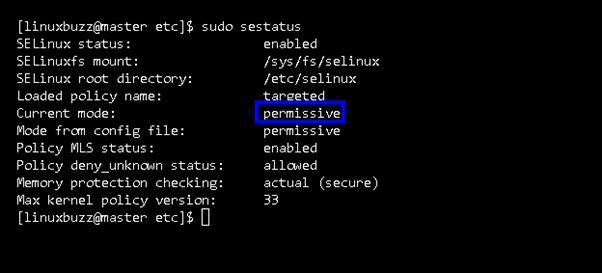
To confirm the changes in SELinux, run:
$ sudo sestatus
Allow the following ports in the firewall on the master node.
$ sudo firewall-cmd --permanent --add-port={6443,2379,2380,10250,10251,10252,10257,10259,179}/tcp
$ sudo firewall-cmd --permanent --add-port=4789/udp
$ sudo firewall-cmd --reload

On the worker node, allow the following ports in the firewall.
$ sudo firewall-cmd --permanent --add-port={179,10250,30000-32767}/tcp
$ sudo firewall-cmd --permanent --add-port=4789/udp
$ sudo firewall-cmd --reload

Step 3: Disable Swap Memory on Each Node
Running a node with swap enabled has an impact on cluster performance. Disable swap memory on AlmaLinux by executing the commands, as shown:
$ sudo swapoff -a
$ sudo sed -i '/ swap / s/^\(.*\)$/#\1/g' /etc/fstab
Step 4: Add Kernel modules and Enable IP forwarding
For successful Kubernetes installation, we must add overlay and br_netfilter kernel modules on each node. Create containerd.conf file with following content so that these modules loaded automatically across the reboot.
$ sudo tee /etc/modules-load.d/containerd.conf <<EOF
overlay
br_netfilter
EOF
Next load the modules using following modprobe command.
$ sudo modprobe overlay
$ sudo modprobe br_netfilter
Now, enable the IP forwarding and bridge-nf-call-iptables on each node. Create the following file and add below content to it.
$ sudo vi /etc/sysctl.d/k8s.conf
net.bridge.bridge-nf-call-iptables  = 1
net.ipv4.ip_forward                 = 1
net.bridge.bridge-nf-call-ip6tables = 1
save and exit the file. To make above changes into the affect, execute following sysctl command.
$ sudo sysctl --system
Step 5: Install the Conatinerd Runtime
Kubernetes Cluster requires a container runtime, and containerd is one of the most common options. However, it is not available in AlmaLinux’s default package repositories; therefore, add the following Docker repository to each node.
$ sudo dnf config-manager --add-repo https://download.docker.com/linux/centos/docker-ce.repo
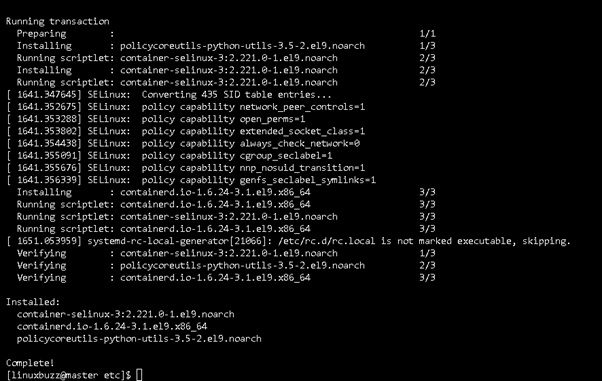
Now, use the dnf command utility to install containerd on each node.
$ sudo dnf install containerd.io -y
Next, we’ll configure containerd so that it can use the systemdcgroup driver. To achieve that, run the following commands on both nodes:
$ containerd config default | sudo tee /etc/containerd/config.toml >/dev/null 2>&1
$ sudo sed -i 's/SystemdCgroup \= false/SystemdCgroup \= true/g' /etc/containerd/config.toml
Enable and restart the containerd service using the below commands:
$ sudo systemctl restart containerd
$ sudo systemctl enable containerd
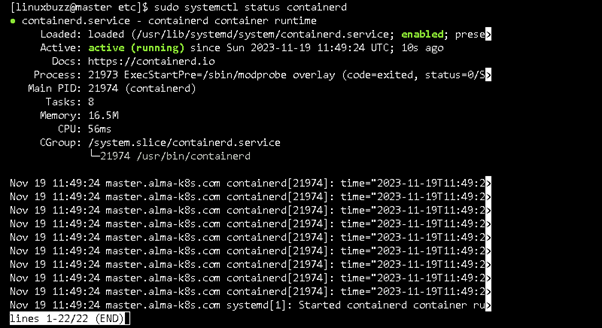
To check if the conatinerd service is running, execute
Step 6: Install Kubernetes Tools
Kubernetes contains three main tools, including kubeadm, which includes cluster initialization tools: the primary node agent, kubelet, and the Kubernetes command-line tool, kubectl.
These tools are not available in the default package repositories of AlmaLinux 9. So, install these tools by adding the following repository to each node.
$ cat <<EOF | sudo tee /etc/yum.repos.d/kubernetes.repo
[kubernetes]
name=Kubernetes
baseurl=https://pkgs.k8s.io/core:/stable:/v1.28.3/rpm/
enabled=1
gpgcheck=1
gpgkey=https://pkgs.k8s.io/core:/stable:/v1.28.3/rpm/repodata/repomd.xml.key
exclude=kubelet kubeadm kubectl cri-tools kubernetes-cni
EOF
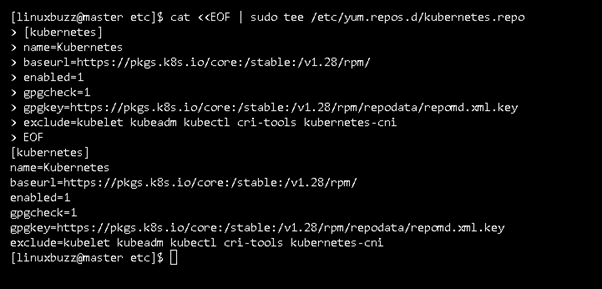
Note: At the time of writing, Kubernetes 1.28 is available, which is why I mentioned v1.28 when adding the repo.
Then, run the dnf command to install Kubernetes tools:
$ sudo yum install -y kubelet kubeadm kubectl --disableexcludes=kubernetes
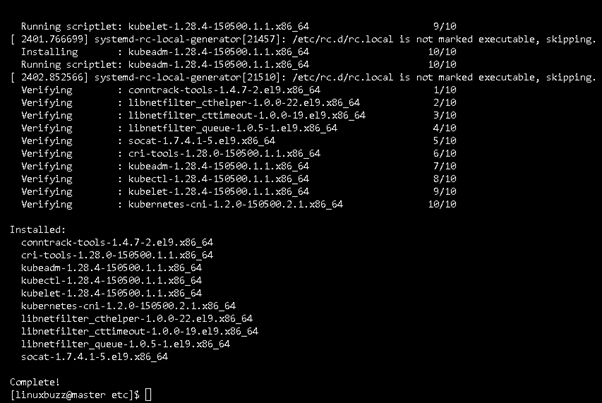
Now, enable the Kubernetes service tools on each node in order to start on boot:
$ sudo systemctl enable --now kubelet
Step 7: Installing Kubernetes Cluster on Alma Linux 9
We are now able to set up the Kubernetes cluster. Run the kubeadm command from the master node to start the Kubernetes cluster.
$ sudo kubeadm init --control-plane-endpoint=master.alma-k8s.com
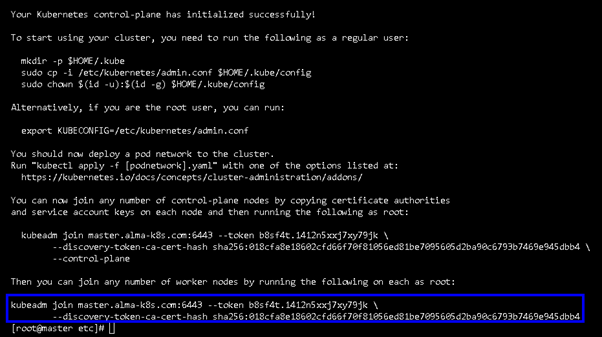
Next, finish the cluster configuration on the master node by executing the following commands:
$ mkdir -p $HOME/.kube
$ sudo cp -i /etc/kubernetes/admin.conf $HOME/.kube/config
$ sudo chown $(id -u):$(id -g) $HOME/.kube/config
Now, let’s join the worker node to the cluster. To achieve that, run the kubeadm command from the worker node as shown:
$ sudo kubeadm join master.alma-k8s.com:6443 --token b8sf4t.1412n5xxj7xy79jk \
--discovery-token-ca-cert-hash sha256:018cfa8e18602cfd6670f81be7095605d2ba90c6793b7469e945dbb4
Allow the node to join the cluster while you wait. When the process is completed, a pop message is displayed, indicating the node has been joined to the cluster.
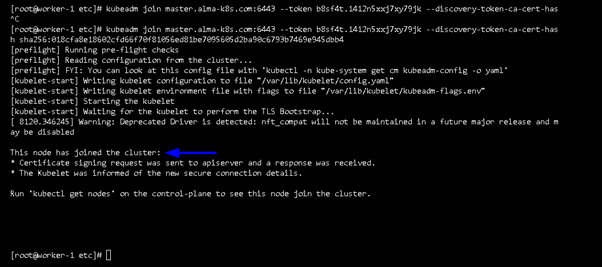
Next, on the master node, run the kubectl command to check the node status:
The output above indicates that the node is NotReady so in the next step, install the Calico network or a plugin to make the node status Ready.
Step 8: Install Calico Network Extension
Calico Network is an extension required on a Kubernetes cluster to enable pod connectivity, make DNS services interact with the cluster, and set the nodes’ state to Ready.
Run the following command from the master node only to install the Calico CNI (Container Network Interface).
$ sudo kubectl apply -f https://raw.githubusercontent.com/projectcalico/calico/v3.26.4/manifests/calico.yaml
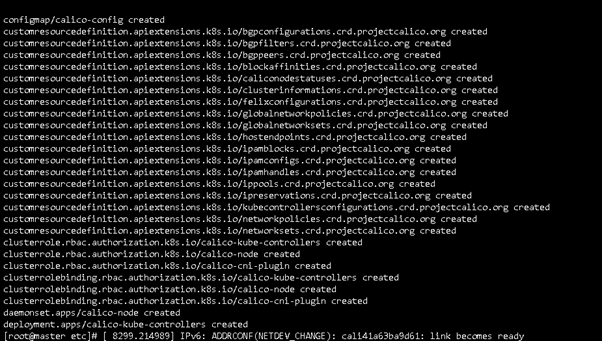
Check the calico pod status:
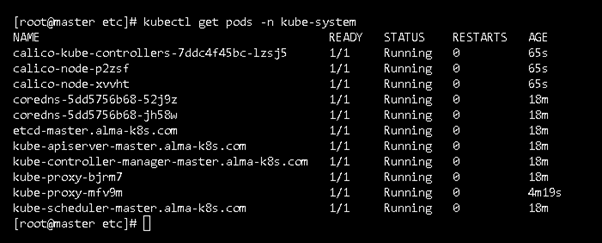
Next, check the node status; this time, the node status should indicate Ready.

That’s it! The output above shows the node status is Ready and can handle the workload.
Conclusion
This concludes our comprehensive tutorial on installing Kubernetes Cluster on AlmaLinux 9. We hope that our tutorial has been informative and has given you the necessary understanding of how to use master and worker nodes to set up and maintain a Kubernetes cluster.
Also Read: How to Install PuTTY (SSH Client) on Linux