If you told that you can run Linux on a Windows box then you would’ve been declared mentally retarded, but wait you can now say shout it to the world. Can you believe that you can run OpenSuse, Fedora ad Ubuntu on Windows? Even impossible says Im possible, so yes, it’s true you can completely run a Linux shell and linux binaries on a Windows PC. Windows Subsystem for Linux (WSL) makes it possible as it provides a compatibility layer to enable run all linux binary executables on Windows 10.

Microsoft partnered with Canonical to enable the functionality of downloading the Ubuntu image in a Windows 10 machine and extracting the tools and utilities to run it natively on top of WSL. They developed a kernel interface that is linux compatible and the Ubuntu binaries running on top of it.
How to Install Windows Subsystem for Linux ?
Please follow the steps outline below to install Windows Subsystem for Linux in your Windows 10 system easily:
Check whether you have the right version
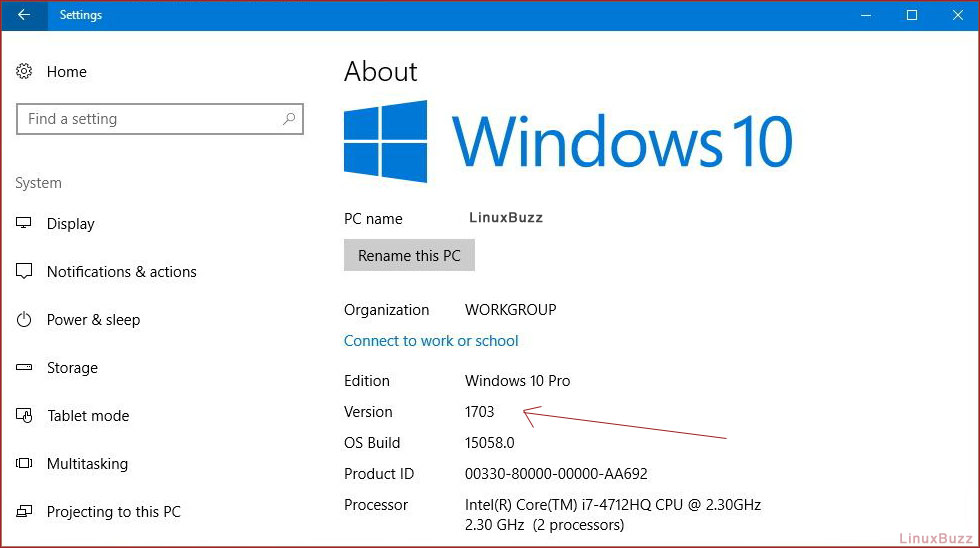
WSL is made available only on 64-bit Windows 10 machines with Anniversary update and later versions. To check whether your system has the version 1703, Creators update go to Settings -> System -> About:

Enable Developer Mode
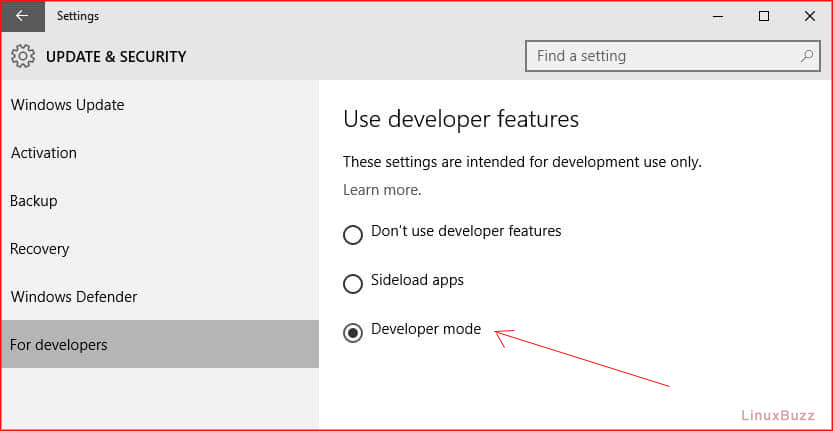
Once you’ve verified that your system has the required version, make sure that you the Developer Mode enabled in order to install WSL in your system. To enable Developer Mode, go to Settings -> Update & Security -> For Developers -> Developer Mode (Check the developer mode).

Enable Windows Subsystem for Linux
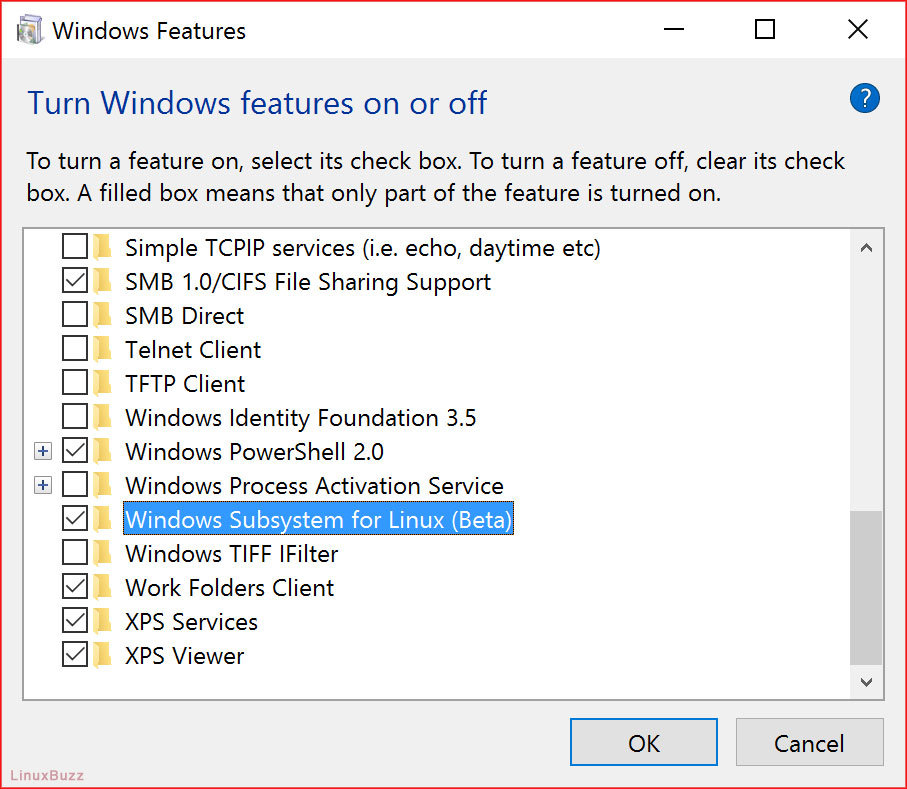
Once you’ve enabled the developer mode, the next step is to enable the Windows Subsystem for Linux in your machine. Go to “Turn Windows Features on or off” and scroll down to locate the “Windows Subsystem for Linux” and check the box to enable it in your system. And press OK and your Windows 10 machine will get restarted.

Install Windows Subsystem for Linux
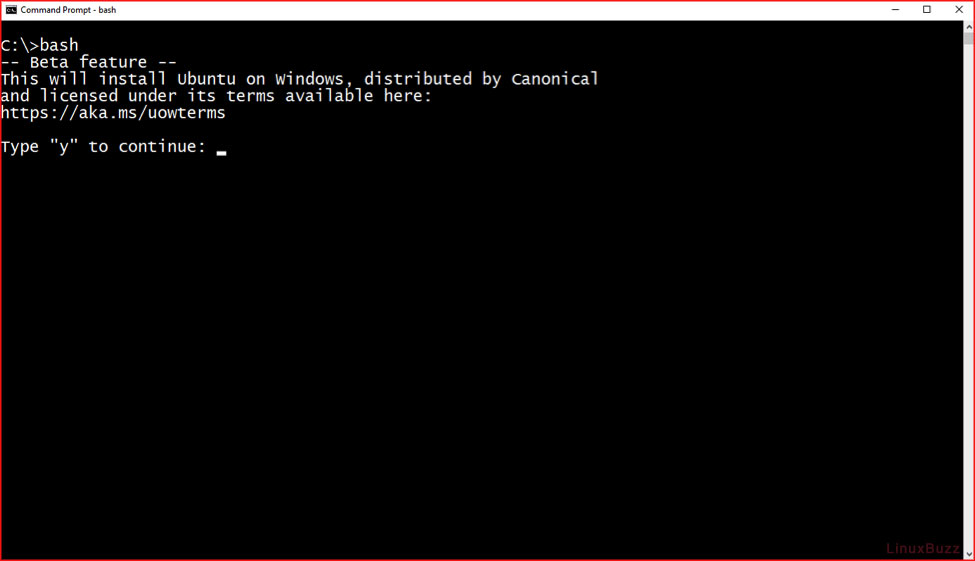
Now it’s time to install WSL in your system and to do that open a command prompt (Run -> type cmd and a command prompt window will open) and in the command prompt type bash like the one in the image below:

Then type “y” to continue with the installation and once the installation is completed, it will ask you to provide a username/password.
Start Windows Subsystem for Linux
That’s it you have successfully installed WSL in your Windows 10 machine. You can start WSL by typing “bash” in the command prompt window.
Check for Updated Version
Since you’ve installed WSL, it is always to check whether you have the latest version installed. So why not check if you have the latest version or not by typing the following commands in the console window:
$ sudo apt update
$ sudo apt upgrade
Install Command-Line Linux applications
You can install any command-line linux applications with the command below:
$ sudo apt install <application_name>
Remove Windows Subsystem for Linux
To remove WSL completely from your system, open a command prompt window and type in the following command.
lxrun /uninstall /full
Install WSL using PowerShell
You can also use a simple method to install Windows Subsystem for Linux using PowerShell. Make sure you open PowerShell in Administrator mode and type in:
Enable-WindowsOptionalFeature -Online -FeatureName Microsoft-Windows-Subsystem-Linux
Restart your PC when prompted and go to your Windows Store and install Ubuntu. Make sure to add the icon to your start menu or just type in “Ubuntu” from the command prompt window start Ubuntu.
Use Graphical Linux Applications
With the normal WSL installations, you can only install only command line linux applications, but with the help of Xfce 4, you can even enjoy all the graphical linux applications on running on a window manager like Xfce and WSL in your Windows 10 system.